Category: Uncategorized

  • How to Clean Marble Floor at Home?

    Marble floors have a presence that few other materials can match. They feel cool underfoot, reflect natural light beautifully, and quietly elevate the look of a home. Whether your space is modern, traditional, or somewhere in between, marble fits effortlessly. But along with its beauty comes responsibility. Marble is not a “set it and forget it” surface. Knowing how to clean marble floor at home correctly is essential if you want it to stay elegant rather than dull or stained.

    Many people damage marble unintentionally by using the wrong products or cleaning it too aggressively. The truth is, marble doesn’t need harsh treatment. It needs understanding, patience, and consistency. With the right habits, you can maintain its shine for decades without expensive products or professional help every month.

    Understanding Marble as a Natural Material

    Before learning how to clean marble floor at home, it helps to understand what marble actually is. Marble is a natural stone formed over thousands of years. Unlike ceramic tiles, it is porous. This means liquids can seep into it if left sitting on the surface.

    Because of this porosity, marble reacts differently to cleaners, water, and even air humidity. Acidic substances can dull it, abrasive tools can scratch it, and excess moisture can stain it. Once you understand this, cleaning marble becomes far less intimidating and much more intuitive.

    Why Marble Floors Lose Shine Over Time

    Many homeowners assume marble loses shine because it’s “old.” In reality, it usually loses shine due to improper cleaning. Learning how to clean marble floor at home prevents the slow buildup of damage that makes floors look tired.

    Common causes of dullness include dust scratching the surface, residue from soap or detergent, and frequent use of hard water. Over time, these small issues add up, but they are completely avoidable with gentle care.

    The Biggest Cleaning Mistakes People Make

    One of the most common mistakes people make while figuring out how to clean marble floor at home is treating it like any other floor. Using vinegar, lemon juice, bleach, or bathroom cleaners may seem effective, but these products slowly eat away at the marble’s surface.

    Another mistake is scrubbing harder when stains don’t come off immediately. Scrubbing damages the polish and opens up the stone, making future stains worse. Marble responds better to repetition than force.

    What You Actually Need to Clean Marble Floors

    You don’t need expensive tools or dozens of products. The basics are enough if you understand how to clean marble floor at home properly.

    A microfiber dust mop, a soft cotton cloth, clean water, and a pH-neutral marble cleaner are all you need. Avoid hard brushes, steel scrubbers, or steam mops. These may clean faster, but they permanently damage the surface.

    Daily Dusting: The Most Important Habit

    Dust is marble’s silent enemy. Tiny particles act like sandpaper under your feet. One of the simplest and most effective steps in how to clean marble floor at home is daily dry dusting.

    Use a microfiber mop to gently collect dust without scratching the surface. This habit alone can dramatically extend the life and shine of your marble floors.

    How to Clean Marble Floor at Home With Just Water

    For everyday cleaning, plain water works remarkably well. Dip a soft mop into warm water, wring it thoroughly, and mop gently. This method forms the foundation of how to clean marble floor at home safely.

    The key is moisture control. Never flood the floor. After mopping, dry the surface immediately with a soft cloth. Drying prevents water marks and keeps the marble looking fresh.

    Using Marble-Safe Cleaners Correctly

    In kitchens or high-traffic areas, water alone may not be enough. This is where marble-safe cleaners come in. Use them sparingly and always dilute as instructed.

    Understanding how to clean marble floor at home also means knowing that using more cleaner doesn’t make floors cleaner. It often leaves residue that dulls the surface over time.

    Handling Spills Before They Become Stains

    Spills happen, but stains don’t have to. One golden rule of how to clean marble floor at home is acting immediately.

    Blot spills gently with a soft cloth or paper towel. Do not wipe, as wiping spreads the liquid deeper into the stone. Once blotted, clean the area with water and dry it thoroughly. This single habit prevents most permanent stains.

    Dealing With Water Marks on Marble

    Water marks are common, especially in homes with open windows or balconies. Fortunately, they’re usually surface-level. Learning how to clean marble floor at home includes understanding that water marks often disappear with gentle cleaning and proper drying.

    Buffing the area with a dry microfiber cloth often restores the shine without any chemicals.

    Why Baking Soda and Vinegar Are Risky

    Many online tips suggest baking soda or vinegar for cleaning. While they may work on tiles, they are risky for marble. Baking soda is mildly abrasive, and vinegar is acidic. Both can dull marble permanently.

    Knowing how to clean marble floor at home means avoiding shortcuts that cause long-term damage, even if they seem harmless at first.

    Cleaning Marble in Busy Areas of the House

    Living rooms, hallways, and entrances see the most foot traffic. These areas need more frequent dusting rather than harsher cleaning. Place doormats at entrances to reduce grit.

    Homes with artistic interiors, such as those featuring wall murals, often attract attention to the floors as well. Clean marble enhances the overall visual balance of the space.

    Caring for Marble Near Decorative Elements

    Interior features can influence how marble behaves. For example, homes with a jali wall often experience more dust circulation. This makes daily dusting even more important.

    Understanding your home’s layout helps you adapt how to clean marble floor at home to real conditions instead of following a one-size-fits-all routine.

    Special Care Near Prayer Spaces

    Marble is commonly used near prayer areas. In homes with a stone temple for home, oil, flowers, and offerings can cause stains if not cleaned promptly.

    Gently wiping the area after daily rituals prevents buildup and keeps the marble looking clean without disturbing the spiritual atmosphere.

    Why Scrubbing Is Never the Answer

    Scrubbing damages marble’s polished surface. Once scratched, marble becomes more absorbent, making stains harder to remove. This is one of the most misunderstood parts of how to clean marble floor at home.

    Gentle cleaning done consistently always works better than aggressive cleaning done occasionally.

    The Impact of Furniture on Marble Floors

    Furniture legs can scratch marble when moved. Felt pads under furniture are a simple preventive step. When cleaning, lift furniture instead of dragging it.

    These small habits play a big role in long-term success with how to clean marble floor at home.

    Seasonal Changes and Marble Maintenance

    Marble reacts to seasonal changes. During humid months, it absorbs moisture faster. During dry months, dust increases. Adjusting your routine seasonally is part of mastering how to clean marble floor at home.

    Dry floors thoroughly in monsoon season and dust more frequently in dry weather.

    When Sealing Marble Makes Sense

    Sealing adds a protective layer that slows absorption. While sealing doesn’t replace cleaning, it makes how to clean marble floor at home easier by giving you more time to act on spills.

    Professional sealing every few years is often recommended for high-use areas.

    Marble Floors and Interior Design Harmony

    Clean marble supports the overall design of your home. It pairs beautifully with textured elements like stone wall cladding, adding contrast without overwhelming the space.

    When marble is clean and polished, it quietly enhances everything around it.

    Decorative Marble Patterns Need Extra Care

    Decorative marble styles such as inlay flooring are especially sensitive to scratches and stains. Gentle cleaning preserves both the stone and the artwork embedded within it.

    Understanding how to clean marble floor at home ensures these details remain sharp and beautiful.

    When DIY Cleaning Is Not Enough

    Sometimes stains or dullness go beyond home care. Knowing how to clean marble floor at home also means knowing when to call professionals.

    Deep stains, etching, or uneven shine may require polishing or restoration done with specialized tools.

    Creating a Simple Marble Cleaning Routine

    A simple routine works best. Dust daily, mop lightly once or twice a week, and clean spills immediately. This routine forms the backbone of how to clean marble floor at home successfully.

    Consistency prevents damage and reduces the need for heavy cleaning later.

    How Rustic Decor Like Pallet Walls Affects Marble Cleaning

    Homes with rustic or textured interiors often experience more surface dust than expected. If your space includes a pallet wall, fine wood particles and settled dust can collect on nearby marble floors over time. This makes regular dry dusting essential to prevent grit from scratching the marble surface. Understanding how décor influences airflow and dust movement helps you refine how to clean marble floor at home, keeping the flooring smooth, polished, and visually balanced with the rest of your interior design.

    Final Thoughts on How to Clean Marble Floor at Home

    Learning how to clean marble floor at home isn’t about strict rules or expensive products. It’s about awareness and care. Marble responds beautifully to gentle treatment and mindful habits.

    When cared for properly, marble floors remain cool, luminous, and timeless quietly supporting the beauty and comfort of your home for generations.

    FAQs

    What is the best way to clean marble floors?

    The best way to clean marble floors is with gentle, regular care. Start by dry dusting daily using a microfiber mop to remove grit that can scratch the surface. For wet cleaning, use warm water or a pH-neutral cleaner made specifically for marble. Mop lightly, avoid excess water, and always dry the floor with a soft cloth. This method keeps marble clean while preserving its natural shine and finish.

    How do I make my marble floor shine again?

    To make your marble floor shine again, clean it thoroughly with warm water and a marble-safe cleaner to remove residue. Dry the surface completely, then buff it gently with a soft microfiber cloth. Regular dusting prevents scratches that dull shine. Avoid polishing products not meant for marble, as they can leave buildup. If dullness persists, professional polishing may be needed to restore the original gloss safely.

    Which chemical is used to clean marble floors?

    A pH-neutral cleaner specifically formulated for marble or natural stone is the safest chemical to use. These cleaners remove dirt without reacting with the stone’s surface. Mild stone soaps are also suitable for regular use. Avoid acidic or alkaline chemicals, as they can etch or dull marble. Always dilute the cleaner as directed and test on a small area before cleaning the entire floor.

    What not to use on marble floor?

    Do not use acidic cleaners like vinegar, lemon juice, or bathroom cleaners on marble floors. Avoid bleach, ammonia, baking soda, and abrasive powders, as they can scratch or etch the surface. Steel wool, hard brushes, and steam mops should also be avoided. These products damage marble’s polish and make it more prone to stains and dullness over time.
  • Difference Between Mosaic and Terrazzo Flooring

    Difference Between Mosaic and Terrazzo Flooring

    Choosing the right flooring is one of the most important decisions when designing a home. Floors are not just something you walk on every day. They shape the overall feel of your space and influence how your home looks and functions. When exploring stylish and durable options, many homeowners find themselves comparing mosaic and terrazzo flooring. Understanding the difference between mosaic and terrazzo flooring can help you make a smart and long lasting choice.

    Both flooring types have been popular for decades and continue to be loved in modern homes. They offer durability, beauty, and timeless appeal. However, knowing the difference between mosaic and terrazzo flooring allows you to select the one that best suits your lifestyle, design taste, and budget.

    In this guide, we will take a closer look at the difference between mosaic and terrazzo flooring, including materials, appearance, installation, maintenance, and the best areas to use each type.

    What Is Mosaic Flooring

    Mosaic flooring is made using small pieces of materials such as marble, glass, ceramic, or natural stone. These pieces are arranged carefully to create patterns, textures, or artistic designs. One of the main aspects of the difference between mosaic and terrazzo flooring is how mosaic focuses on detail and craftsmanship.

    Mosaic floors have been used in homes and historical buildings for years. Even today, they are popular among homeowners who want something decorative and unique. Since each piece is placed individually, mosaic flooring allows for creative designs and personalized patterns.

    This artistic approach plays a big role in the difference between mosaic and terrazzo flooring because terrazzo follows a more uniform and seamless style.

    What Is Terrazzo Flooring

    Terrazzo flooring is created by embedding small chips of marble, quartz, glass, or granite into a cement or resin base. Once the surface sets, it is polished to achieve a smooth and glossy finish. When discussing the difference between mosaic and terrazzo flooring, terrazzo stands out for its sleek and modern appearance.

    Terrazzo flooring has its roots in Italian design and has become popular worldwide due to its durability and elegant finish. It is commonly used in both residential and commercial spaces such as living rooms, offices, and hotels.

    Another key point in the difference between mosaic and terrazzo flooring is the installation process. Mosaic involves arranging small pieces manually, while terrazzo is poured and polished to create a seamless surface.

    Key Difference Between Mosaic and Terrazzo Flooring

    Understanding the core difference between mosaic and terrazzo flooring helps you decide which option works best for your home.

    Material Composition

    One major difference between mosaic and terrazzo flooring lies in the materials. Mosaic flooring uses small pieces arranged together to form designs. Terrazzo flooring uses chips mixed into cement or resin and then polished.

    Visual Appearance

    The visual style is another clear difference between mosaic and terrazzo flooring. Mosaic flooring looks artistic and detailed. Terrazzo flooring has a smoother and more uniform appearance with scattered chips creating a subtle pattern.

    Installation Process

    The installation method highlights an important difference between mosaic and terrazzo flooring. Mosaic flooring requires careful placement of each piece and takes more time. Terrazzo is poured and polished, making it suitable for covering large areas efficiently.

    Durability

    Both options are strong and long lasting. However, the difference between mosaic and terrazzo flooring becomes noticeable in heavy traffic areas. Terrazzo is often more resistant to wear and tear, which is why it is commonly used in commercial spaces.

    Maintenance

    Maintenance is another practical difference between mosaic and terrazzo flooring. Mosaic floors need attention to grout lines and occasional polishing. Terrazzo floors are easier to maintain due to their smooth and seamless finish.

    Design and Aesthetic Appeal

    When it comes to design, the difference between mosaic and terrazzo flooring is quite clear. Mosaic flooring is perfect for homeowners who enjoy artistic and detailed interiors. It allows for custom patterns and vibrant color combinations that can make any space stand out.

    Terrazzo flooring offers a more modern and elegant look. Its smooth surface and subtle texture make it ideal for contemporary homes. Many homeowners choose terrazzo for a clean and minimal interior style.

    Some people also combine mosaic flooring with features like a mosaic wall panel to create a coordinated and artistic theme throughout the home.

    Cost Comparison

    Budget is always an important factor when choosing flooring. The difference between mosaic and terrazzo flooring can also be seen in their cost.

    Mosaic flooring can be affordable if simple materials and designs are used. However, intricate patterns and premium materials can increase the overall price. Terrazzo flooring usually requires a higher initial investment because of specialized installation and polishing.

    Even though terrazzo may cost more upfront, the long term value often balances the expense. This financial aspect highlights another difference between mosaic and terrazzo flooring to consider when planning your budget.

    Maintenance and Cleaning

    Maintenance plays a big role in flooring decisions. The difference between mosaic and terrazzo flooring becomes noticeable when it comes to cleaning.

    Mosaic floors require regular cleaning to keep grout lines free from dirt. Occasional polishing helps maintain their shine. Terrazzo floors are easier to maintain because they have fewer joints and a smooth surface. Simple sweeping and mopping are usually enough.

    Understanding the cleaning requirements makes it easier to decide which option suits your daily routine. This is another practical difference between mosaic and terrazzo flooring to keep in mind.

    Best Areas for Mosaic Flooring

    Mosaic flooring works beautifully in areas where design and detail matter most. Living rooms, bathrooms, and entryways often benefit from its decorative charm. It also pairs well with matching elements like mosaic bathroom accessories to create a consistent interior theme.

    Because of its artistic appeal, mosaic flooring is ideal for feature areas and spaces where you want to add personality. This highlights yet another difference between mosaic and terrazzo flooring, as terrazzo focuses more on simplicity and uniformity.

    Best Areas for Terrazzo Flooring

    Terrazzo flooring is a great choice for large spaces and high traffic areas. Living rooms, hallways, and commercial spaces benefit from its durability and seamless finish.

    Many modern homes use terrazzo in open layouts to create a clean and elegant look. Some homeowners also pair terrazzo flooring with design elements like mosaic flooring in nearby spaces for a balanced interior style.

    This combination further shows the difference between mosaic and terrazzo flooring, as both can complement each other when used thoughtfully.

    Sustainability and Eco Friendly Value

    Sustainability is becoming increasingly important in home design. When comparing the difference between mosaic and terrazzo flooring, both options can be eco friendly.

    Mosaic flooring often uses natural stone or recycled materials. Terrazzo also supports sustainability by using recycled marble or glass chips. Choosing high quality materials ensures long lasting and environmentally responsible flooring.

    Which One Should You Choose

    The final choice depends on your personal style, budget, and lifestyle needs. Understanding the difference between mosaic and terrazzo flooring makes the decision easier.

    Choose mosaic flooring if you love artistic patterns and detailed designs. It is perfect for homeowners who want a traditional and creative touch. Choose terrazzo flooring if you prefer a modern, sleek, and low maintenance option that lasts for years.

    Both options offer beauty and durability. The key is selecting the one that matches your home and daily life.

    Final Thoughts

    Flooring has a big impact on how your home looks and feels. Knowing the difference between mosaic and terrazzo flooring helps you choose wisely and invest in something that lasts. Mosaic flooring offers artistic charm and detailed beauty. Terrazzo flooring provides modern elegance and strong durability.

    By understanding the difference between mosaic and terrazzo flooring, you can confidently select the flooring that suits your space, style, and budget. Whether you prefer traditional patterns or a contemporary finish, both mosaic and terrazzo flooring can enhance your home and create a space you will enjoy for years.

    FAQs

    Which is better, mosaic or terrazzo flooring?

    Both options are durable and stylish, but the right choice depends on your needs. Mosaic flooring is ideal for decorative and artistic spaces, offering unique patterns and traditional charm. Terrazzo flooring is better for modern homes and high-traffic areas because of its seamless finish and durability. If you want creative designs, choose mosaic. If you prefer a sleek, low-maintenance, and long-lasting surface, terrazzo flooring is a great option.

    Is terrazzo flooring more expensive than mosaic flooring?

    Yes, terrazzo flooring is usually more expensive than mosaic flooring. It requires specialized installation and polishing, which increases the overall cost. However, terrazzo is highly durable and low maintenance, making it cost-effective over time. Mosaic flooring can be more affordable depending on materials and design complexity. Simple mosaic designs cost less, but intricate patterns and premium materials can increase the total price.

    Which flooring is easier to maintain, mosaic or terrazzo?

    Terrazzo flooring is generally easier to maintain than mosaic flooring. Its smooth and seamless surface makes cleaning simple with regular sweeping and mopping. Mosaic flooring has grout lines that may collect dirt over time and need occasional deep cleaning. Both options are durable, but terrazzo requires less effort for daily maintenance, making it a convenient choice for busy households and commercial spaces.

  • Banquet Hall Wall Panelling Design Ideas for a Grand Look

    Banquet Hall Wall Panelling Design Ideas for a Grand Look

    When someone steps into a banquet hall, they immediately notice how the space feels. Before the décor and stage setup grab attention, it is usually the walls that create the first impression. That is why choosing the right banquet hall wall panelling design is so important when you want a venue to look grand and memorable.

    A well-designed banquet hall is not only about lighting and furniture. The walls play a major role in setting the mood for weddings, corporate events, and celebrations. With the right banquet hall wall panelling design, even a simple hall can feel luxurious and welcoming.

    In this guide, you will discover practical and timeless wall paneling ideas that help create an elegant and impressive banquet hall. Whether you are designing a new venue or renovating an existing one, the right choices can make a big difference.

    Why Wall Panelling Matters in a Banquet Hall

    Banquet halls are meant to impress guests. From weddings to business events, people expect a space that looks refined and well-maintained. A thoughtfully planned banquet hall wall panelling design helps achieve that instantly.

    Wall paneling adds texture and depth to plain walls. It also creates a consistent theme that complements different event setups. From stage decorations to floral arrangements, everything looks better when the background is elegant.

    Another advantage of a good banquet hall wall panelling design is that it improves acoustics and hides wiring or structural imperfections. This makes the space look clean and professional while also enhancing the guest experience.

    Wooden Panels for a Timeless Grand Look

    Wooden panels are a classic choice for banquet halls. They bring warmth and richness that instantly make the space feel premium. A wooden banquet hall wall panelling design works beautifully for traditional wedding venues and formal event spaces.

    Dark wood tones like walnut or mahogany create a royal ambiance. Lighter wood finishes offer a modern and sophisticated look. Wooden panels can be installed across full walls or used as accent sections near the stage and entrance.

    This type of banquet hall wall panelling design pairs well with chandeliers, warm lighting, and elegant décor. It creates a welcoming atmosphere that guests remember long after the event.

    Decorative Molding Panels for Elegant Interiors

    Decorative molding panels are another timeless option. This banquet hall wall panelling design uses symmetrical patterns and frames to create a refined look. It adds depth without making the walls feel heavy.

    Soft shades like white, cream, and champagne work best because they match different event themes. Molding panels also provide a beautiful backdrop for photography and stage setups.

    A well-designed molding-based banquet hall wall panelling design ensures that the venue looks elegant for every occasion, whether it is a wedding or a corporate event.

    Upholstered Panels for a Luxury Feel

    If you want your banquet hall to feel plush and luxurious, upholstered panels are worth considering. This banquet hall wall panelling design adds softness and comfort while improving sound quality.

    Fabric panels in velvet or suede create a premium look. Neutral shades like beige, grey, and gold blend easily with different décor styles. Upholstered panels are often used near stages or seating areas to enhance the overall ambiance.

    They also reduce echo, which makes this banquet hall wall panelling design ideal for conferences, live performances, and large gatherings.

    Marble and Stone Panels for High-End Venues

    Marble and stone paneling instantly give a banquet hall a premium feel. A marble-based banquet hall wall panelling design looks luxurious and timeless. It works especially well in large halls where the goal is to create a grand impression.

    Marble panels can be installed behind the stage, at the entrance, or as feature walls. Neutral marble shades such as white and beige are versatile and elegant. Darker tones add drama and sophistication.

    Some designers also include a small section with a mosaic wall panel to introduce artistic detail. This adds character without overpowering the overall look of the venue.

    LED Wall Panels for a Modern Touch

    Modern banquet halls often include lighting within the wall panels. An LED-enhanced banquet hall wall panelling design creates a dynamic and visually appealing environment.

    Backlit panels and soft LED strips can be customized according to event themes. Warm lights suit weddings and formal events, while colorful lighting works for parties and corporate functions.

    This type of banquet hall wall panelling design allows venue owners to change the ambiance easily without redesigning the entire space.

    Mirror and Glass Panels for Spacious Feel

    Mirrors and glass panels can make banquet halls feel larger and brighter. This banquet hall wall panelling design reflects light and creates a sense of openness, which is especially useful in compact spaces.

    Mirrored panels add glamour and help enhance event photography. Frosted or textured glass panels bring a modern yet elegant touch. When combined with soft lighting, this banquet hall wall panelling design creates a welcoming and sophisticated atmosphere.

    Choosing the Right Colors for Wall Panels

    Color selection plays an important role in creating a timeless banquet hall wall panelling design. Neutral shades are always a safe and versatile choice. White, beige, champagne, and soft grey suit almost every event theme.

    Darker tones like deep brown, navy, or charcoal can add richness in larger halls. Avoid very bright colors that may clash with decorations. A balanced palette ensures your banquet hall wall panelling design stays stylish and relevant for years.

    Mixing Materials for a Unique Look

    Combining different materials can make your banquet hall stand out. Wood with metal accents or marble with fabric panels creates depth and interest. A thoughtfully planned banquet hall wall panelling design that mixes textures looks modern yet timeless.

    Consistency is important. The materials should complement each other and maintain a cohesive theme. When done right, a mixed-material banquet hall wall panelling design adds character and elegance.

    Accent Panels or Full Wall Paneling

    Some banquet halls choose full wall paneling, while others focus on key areas. Both approaches can work well. Accent panels highlight stages, entrances, or photo areas. Full paneling creates a more immersive and luxurious environment.

    Choosing the right layout ensures your banquet hall wall panelling design enhances the venue without feeling overwhelming. It also helps manage costs effectively.

    Lighting That Enhances Wall Panels

    Lighting can completely change how your walls look. Soft warm lighting highlights textures and creates a welcoming ambiance. Spotlights and wall lights can emphasize certain panel sections.

    A well-lit banquet hall wall panelling design enhances the overall experience for guests and improves event photography. Good lighting ensures that the venue looks stunning both in person and in pictures.

    Budget and Material Planning

    The cost of a banquet hall wall panelling design depends on the materials and level of detailing. MDF and PVC panels are budget-friendly options. Wood, marble, and upholstered panels fall into higher price ranges.

    Investing in quality materials and professional installation ensures durability. A well-executed banquet hall wall panelling design can last for years and continue to attract clients.

    Maintenance for Long-Lasting Beauty

    Regular maintenance keeps wall panels looking fresh. Dust surfaces frequently and use gentle cleaning products suitable for each material. Fabric panels may require occasional professional cleaning.

    With proper care, your banquet hall wall panelling design will continue to look elegant and well-maintained for a long time.

    Creating a Cohesive Venue Experience

    A great banquet hall feels consistent in every corner. From the entrance to restrooms, maintaining design harmony enhances the guest experience. Small details can make a big impact.

    For example, using coordinated mosaic bathroom accessories in restrooms can complement the overall theme. Stylish mosaic flooring can also add a touch of luxury. These elements support the beauty of your banquet hall wall panelling design and create a unified look.

    Common Mistakes to Avoid

    Avoid using too many textures or colors on the walls. Overcrowded designs can look messy rather than grand. Choose durable materials that are easy to maintain. Poor lighting or installation can reduce the impact of even the best banquet hall wall panelling design.

    Working with experienced professionals helps ensure a clean and elegant result.

    Final Thoughts

    A thoughtfully planned banquet hall wall panelling design can completely transform a venue. It sets the mood, enhances visual appeal, and creates a luxurious atmosphere that guests remember.

    Whether you choose wooden panels, marble finishes, upholstered walls, or modern lighting designs, focus on quality and timeless style. The right banquet hall wall panelling design not only improves the look of your space but also increases its value and appeal.

    With careful planning and attention to detail, you can create a banquet hall that feels grand, welcoming, and truly unforgettable for every event.

    FAQs

    Which panelling makes a room look bigger?

    Light-colored panels, vertical slat paneling, and mirror or glass panels make a room look bigger. Vertical designs draw the eye upward and create the illusion of height, while mirrors reflect light and add depth. Choosing minimal textures and soft neutral shades helps maintain an open and spacious feel.

    What are the latest trends in wall design?

    Latest wall design trends include fluted panels, 3D textured panels, marble finish walls, and LED-backlit paneling. Neutral tones like beige, grey, and warm white are popular. Mixing materials such as wood and metal, or adding subtle geometric patterns, also creates a modern and stylish look.

    How to make wall paneling look good?

    To make wall paneling look good, choose colors that match your décor and use proper lighting to highlight textures. Keep the design simple and balanced to avoid overcrowding. Add warm lights, maintain symmetry, and use quality materials. Regular cleaning and proper installation also help wall paneling look elegant and long-lasting.

  • Classic Wall Panel Design Ideas That Never Go Out of Style

    Classic Wall Panel Design Ideas That Never Go Out of Style

    Some design trends fade quickly, while others stay beautiful for decades. One element that has always remained timeless in home interiors is the classic wall panel design. It brings charm, depth, and elegance to any room without looking outdated.

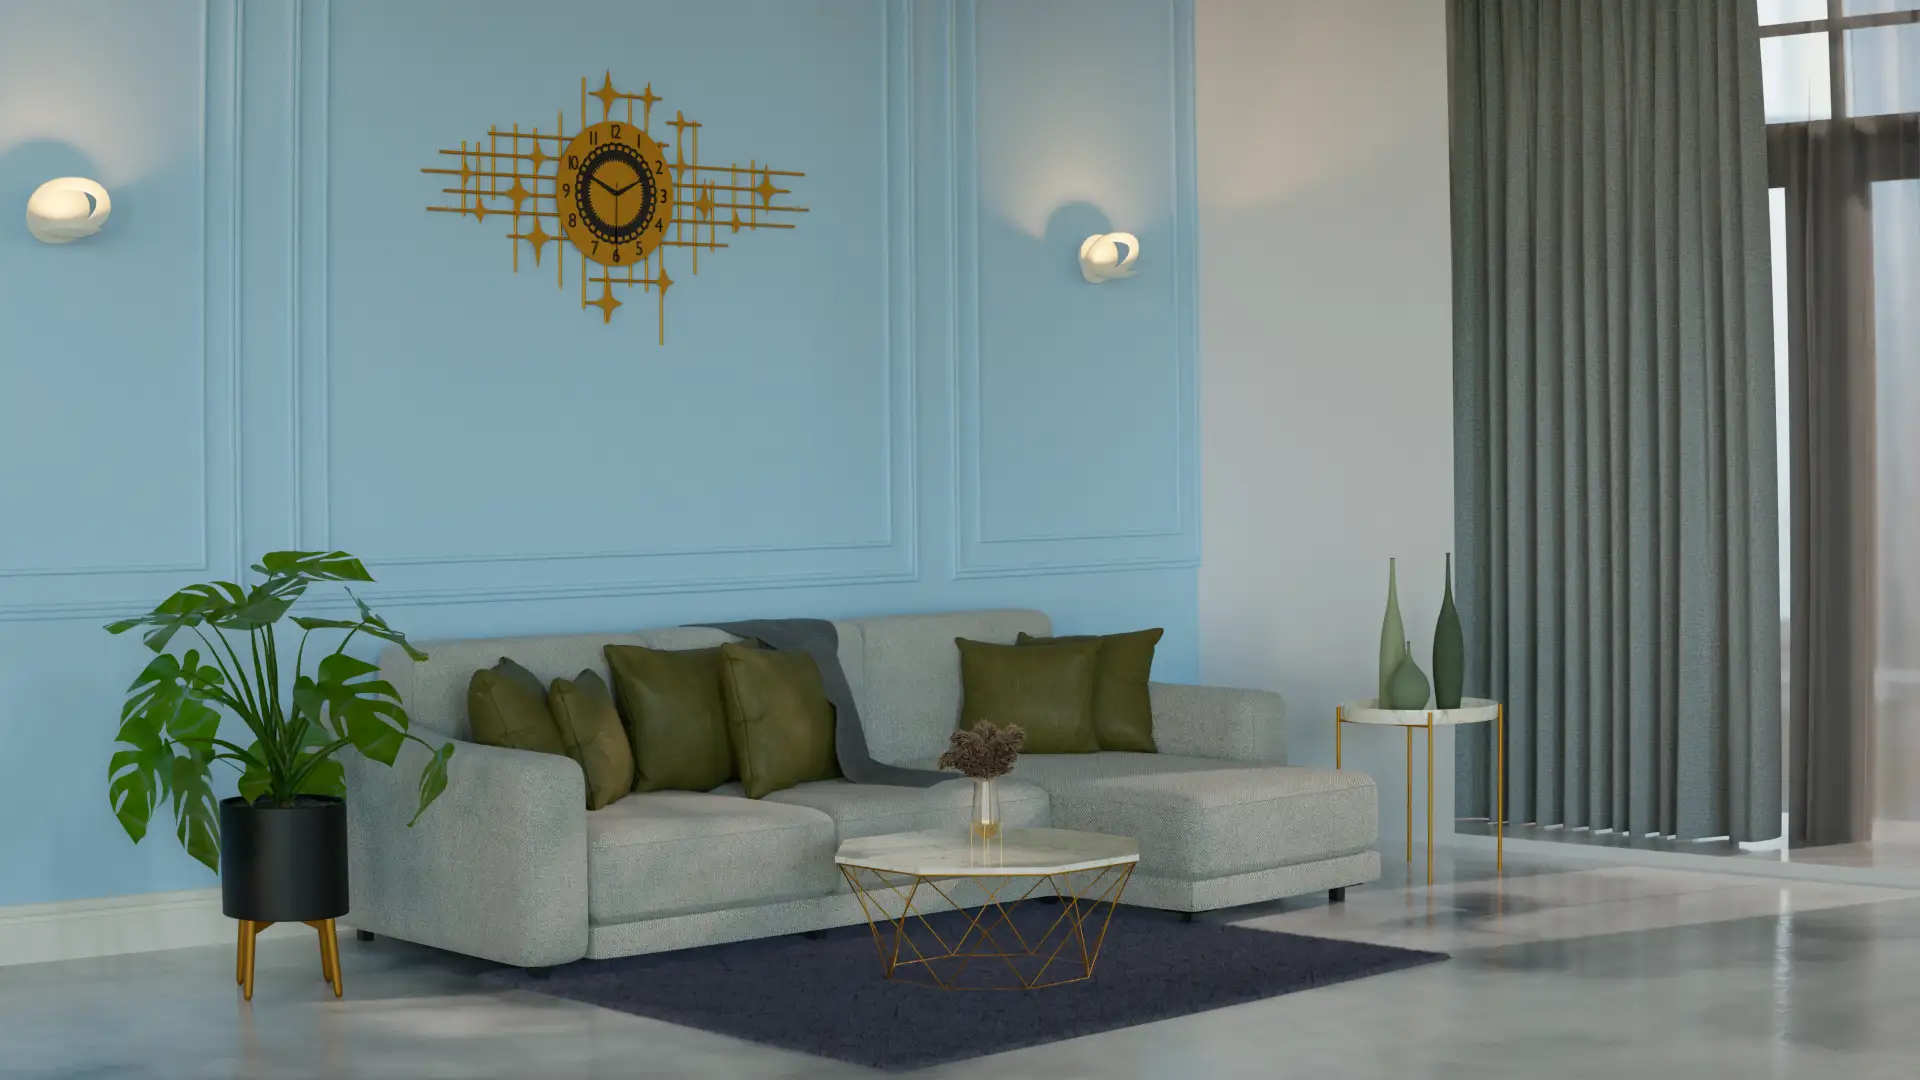
    Whether you live in a modern apartment or a traditional home, a well-planned classic wall panel design can completely transform your space. It adds character to plain walls and gives your home a more refined and polished feel. The best part is that classic paneling blends easily with changing décor styles, so you do not have to worry about it going out of fashion.

    In this guide, we will explore timeless ideas, materials, and styling tips to help you choose the right classic wall panel design for your home. If you want your interiors to look elegant today and years from now, this is a great place to start.

    Why Classic Wall Paneling Still Feels Relevant

    There is something comforting about classic interiors. They feel balanced, elegant, and welcoming. A thoughtfully chosen classic wall panel design brings all these qualities into your home.

    Wall paneling adds structure to walls that might otherwise look plain. It creates a sense of depth and detail without needing too many decorative items. Unlike trendy wallpapers or bold paint colors, a classic wall panel design remains stylish even as interior trends change.

    Another reason people love classic panels is their versatility. They can work in traditional homes, modern spaces, and even minimal interiors. With the right colors and materials, a classic wall panel design blends seamlessly into almost any setting.

    Benefits of Adding Classic Wall Panels

    Choosing a classic wall panel design is not only about making your home look good. It also brings practical advantages. Panels can hide small wall imperfections and protect walls from wear and tear. In larger rooms, they help balance the space and even improve acoustics slightly.

    Wall panels also make a home feel more finished and thoughtfully designed. When guests walk into a room with a beautiful classic wall panel design, it leaves a lasting impression. It shows attention to detail and adds a subtle touch of luxury.

    Another important benefit is durability. High-quality paneling can last for years with minimal maintenance. This makes it a smart and long-term investment for homeowners.

    Wooden Panels for Warmth and Charm

    Wood is one of the most popular choices for a classic wall panel design. It brings warmth and richness that few other materials can match. Wooden panels create a cozy and inviting atmosphere, especially in living rooms and bedrooms.

    Natural wood tones like walnut, teak, and oak offer a traditional feel. Painted wooden panels in white, cream, or soft grey suit modern classic homes beautifully. This type of classic wall panel design works well behind sofas, beds, or even as full-wall paneling.

    The key to keeping wooden panels timeless is simplicity. Choose clean lines and balanced patterns instead of overly trendy designs. This ensures your classic wall panel design continues to look elegant for years.

    Wainscoting for a Timeless Look

    Wainscoting is one of the most recognizable forms of classic wall panel design. It usually covers the lower half of the wall and adds structure and sophistication to a room.

    This style has been used in homes for centuries and still feels fresh today. White wainscoting creates a clean and airy feel. Soft neutral shades like beige or pastel grey add warmth without losing the classic charm.

    Wainscoting works beautifully in living rooms, dining areas, hallways, and even bedrooms. It is a simple yet effective way to bring a classic wall panel design into your home.

    Raised Panel Designs for Elegant Spaces

    Raised panels are perfect if you want a slightly more detailed and luxurious classic wall panel design. These panels have a three-dimensional effect that adds depth and character to the walls.

    They are often seen in traditional living rooms, formal dining areas, and home libraries. When painted in neutral shades, raised panels look elegant without feeling heavy. Soft lighting enhances their texture and makes the room feel warm and welcoming.

    This type of classic wall panel design pairs well with traditional furniture and classic décor elements.

    Flat Panel Designs for Subtle Elegance

    Not everyone wants heavily detailed panels. Flat panels offer a simpler and more understated classic wall panel design. They sit smoothly against the wall and create a clean and balanced look.

    Flat paneling is perfect for modern homes that want a touch of classic elegance. Neutral colors like white, cream, or light grey keep the design timeless. This style blends easily with contemporary furniture and décor while maintaining the beauty of a classic wall panel design.

    Decorative Molding for Artistic Detail

    Decorative molding panels add a creative touch to your walls. This classic wall panel design uses moldings to create symmetrical patterns such as rectangles or squares.

    These designs work well in living rooms, bedrooms, and entryways. You can paint the moldings in the same color as the wall for a subtle look or use a contrasting shade for more impact. Either way, decorative molding adds depth and elegance.

    Because of its balanced and symmetrical nature, this type of classic wall panel design never feels outdated.

    Combining Materials for a Unique Style

    You can make your interiors more interesting by mixing materials. Wood can be combined with marble or subtle mosaic details for a distinctive yet timeless look.

    For instance, adding a small section with a mosaic wall panel can bring artistic charm while still maintaining the elegance of a traditional space. The key is to keep the design balanced and not overly busy.

    When done thoughtfully, mixing textures enhances the beauty of a classic wall panel design and makes your interiors feel more personalized.

    Choosing the Right Colors

    Color plays a big role in maintaining the timeless appeal of a classic wall panel design. Neutral shades are always a safe and elegant choice. White, ivory, beige, and soft grey create a calm and sophisticated atmosphere.

    Darker tones like navy, charcoal, or deep brown can also work beautifully in larger rooms. They add richness and depth while keeping the design classic. Avoid overly bright or trendy colors that may feel outdated after a few years.

    A well-chosen color palette ensures your classic wall panel design continues to look stylish for a long time.

    Best Places to Use Classic Wall Panels

    A classic wall panel design can enhance almost any room in your home. In living rooms, it creates a welcoming and refined environment. In bedrooms, it adds comfort and warmth. Dining areas look more elegant with structured wall panels.

    You can also use paneling in entryways or hallways to make a strong first impression. Even home offices feel more polished with a subtle classic wall panel design.

    Adapting the panel style and size according to the room ensures a balanced look throughout your home.

    Lighting That Complements Wall Panels

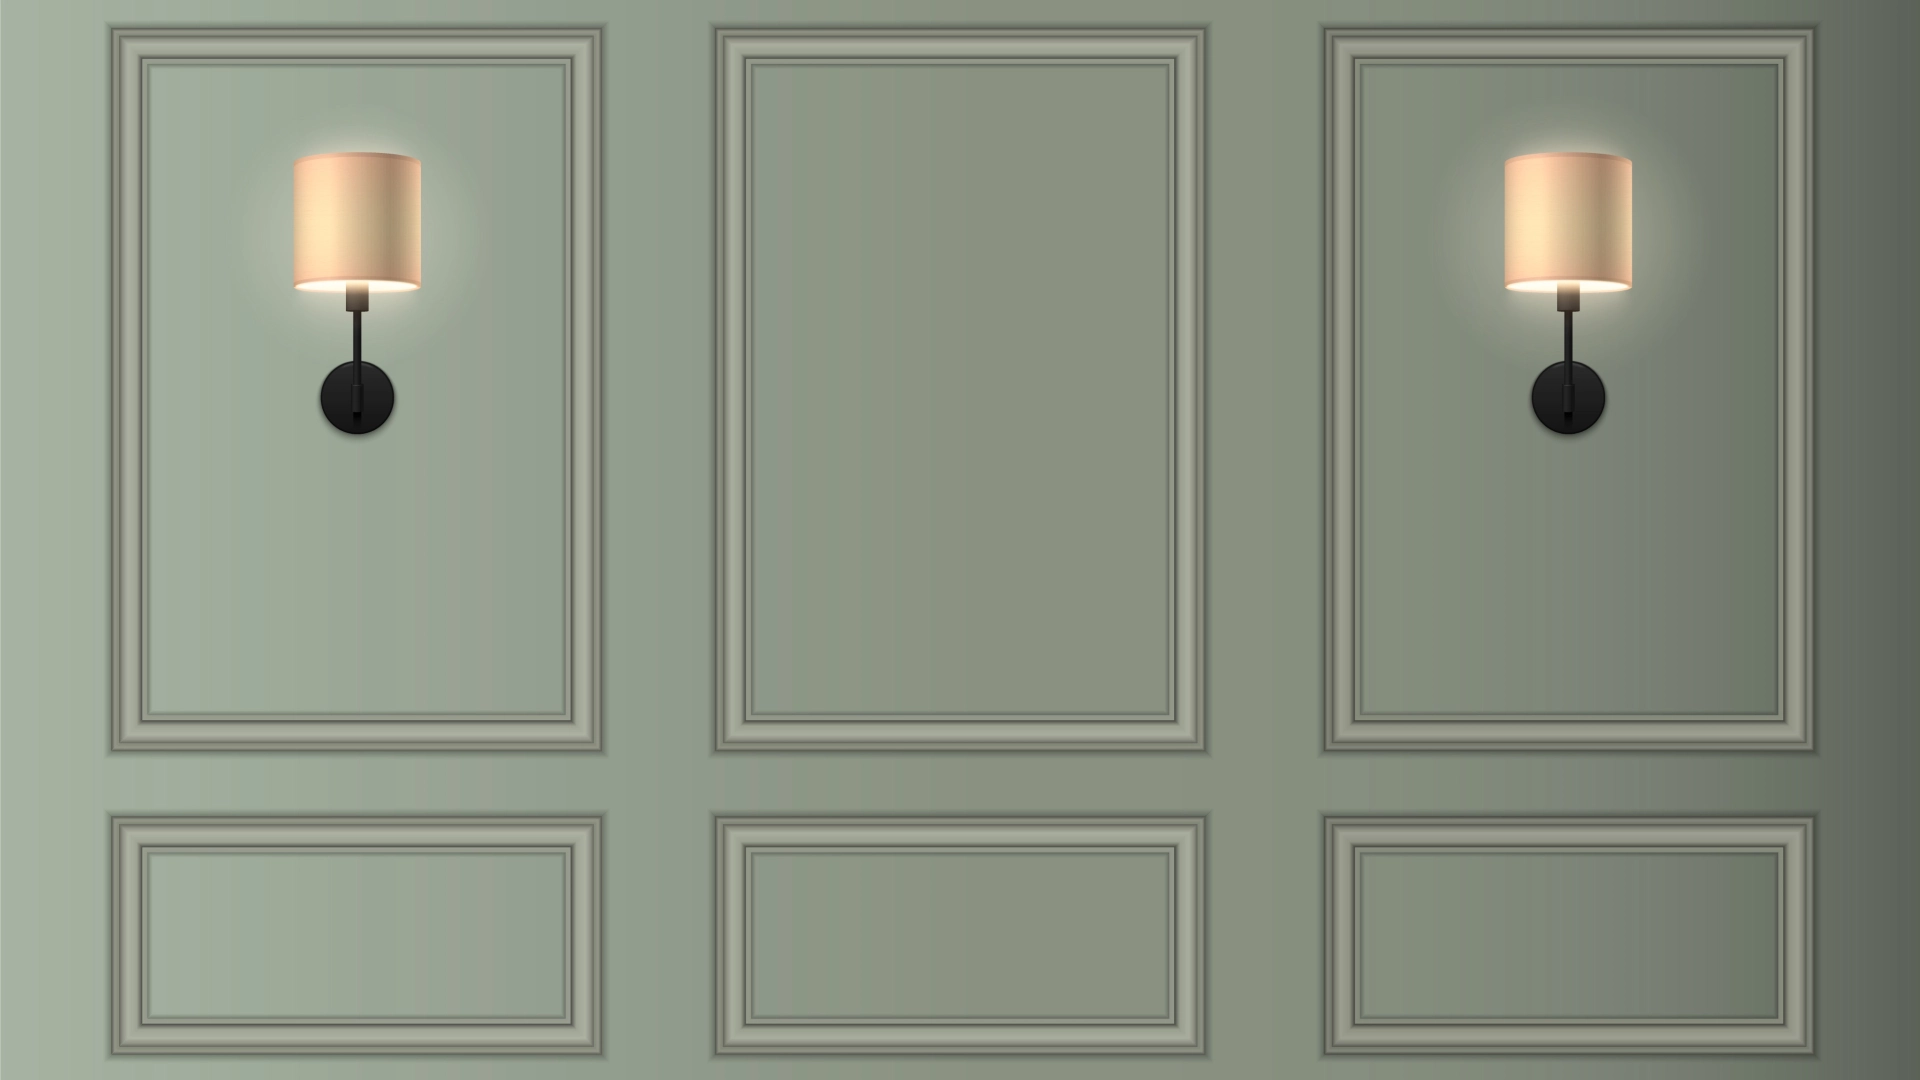
    Lighting can make a huge difference in how your classic wall panel design appears. Warm lights highlight textures and create a cozy ambiance. Wall sconces placed on panelled walls enhance symmetry and elegance.

    Picture lights or soft LED strips can add depth and make the panels stand out. Good lighting helps showcase the beauty of your classic wall panel design and enhances the overall atmosphere of the room.

    Budget and Installation Considerations

    The cost of a classic wall panel design depends on the material and level of detailing. MDF and engineered wood are more affordable options. Solid wood and marble panels fall into a higher budget range.

    Professional installation is important for achieving a neat and polished finish. Proper measurements and finishing ensure that your classic wall panel design looks refined and lasts for years.

    Planning your budget and working with skilled professionals will help you achieve the best results.

    Maintaining the Beauty of Wall Panels

    Maintenance is simple but essential. Dust panels regularly with a soft cloth. Avoid harsh cleaning products on painted or wooden surfaces. Marble and stone panels should be cleaned gently and sealed when required.

    With proper care, a classic wall panel design will continue to look beautiful and well-maintained for many years.

    Creating Harmony Across the Home

    A cohesive home always feels more thoughtfully designed. If you use classic panels in your living room, try to maintain similar design elements in other spaces. Small details can create a strong visual connection.

    For example, pairing traditional interiors with elegant mosaic bathroom accessories in bathrooms can maintain consistency. You can also add matching mosaic flooring to enhance the overall theme.

    These subtle touches help carry the charm of a classic wall panel design throughout the home.

    Final Thoughts

    A well-chosen classic wall panel design adds more than just visual appeal. It brings warmth, elegance, and a sense of timeless beauty to your home. With the right materials, colors, and installation, wall panels can transform any space into something truly special.

    Take your time exploring different styles and options. Focus on quality and balance rather than trends. Whether you prefer wooden panels, decorative moldings, or subtle modern classics, there is a classic wall panel design that will suit your home perfectly.

    When planned thoughtfully, a classic wall panel design becomes a lasting feature that continues to enhance your interiors year after year.

    FAQs

    How to make panel walls look good?

    To make panel walls look good, choose a design that matches your room’s style and color scheme. Use neutral shades for a timeless look and add warm lighting to highlight textures. Keep décor minimal so the panels stand out naturally. Mix materials like wood or subtle textures for depth. Proper installation and regular cleaning also help maintain a polished, stylish appearance that enhances the overall feel of your space.

    Is wall paneling timeless?

    Yes, wall paneling is considered timeless because it adds depth, texture, and elegance that never goes out of style. Classic designs like wooden panels, wainscoting, and molding have been used for decades and still feel relevant today. When done in neutral colors and simple patterns, wall paneling easily adapts to changing interior trends, making it a long-lasting design choice that enhances both modern and traditional homes.

    Which type of wall panel is best?

    The best type of wall panel depends on your style, budget, and maintenance needs. Wooden panels are ideal for a timeless and premium look. MDF and PVC panels are budget-friendly and easy to maintain, making them perfect for modern homes. Marble or stone panels suit luxury interiors, while upholstered panels add softness and comfort. Choose wall panels that match your décor, lighting, and overall space for the best results.

  • Wall Paneling Design for Drawing Room: Modern & Timeless Ideas

    Wall Paneling Design for Drawing Room: Modern & Timeless Ideas

    Your drawing room is one of the most lived-in and noticed spaces in your home. It is where guests gather, families relax, and everyday moments turn into memories. Because of this, the way it looks and feels matters a lot. One of the easiest and most effective ways to elevate this space is by choosing the right wall paneling design for drawing room.

    Wall paneling has become a favorite in modern interiors, and for good reason. It adds depth, texture, and personality without making the space feel cluttered. Whether you like minimal interiors or rich luxurious décor, a thoughtfully selected wall paneling design for drawing room can completely transform your space.

    In this guide, you will find modern and timeless paneling ideas, practical tips, and inspiration to help you create a drawing room that feels both stylish and welcoming.

    Why Wall Paneling Is So Popular Today

    People today want homes that feel warm, personal, and thoughtfully designed. A simple coat of paint often feels incomplete. This is where a well-planned wall paneling design for drawing room comes into play.

    Wall paneling brings a refined look to plain walls. It adds character without overwhelming the room. It also hides small wall imperfections and improves acoustics, especially in larger drawing rooms. Many homeowners choose paneling because it instantly creates a focal point and makes the room feel more premium.

    Another big reason for its popularity is versatility. You can find options that suit every budget and style. From affordable PVC panels to luxurious marble and wood, there is a wall paneling design for drawing room for everyone.

    Wooden Wall Paneling That Feels Warm and Timeless

    Wooden paneling has always been a classic choice. It brings warmth and richness to the drawing room. If you want a cozy yet elegant space, wood is hard to beat.

    You can choose from natural finishes like teak, oak, or walnut for a rich feel. For modern homes, vertical wooden slats are trending. They make ceilings appear taller and give the room a clean, contemporary look. This type of wall paneling design for drawing room works beautifully behind a TV unit or sofa.

    If you prefer something more traditional, rectangular wooden frames painted in neutral shades create a timeless European look. Wooden panels also pair well with warm lighting and minimal décor.

    MDF and PVC Panels for Practical Homes

    Not everyone wants to invest heavily in wall treatments, and that is perfectly fine. MDF and PVC panels are excellent choices if you want a stylish wall paneling design for drawing room without stretching your budget.

    These panels are lightweight, easy to install, and available in a wide range of textures and colors. PVC panels are also moisture resistant and low maintenance, which makes them suitable for busy households.

    You can find 3D textured designs that add visual interest without requiring complex installation. Painted MDF panels can mimic the look of wood or even create modern geometric patterns. For smaller drawing rooms, these materials offer a quick and practical upgrade.

    Upholstered Panels for a Soft Luxury Feel

    If you love plush interiors and a hotel-like atmosphere, upholstered panels are worth considering. Fabric paneling adds softness and comfort to the drawing room. It also helps reduce echo in larger spaces.

    Velvet and suede panels are popular choices for a luxurious look. Neutral tones like beige, grey, and cream work well for modern homes, while deeper shades like navy or emerald add drama. This type of wall paneling design for drawing room is often used behind sofas or as a feature wall.

    It instantly makes the space feel cozy and inviting. When paired with warm lighting, it creates a relaxing and elegant environment.

    Wainscoting for a Classic Look

    Wainscoting is one of those styles that never goes out of fashion. It usually covers the lower half of the wall with decorative molding. This wall paneling design for drawing room suits both traditional and modern interiors.

    Paint it white for a clean and classic feel. Choose soft pastels or muted tones if you want something more contemporary. Wainscoting works especially well in homes with higher ceilings, as it adds structure and visual balance.

    You can also combine it with wallpaper or textured paint on the upper wall for added depth.

    Marble and Stone Panels for Grand Interiors

    If your goal is to create a luxurious drawing room, marble or stone paneling is an excellent option. It gives the space a high-end look that feels both modern and timeless.

    Marble panels are often used behind TV units or as a statement wall. Natural stone textures also add a beautiful earthy feel. Some homeowners even experiment with a mosaic wall panel to bring artistic detailing into the drawing room. Mosaic designs can act as stunning focal points and add a handcrafted charm.

    These materials work best in larger spaces where their beauty can truly stand out.

    Choosing the Right Paneling for Your Space

    Before finalizing any wall paneling design for drawing room, consider your space carefully. The right choice depends on your room size, lighting, and overall décor.

    In smaller drawing rooms, light-colored panels or vertical designs help create a sense of openness. Dark or heavy panels may make the space feel cramped. Larger rooms can handle bold textures and darker tones more comfortably.

    Lighting also plays a key role. Natural light highlights wood and stone textures beautifully. Warm artificial lighting enhances the richness of panels and creates a cozy atmosphere.

    Always choose colors and materials that complement your furniture and flooring. A balanced design feels more cohesive and inviting.

    Modern Minimalist Paneling Ideas

    Modern homes often lean toward simplicity. A minimalist wall paneling design for drawing room focuses on clean lines and subtle textures.

    Fluted panels, matte finishes, and neutral shades like beige or grey are popular choices. Many homeowners add hidden LED lighting to highlight the panels softly. This creates a sophisticated and uncluttered look.

    Keep décor minimal so that the paneling remains the star of the room. A few well-chosen pieces like artwork or indoor plants are enough.

    Traditional and Royal Style Inspirations

    If you love a more classic or royal feel, you can go for ornate moldings, carved wood panels, or rich colors. This type of wall paneling design for drawing room pairs beautifully with chandeliers, traditional furniture, and decorative accents.

    Deep wood tones, gold highlights, and detailed frames create a regal atmosphere. It is perfect for those who enjoy timeless elegance and a touch of grandeur.

    Mixing Materials for a Unique Touch

    You do not have to stick to just one material. Mixing textures can create a more dynamic look. Wood combined with marble or fabric panels framed in metal can look stunning.

    Some homeowners carry design elements into other areas of the home to maintain consistency. For example, if your drawing room includes mosaic details, you can complement them with mosaic bathroom accessories in bathrooms. This creates a cohesive visual story throughout the house.

    Accent Wall or Full Paneling

    Many people wonder whether to panel just one wall or the entire drawing room. Both approaches can work well depending on your space and budget.

    An accent wall is ideal if you want a stylish update without major renovation. It highlights a specific area like the TV unit or seating space. Full wall paneling works better in large or luxury homes where you want a more dramatic transformation.

    Most modern homes prefer an accent-based wall paneling design for drawing room because it feels balanced and visually appealing.

    Enhancing Paneling with Lighting

    Good lighting can completely change the way your paneling looks. Soft LED strips, wall washers, or warm spotlights can highlight textures beautifully.

    Wooden panels glow under warm lighting. Marble and stone look elegant with focused lights. Proper lighting makes your wall paneling design for drawing room stand out even more.

    Budget and Maintenance Tips

    The cost of paneling depends on the material you choose. PVC and MDF are more affordable. Natural wood and marble fall into the premium category. Always plan your budget in advance and consult professionals for accurate estimates.

    Maintenance is also important. Dust panels regularly and avoid harsh chemicals on wood or fabric. Stone and marble surfaces should be sealed properly to maintain their shine. With proper care, your wall paneling design for drawing room will stay beautiful for years.

    Creating Design Harmony Across the Home

    A well-designed home feels connected. If your drawing room features marble or mosaic details, you can echo similar tones in other areas. Even subtle touches like coordinating with mosaic flooring in bathrooms can create harmony throughout the house.

    Consistency in materials and colors makes the entire home feel thoughtfully designed.

    Final Thoughts

    Choosing the right wall paneling design for drawing room can truly transform your home. It is not just about decoration. It is about creating a space that feels warm, stylish, and welcoming.

    Take your time exploring different materials, textures, and styles. Think about how you want your drawing room to feel. Whether you prefer modern simplicity or classic elegance, there is a wall paneling design for drawing room that will perfectly match your vision.

    When done thoughtfully, wall paneling becomes more than a trend. It becomes a timeless feature that adds comfort, beauty, and personality to your home.

    FAQs

    What is the best wall paneling design for drawing room?

    The best wall paneling design for drawing room depends on your interior style and budget. Wooden panels create a warm and premium look, while PVC and MDF panels are affordable and easy to maintain. For luxury interiors, marble or upholstered panels work beautifully. Choose a design that matches your furniture, lighting, and overall home décor.

    Is wall paneling good for small drawing rooms?

    Yes, a well-chosen wall paneling design for drawing room can enhance even small spaces. Light-colored panels, vertical slats, or minimal designs make the room look bigger and more elegant. Avoid heavy textures or very dark colors in compact drawing rooms to maintain a spacious feel.

    Which material is best for wall paneling in the drawing room?

    Wood, MDF, PVC, marble, and fabric are popular materials for a wall paneling design for drawing room. Wooden panels offer a premium and timeless look, while PVC and MDF are budget-friendly and low maintenance. Marble and upholstered panels are ideal for luxurious interiors.

  • How Wall Panelling Designs Transform Living Room Interiors?

    How Wall Panelling Designs Transform Living Room Interiors?

    Your living room is more than just a space with a sofa and TV. It is where guests sit, families gather, and everyday life happens. The way this room looks and feels says a lot about your home. One design feature that can completely change its appearance is wall panelling designs living room. From adding texture to creating a luxury feel, wall panels can turn an ordinary space into something truly special.

    Today, more homeowners and interior designers are choosing wall panelling designs living room to upgrade interiors without major renovation. Whether your style is modern, classic, or minimal, wall panelling offers a simple way to make your living room look refined and thoughtfully designed.

    In this guide, we will explore how wall panelling designs living room can transform your space, the best styles to choose from, materials to consider, and practical tips to help you make the right choice.

    Why Wall Panelling Is So Popular Today

    Interior trends keep changing, but some design elements stay relevant because they combine beauty and function. That is exactly why wall panelling designs living room have become so popular in modern homes.

    Unlike plain painted walls, wall panels bring depth and character to a room. They make walls look finished and complete. At the same time, they help hide imperfections and add durability. Many homeowners prefer wall panelling designs living room because they offer both style and practicality.

    Another reason for their growing popularity is flexibility. There are countless textures, colors, and materials available. From wooden panels to modern 3D patterns, wall panelling designs living room can be customized to match any interior theme or budget.

    How Wall Panelling Changes the Look of a Living Room

    One of the biggest advantages of wall panelling designs living room is the instant visual transformation they bring. Even a simple room can look luxurious once wall panels are added.

    Adds Texture and Depth

    Flat walls can sometimes feel plain. Wall panels introduce layers and patterns that create depth. Textured finishes and grooved designs make the space feel more dynamic. This is why many homeowners use wall panelling designs living room to create a rich and stylish environment.

    Creates a Beautiful Focal Point

    Every living room needs a focal point. Instead of relying only on paint or wallpaper, many designers now use wall panelling designs living room to create stunning feature walls. Panels behind the TV unit or sofa can instantly draw attention and make the space look professionally designed.

    Enhances Lighting

    Lighting plays an important role in interior design. When paired with soft LED lights or spotlights, wall panelling designs living room create subtle shadows and highlights. This adds warmth and elegance to the room.

    Popular Wall Panelling Styles for Living Rooms

    Choosing the right style can make all the difference. Here are some of the most loved wall panelling designs living room options that suit different home styles.

    Wooden Wall Panels

    Wooden panels are timeless and elegant. They add warmth and natural beauty to any living room. From deep walnut tones to light oak finishes, wooden wall panelling designs living room work well in both traditional and modern spaces. They also offer durability and long-term value.

    3D Wall Panels

    If you want a modern and creative look, 3D panels are a great choice. These wall panelling designs living room feature geometric patterns and textures that make the wall stand out. They are perfect for contemporary homes that need a stylish touch.

    Upholstered Panels

    Fabric or leather panels bring comfort and luxury. Upholstered wall panelling designs living room create a cozy atmosphere and also help with sound insulation. They are ideal for homeowners who want a soft and elegant interior.

    PVC and Laminate Panels

    For budget-friendly yet stylish options, PVC and laminate panels are excellent. These wall panelling designs living room can mimic wood or marble finishes and are easy to maintain. They are also quick to install, making them a practical choice for many homes.

    Functional Benefits of Wall Panelling

    While aesthetics matter, functionality is equally important. Wall panelling designs living room offer several practical advantages.

    Covers Wall Imperfections

    Over time, walls can develop cracks or uneven surfaces. Installing wall panelling designs living room helps hide these imperfections and gives the room a clean, polished look.

    Improves Insulation

    Certain materials like wood and fabric provide better insulation. They help maintain indoor temperature and reduce outside noise. This makes wall panelling designs living room especially useful for homes in busy areas.

    Easy to Maintain

    Modern panels are designed to be durable and low maintenance. Unlike wallpaper that may peel, high-quality wall panelling designs living room can last for years with minimal care.

    Choosing the Right Material

    Selecting the right material is key to achieving the best results with wall panelling designs living room.

    Wood is a classic choice that offers warmth and elegance. MDF panels are more affordable and can be painted in any shade. PVC panels are lightweight, waterproof, and easy to clean. Stone or marble-finish panels create a luxurious look and add a premium feel to the space.

    Each material has its own advantages. Choosing the right one depends on your budget, lifestyle, and design preference.

    Color and Design Combinations

    Color plays an important role in enhancing wall panelling designs living room. The right combination can make your living room feel bigger and more inviting.

    Neutral shades like beige, cream, and grey create a calm atmosphere. Dark tones such as walnut or charcoal add depth and drama. Light-colored wall panelling designs living room can make small spaces feel open and airy.

    Matching panel colors with furniture and flooring helps create a balanced and cohesive look.

    Wall Panelling for Small Living Rooms

    Wall panels are not just for large homes. Smartly chosen wall panelling designs living room can also improve small spaces.

    Vertical panels can make the ceiling look higher, while light colors create a sense of openness. Minimal designs prevent the room from feeling crowded. With the right approach, wall panelling designs living room can make even compact spaces look stylish and spacious.

    Blending Wall Panelling with Other Decor

    To achieve a well-designed home, it is important to maintain consistency across spaces. Wall panelling designs living room should complement furniture, lighting, and decorative elements.

    Some homeowners like to add artistic features such as a mosaic wall panel to bring texture and personality to their interiors. Coordinating elements across rooms also helps maintain a unified theme. For example, matching details with mosaic bathroom accessories in other parts of the home creates visual harmony.

    Even statement pieces like mosaic flooring in nearby spaces can enhance the overall design when paired thoughtfully with wall panelling.

    Budget Planning for Wall Panelling

    The cost of wall panelling designs living room depends on materials, design complexity, and installation. PVC and laminate options are more affordable, while solid wood and custom designs can be more expensive.

    Setting a budget in advance helps you make the right choice. Investing in quality wall panelling designs living room ensures durability and long-term value.

    Tips for Choosing the Perfect Wall Panelling

    Selecting the right wall panelling designs living room requires careful planning. Consider the size of your room and the existing decor. Choose colors that complement your furniture and lighting. Focus on durable materials that are easy to maintain.

    Avoid overly heavy designs in smaller rooms. If needed, consult an interior designer for professional guidance. With thoughtful selection, wall panelling designs living room can completely transform your home.

    Future Trends in Wall Panelling

    Interior design trends continue to evolve, and wall panelling designs living room are becoming more creative. Sustainable materials and eco-friendly options are gaining popularity. Many homeowners are also experimenting with mixed textures and natural finishes.

    Simple patterns, soft tones, and functional designs are expected to dominate future trends. These modern wall panelling designs living room focus on comfort, style, and practicality.

    Final Thoughts

    A beautifully designed living room leaves a lasting impression. With the right wall panelling designs living room, you can transform a basic space into something elegant and welcoming. From improving aesthetics to enhancing functionality, wall panels offer many benefits.

    Whether you prefer classic wooden finishes, modern textured panels, or luxurious marble designs, there is something for every taste and budget. Thoughtfully chosen wall panelling designs living room can enhance your home’s overall appeal and create a space you truly enjoy spending time in.

    FAQs

    Is wall panelling good for living rooms?

    Yes, wall panelling is an excellent choice for living rooms. It enhances the overall look by adding texture, depth, and style to plain walls. Wall panels also help hide wall imperfections and improve insulation. Whether you prefer modern, classic, or luxury interiors, wall panelling creates a polished and elegant finish. It is durable, easy to maintain, and instantly upgrades the ambiance of your living room.

    Which material is best for living room wall panelling?

    The best material depends on your budget and style. Wooden panels offer a warm and premium look, while MDF panels are affordable and versatile. PVC panels are lightweight, waterproof, and easy to maintain, making them popular for modern homes. For a luxurious finish, stone or marble-effect panels work beautifully. Choosing high-quality materials ensures durability and a long-lasting, stylish living room interior.

    Does wall panelling make a room look bigger?

    Yes, the right wall panelling design can make a room look bigger. Light-colored panels reflect more light and create an open feel. Vertical panels can make ceilings appear higher, while minimal patterns prevent the room from looking crowded. When paired with proper lighting and furniture placement, wall panelling helps small living rooms feel more spacious and visually balanced.

  • What is Mosaic Painting?

    What is Mosaic Painting?

    Art has always been a mirror of human creativity. From the earliest cave drawings to modern digital illustrations, every era finds new ways to express emotion and beauty. Among these timeless forms, mosaic painting stands out for its ability to turn small fragments of stone, glass, or ceramic into something truly spectacular.

    But before diving into its details, let’s take a moment to understand what is mosaic painting and why it continues to fascinate artists, designers, and admirers around the world.

    So, what exactly is mosaic painting? At its simplest, mosaic painting is the art of creating images or patterns using small pieces of colored materials known as tesserae. These can be bits of glass, marble, stone, ceramic, or even shells. Each tiny piece is carefully placed next to the other until a beautiful image, design, or scene comes to life.

    The word “mosaic” originates from the Greek term mouseios, which means “of the muses.” It’s a fitting name because every mosaic truly feels inspired. When you think about what is mosaic painting, imagine an artist patiently arranging hundreds or even thousands of tiny pieces until a grand picture slowly emerges. It’s not just art; it’s craftsmanship, patience, and storytelling combined.

    The Origins and History of Mosaic Painting

    To really understand what is mosaic painting, it helps to trace where it all began. The earliest known mosaics appeared in Mesopotamia around 3,000 BCE. People decorated temples and palaces using colored stones and clay pieces arranged in patterns.

    The Greeks later refined the craft, introducing more detailed and symmetrical designs. But it was the Romans who truly popularized mosaic art, turning it into a luxury form of decoration. Roman villas and bathhouses were covered in stunning floor mosaics depicting gods, legends, and everyday life scenes.

    Then came the Byzantine era, where mosaics became deeply spiritual. Artists started using gold and glass to create glowing images inside churches, giving rise to masterpieces like those in Hagia Sophia and Ravenna.

    From temples to cathedrals, the history of what is mosaic painting reflects a journey that blends beauty, culture, and devotion.

    How Mosaic Painting Differs from Traditional Painting

    At first glance, mosaic art might seem like another form of painting, but the process and effect are very different. In traditional painting, artists use brushes and pigments to apply color. In mosaic painting, color comes from the physical material itself the way each tiny tile catches and reflects light.

    When sunlight hits a mosaic surface, it bounces differently off each piece, creating a shimmering effect. That’s what gives mosaic paintings their depth and texture. If you’re exploring what is mosaic painting, you’ll realize it’s more than visual art it’s a tactile experience that feels alive every time light changes.

    Techniques Used in Mosaic Painting

    There are several ways to create mosaic paintings, depending on the type of surface and design. Understanding these methods gives a clearer idea of what is mosaic painting in practice:

    1. Direct Method – Tiles or tesserae are glued directly onto the surface. This technique lets the artist work freely and see how the design looks as it develops.
    2. Indirect Method -The design is created on a temporary surface, such as paper or mesh, and later transferred to its final base. This is ideal for large-scale or complex works.
    3. Double Indirect Method – Used for highly detailed pieces that require perfect alignment. Tiles are first arranged face-up, captured in a mold, and then permanently set.

    Each technique highlights the blend of creativity and precision that defines what is mosaic painting.

    Materials Used in Mosaic Painting

    Every mosaic painting begins with a thoughtful choice of materials. The type of tesserae determines the final look, texture, and brightness of the piece. Some popular materials include:

    • Glass for brightness and vibrancy, perfect for luminous wall pieces
    • Ceramic for durability and a smooth finish
    • Stone or Marble for an earthy, classic touch
    • Metal or Mirror Pieces for a modern, reflective appeal

    Together, these materials show that what is mosaic painting isn’t limited by tradition. It’s an art form that evolves with every creative hand that touches it.

    The Modern Evolution of Mosaic Painting

    Today, mosaic painting has evolved far beyond ancient temples and cathedrals. Modern artists have reimagined the art form, blending traditional craftsmanship with contemporary styles. From public murals to home interiors, mosaics now appear everywhere.

    Contemporary artists often use recycled materials, glass shards, beads, and even digital elements to create new-age designs. So, when we ask what is mosaic painting in the modern sense, it’s not just about decoration it’s about sustainability, innovation, and self-expression.

    Mosaic Art in Home Decor

    Mosaic painting has found a fresh identity in interior design. Homes and workspaces now use mosaic patterns to add personality and character.

    A beautifully designed mosaic wall panel can completely change the atmosphere of a room, turning a plain wall into an artful centerpiece. Similarly, like mirrors, trays, and décor pieces add a subtle artistic flair to modern spaces.

    Even are becoming increasingly popular, combining everyday function with artistic expression. These examples prove how versatile mosaic painting has become in modern décor a blend of beauty and practicality.

    Cultural and Symbolic Meaning of Mosaic Painting

    Beyond its beauty, what is mosaic painting also carries deep meaning. In many cultures, mosaics symbolize unity through diversity mosaic bathroom accessories many small, imperfect pieces coming together to form a perfect whole.

    In ancient civilizations, mosaics told stories of faith and mythology. In Islamic architecture, they represent infinity and divine symmetry. In modern art, they often symbolize the complexity of human identity.

    Each interpretation shows that mosaic art isn’t just about patterns or color. It’s about perspective, balance, and harmony.

    Popular Themes and Styles in Mosaic Painting

    Throughout history, artists have explored various themes through mosaic painting. Some of the most loved styles include:

    • Geometric Designs that reflect order and balance
    • Floral Motifs symbolizing growth and nature
    • Religious and Mythological Scenes found in classical works
    • Abstract Compositions that express emotion and creativity

    These styles show that what is mosaic painting can be anything from a spiritual reflection to a personal story.

    Why Mosaic Painting Still Matters Today

    In a world of fast trends and digital art, mosaic painting continues to hold a special charm. Part of understanding what is mosaic painting is appreciating its timeless nature. Each piece takes time, precision, and patience mosaic wash basins values that are often lost in today’s fast-paced lifestyle.

    It’s also sustainable, as many artists now use recycled tiles or glass to create eco-friendly designs. Whether in homes, gardens, or city walls, mosaics remind us that beauty can come from the smallest, even discarded, fragments.

    How to Create Your Own Mosaic Painting

    If you’ve ever been curious to try it yourself, here’s a simple way to experience what is mosaic painting firsthand:

    1. Choose a design or pattern you’d like to create.
    2. Select your materials glass, ceramic, or any colorful fragments.
    3. Prepare a base, such as wood or canvas.
    4. Apply adhesive and start arranging the pieces according to your design.
    5. Fill the gaps with grout and let it dry.
    6. Gently clean the surface and polish it to bring out the shine.

    The process is both meditative and rewarding. By the time you’re done, you’ll not only have a piece of art but also a deeper understanding of what mosaic painting really means.

    Famous Mosaic Masterpieces Around the World

    One of the best ways to appreciate what is mosaic painting is to look at the masterpieces that have stood the test of time:

    • The Alexander Mosaic in Pompeii, depicting the legendary battle between Alexander the Great and Darius.
    • Hagia Sophia Mosaics in Istanbul, showcasing golden depictions of saints and angels.
    • Ravenna Mosaics in Italy, celebrated for their religious detail and color.
    • Park Güell in Barcelona, where architect Antoni Gaudí turned mosaic art into vibrant architectural wonder.

    Each of these creations tells a story and captures a moment in history, frozen forever in stone and glass.

    Preserving Mosaic Art

    Because mosaic paintings are made from varied materials, they need special care. Dust and moisture are their biggest enemies. Regular cleaning and gentle maintenance can help keep them vibrant for generations. Ancient mosaics have survived thousands of years precisely because of this care and craftsmanship.

    The Future of Mosaic Painting

    So, what does the future hold for this ancient art? The answer lies in its adaptability. With advancements in technology and design, mosaic painting is finding new life through modern techniques and sustainable materials. Artists are now experimenting with 3D designs, interactive surfaces, and even digital mosaics that combine art with innovation.

    No matter how technology evolves, the essence of what is mosaic painting will always remain the same finding beauty in the fragments of life.

    Conclusion

    In the end, what is mosaic painting isn’t just a question about art; it’s a reflection of human creativity and resilience. From ancient civilizations to modern homes, mosaics have always told stories through colors, textures, and light.

    It’s the art of unity, where every broken piece finds its purpose in creating something whole and meaningful. So next time you come across a shimmering wall or floor made of tiny colored tiles, pause for a moment. You’ll know exactly what is mosaic painting an eternal dance of color, craftsmanship, and imagination.

    FAQs

    What is special about mosaics?

    What makes mosaics special is their ability to turn small, broken pieces of glass, stone, or ceramic into a stunning, unified artwork. Each fragment adds texture, color, and depth, creating a design that shines differently with every light. Mosaics symbolize harmony in diversity, blending creativity, craftsmanship, and timeless beauty into one expressive art form.

    What are the three uses of mosaic?

    The three main uses of mosaics are:

    • Decoration: They are often used to enhance the beauty of walls, floors, and ceilings in homes and public buildings.
    • Practical Design: Mosaics add durability and visual interest to everyday items like tables, pathways, and fountains.
    • Artistic Expression: Artists use them to create meaningful patterns, images, and storytelling artworks.
    Why was mosaic important?

    Mosaics were important because they served as both decoration and storytelling tools in ancient cultures. They were used to express religious beliefs, record historical events, and display wealth or power. Beyond beauty, mosaics symbolized creativity, craftsmanship, and cultural identity, preserving art that could withstand time, weather, and generations making them lasting pieces of human history.

  • How to Make a Mosaic Flower Pot?

    How to Make a Mosaic Flower Pot?

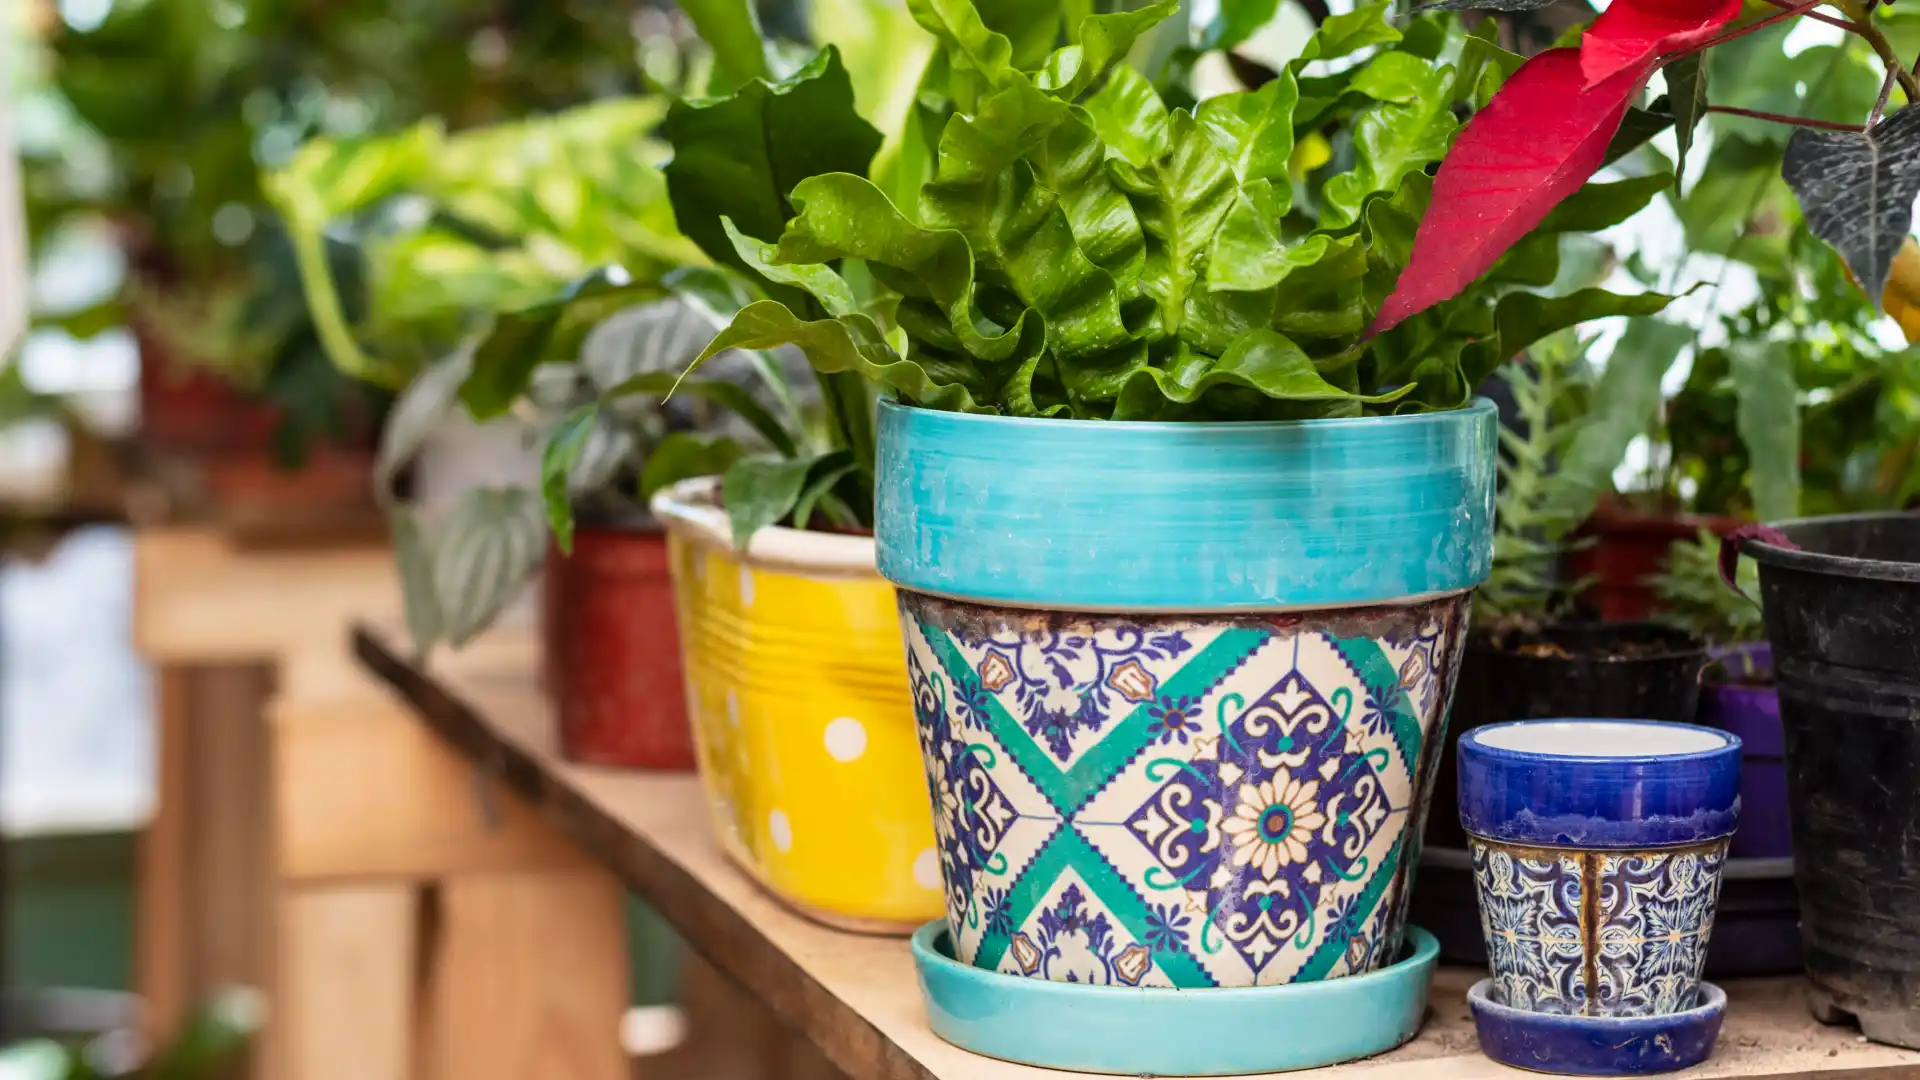
    Have you ever looked at an old flower pot and thought it could use a little life? That’s where mosaic art comes in. Learning how to make a mosaic flower pot is not just about decorating; it’s about giving your creativity a space to bloom. With some colorful tiles, a bit of patience, and a few easy steps, you can turn a plain pot into a beautiful piece of art.

    In this guide, we’ll walk through everything you need to know about how to make a mosaic flower pot, from materials to finishing touches. Whether you’re a beginner or an experienced crafter, this project will leave you with something truly personal and unique.

    What is a Mosaic Flower Pot?

    Before we dive into the process, let’s understand what mosaic art really is. A mosaic is an artwork created by arranging small pieces of glass, stone, ceramic, or tiles into patterns or images. When you apply this technique to a pot, it becomes a how to make a mosaic flower pot a stunning mix of color and texture that instantly brightens up any garden or indoor corner.

    Mosaic designs have been used for centuries to decorate temples, walls, and public spaces. Today, they’ve found their way into modern home décor through items like, Mosaic bathroom accessories. The same principles of design apply when you create your very own mosaic flower pot.

    Why Make a Mosaic Flower Pot?

    Creating a mosaic pot is more than just a DIY project; it’s an artistic experience. Here’s why it’s worth trying:

    1. Adds Personality: Every pot you make reflects your unique style and creativity.
    2. Sustainable Crafting: It’s a great way to reuse broken tiles, crockery, or old glass pieces.
    3. Therapeutic Activity: The process is calming and meditative, helping you unwind.
    4. Beautiful Results: A handmade how to make a mosaic flower pot  is a statement piece that can uplift any space.

    Materials You’ll Need

    To get started, gather the following materials:

    • A plain terracotta or ceramic flower pot
    • Mosaic tiles or broken glass/ceramic pieces
    • Tile adhesive or strong glue
    • Grout (available in various colors)
    • Sponge and cloth
    • Safety gloves and goggles
    • Tweezers (for small pieces)
    • Sealant (optional but recommended)

    Once you have everything ready, how to make a mosaic flower pot you’re just a few steps away from transforming your ordinary pot into a masterpiece.

    Step-by-Step Guide: How to Make a Mosaic Flower Pot

    Now let’s go step by step into the creative process of how to make a mosaic flower pot that’s both beautiful and durable.

    Step 1: Prepare Your Pot

    Start by cleaning your pot thoroughly. Remove any dust, grease, or dirt so that the adhesive can stick properly. If your pot has any old paint, sand it lightly to create a smooth surface.

    Step 2: Plan Your Design

    Before gluing anything, plan your design. You can sketch it on paper or directly on the pot using a pencil. Simple patterns like flowers, spirals, or geometric shapes work wonderfully. how to make a mosaic flower pot If you’re going for a random pattern, arrange a few pieces loosely to see how they look together.

    Step 3: Apply the Adhesive

    Once your design is ready, start applying the adhesive in small sections. Stick the mosaic pieces one by one, pressing gently to secure them. Leave small gaps between the pieces for the grout. Continue until the entire surface is covered.

    Step 4: Let It Dry

    After placing all the pieces, let your pot dry for 24 hours. Mosaic wash basins This helps the adhesive set firmly, ensuring your design lasts for years.

    Step 5: Apply the Grout

    Mix your grout as per the instructions on the packet. Using a rubber spatula or your gloved hands, spread it across the surface. Fill all the gaps evenly. how to make a mosaic flower pot Don’t worry if it looks messy this is part of the process.

    Step 6: Wipe Away the Excess

    Wait about 15 minutes, then wipe off the excess grout using a damp sponge. Be gentle so you don’t disturb the pieces. Repeat this process a few times until your tiles are clean and shiny.

    Step 7: Let It Cure and Seal

    Allow your how to make a mosaic flower pot  to dry completely for another day. If you’re planning to keep it outdoors, apply a sealant to protect it from moisture and fading. This step helps your artwork last much longer.

    Creative Ideas for Mosaic Flower Pots

    Now that you know how to make a mosaic flower pot, it’s time to experiment. Here are a few design ideas to inspire you:

    1. Nature-Inspired Patterns: Use green, brown, and yellow tiles to create floral or leaf designs.
    2. Abstract Art: Go freeform with mixed colors and shapes for a modern, artsy vibe.
    3. Themed Pots: Match your mosaic colors with your garden theme think blue for water plants or red for rose corners.
    4. Upcycled Style: Use old cups, plates, or mirror shards for a rustic, eco-friendly design.

    Tips for a Perfect Mosaic Flower Pot

    To make your mosaic pot look professional, keep these tips in mind:

    • Choose contrasting colors for more visual impact.
    • Use small pieces for intricate designs and larger ones for bold patterns.
    • Always test your grout color before applying it to the whole pot.
    • Don’t rush the drying process it’s the key to durability.
    • If you’re a beginner, start with smaller pots before moving to larger ones.

    Caring for Your Mosaic Flower Pot

    Once you’ve made your beautiful how to make a mosaic flower pot , proper care will keep it looking new for years. Avoid soaking it in water, and clean it with a damp cloth when needed. If used outdoors, check for any loose tiles occasionally and reseal them if required.

    The Joy of Handmade Art

    There’s something truly special about making something with your own hands. When you learn how to make a mosaic flower pot, you’re not just crafting an object Mosaic wall panel you’re creating a reflection of yourself. Each tiny tile represents patience, creativity, and the beauty of imperfection. No two mosaic pots are ever the same, and that’s what makes them so wonderful.

    Conclusion

    Learning how to make a mosaic flower pot is one of the most satisfying DIY projects you can try. It’s creative, sustainable, and adds a unique touch to your home or garden décor. All you need is a few materials, a bit of imagination, and the willingness to get your hands a little messy.

    Whether you’re making one for yourself or as a heartfelt gift, a mosaic pot brings color and charm wherever it’s placed. So grab those tiles, put on some music, and let your creativity flow. With time and care, you’ll have a mosaic masterpiece that will remind you of the joy of creating something truly your own.

    FAQs

    Why is mosaic important?

    Mosaics are important because they blend art, history, and craftsmanship in a timeless way. They preserve cultural stories through colorful patterns made from simple materials like glass or stone. Beyond decoration, mosaics symbolize creativity, patience, and unity turning small, broken pieces into something beautiful and whole, reflecting the artistry and spirit of human expression across generations.

    What are the three types of mosaics?

    The three main types of mosaics are:

    • Pebble Mosaics: Made using natural pebbles or small stones to create simple, earthy designs, often used in pathways or gardens.
    • Glass Mosaics: Crafted from colorful glass pieces that reflect light beautifully, perfect for decorative art and interiors.
    • Ceramic Mosaics: Created with glazed or unglazed ceramic tiles, commonly used for walls, floors, and architectural details.
    What is the full form of mosaic?

    The word “mosaic” doesn’t actually have a full form it’s not an acronym. It comes from the Greek word “mouseion,” meaning “a work of the Muses” (the goddesses of inspiration in art and creativity). Over time, the term evolved to describe artworks made by arranging small pieces of stone, glass, or tile into beautiful patterns or images.

  • How to Make Mosaic Art at Home?

    How to Make Mosaic Art at Home?

    Have you ever looked at colorful walls or intricate designs made of tiny glass or tile pieces and wondered how they’re made? That’s the beauty of mosaic art a timeless craft that transforms small, broken materials into stunning masterpieces. The best part? You can create your own mosaic designs right at home. In this guide, you’ll learn how to make mosaic art at home, step by step, even if you’ve never tried it before.

    Before diving into the steps, let’s understand what mosaic art really is. Mosaics are artworks created by assembling small fragments of glass, ceramic, stone, or other materials called tesserae into a design. These designs can range from simple patterns to detailed scenes. Ancient civilizations like the Greeks and Romans used mosaics to decorate temples, palaces, and floors, and the art form continues to inspire creators even today.

    Learning how to make mosaic art at home allows you to blend creativity, patience, and sustainability. You get to give broken or unused pieces a second life, turning them into something extraordinary and meaningful.

    Why Try Mosaic Art at Home?

    Once you start learning how to make mosaic art at home, you’ll see why people fall in love with it. Here are some wonderful reasons to start:

    • It’s creative and relaxing: Arranging small pieces into a larger design is almost meditative.
    • It’s eco-friendly: You can reuse old tiles, mirrors, or broken dishes instead of throwing them away.
    • It’s long-lasting: Mosaic art is durable and retains its beauty for decades.
    • It adds charm to your space: From garden pots to mirrors and walls, mosaics bring color and character anywhere.
    • It’s for everyone: You don’t need to be a professional artist to create something beautiful.

    Once you understand how to make mosaic art at home, you’ll realize it’s not just an art form it’s a beautiful expression of your imagination.

    Things You’ll Need to Make Mosaic Art at Home

    Before you begin, gather these basic materials to create your first piece of mosaic art:

    • Base surface: Choose something sturdy like a wooden board, terracotta pot, mirror frame, or tray.
    • Tiles or materials: Use colored glass, broken ceramic, stones, marbles, or beads.
    • Adhesive: A strong craft glue or tile adhesive to hold pieces in place.
    • Grout: Used to fill the spaces between tiles and secure the design.
    • Sponge and cloth: For cleaning excess grout and polishing.
    • Protective gear: Gloves and safety goggles are important when cutting tiles or glass.

    Once you have these ready, you’re all set to learn how to make mosaic art at home from start to finish.

    Step-by-Step Guide: How to Make Mosaic Art at Home

    Here’s a simple, easy-to-follow process to help you create your first mosaic piece.

    Step 1: Choose Your Design

    Start by picking a design that inspires you. Beginners should go for simple shapes like flowers, hearts, or geometric patterns. Sketch your design lightly on your chosen surface. This will guide you as you start arranging the tiles.

    Step 2: Prepare Your Materials

    Use a tile cutter or nipper to break your tiles or glass pieces into smaller, manageable sizes. Be careful always wear gloves and safety glasses. You can mix different colors and materials to make your mosaic more vibrant.

    Step 3: Apply Adhesive

    Spread a thin layer of adhesive on a small section of your surface. Press your pieces gently onto it, following your sketch. The trick to mastering how to make mosaic art at home lies in arranging the pieces evenly and keeping consistent spacing.

    Step 4: Let It Dry

    After completing your pattern, leave it to dry completely for about 24 hours. This ensures your tiles stick firmly before adding grout.

    Step 5: Apply Grout

    Mix the grout according to the instructions on the package. Using a spatula or rubber scraper, spread it across your mosaic, filling the gaps. Don’t worry if it looks messy you’ll clean it up soon.

    Step 6: Clean and Polish

    Once the grout starts to set, wipe off the excess with a damp sponge. When dry, polish the surface with a clean cloth to reveal your beautiful design underneath.

    Step 7: Seal (Optional)

    If your mosaic will be outdoors, apply a sealant to protect it from water and sunlight. Sealing also enhances the shine and color of your tiles.

    And that’s it you now know how to make mosaic art at home from scratch.

    Creative Mosaic Art Ideas You Can Try

    Once you’ve learned the process, you can experiment with different projects. Here are some ideas that can make your space look unique and artistic:

    • Mosaic flower pots: Add vibrant designs to your garden.
    • Picture frames: Turn plain frames into colorful decor pieces.
    • Garden stepping stones: Personalize your walkway with mosaic patterns.
    • Mosaic tabletops: Transform old furniture into statement pieces.
    • Wall hangings: Create art panels that bring life to empty walls.

    If you want to go bigger, you can even design a mosaic wall panel for your living room or balcony. It’s an amazing way to showcase your creativity and add character to your space.

    Tips for Perfecting Your Mosaic Art

    Learning how to make mosaic art at home is easy, but a few tips can make your work look more professional:

    • Always start with simple designs before trying complex patterns.
    • Choose colors that complement each other for a balanced look.
    • Keep your grout lines even they define your design.
    • Clean up as you go to avoid grout drying on the surface.
    • Be patient mosaic art is all about precision and creativity.

    With these small habits, your projects will look polished and beautifully detailed.

    Common Mistakes to Avoid

    Even with practice, beginners often make a few avoidable mistakes. Here are some things to watch out for:

    • Uneven spacing: Makes your mosaic look messy.
    • Using too much glue: It can seep through and ruin the design.
    • Ignoring grout consistency: Too watery grout won’t hold; too thick will crack.
    • Skipping sealing: Without sealing, outdoor pieces may get damaged.
    • Not planning the layout: Always sketch before gluing to avoid last-minute confusion.

    Avoiding these mistakes ensures that your mosaic art stays durable and visually appealing.

    Exploring Mosaic Art Beyond Home Projects

    Once you master how to make mosaic art at home, you’ll realize how versatile it can be. Modern interior designers are using mosaics not just as crafts but as major décor elements. From kitchen backsplashes to luxurious bathrooms, mosaic art adds both elegance and character.

    You can also pair your designs with mosaic bathroom accessories or coordinate your decor with to create a cohesive and artistic look throughout your home. The mix of textures, colors, and patterns brings life to even the simplest spaces.

    How Mosaic Art Enhances Your Space

    Mosaic art has the power to completely transform your environment. how to make mosaic art at home a simple wall or tabletop can become a conversation starter. Here’s how it enhances your space:

    • Adds personality: Every mosaic piece reflects your unique creativity.
    • Creates visual depth: The varied textures catch and mosaic wash basins reflect light beautifully.
    • Tells a story: You can design pieces that hold personal meaning.
    • Blends tradition and modernity: Mosaic art works equally well in vintage and contemporary interiors.

    Whether you choose bold colors or subtle tones, mosaic designs bring warmth and individuality into your home.

    Caring for Your Mosaic Art

    After you’ve learned how to make mosaic art at home and created your masterpiece, it’s essential to care for it properly. Maintenance ensures your artwork remains vibrant for years.

    • Wipe the surface gently with a damp cloth to remove dust.
    • Avoid abrasive cleaners that might scratch the tiles.
    • If placed outdoors, reseal the surface every year for protection.
    • Keep it away from excessive heat or freezing temperatures.

    Regular maintenance keeps your mosaic as dazzling as the day you finished it.

    The Emotional Side of Mosaic Art

    Mosaic art isn’t just about creativity it’s deeply symbolic. Taking broken or discarded pieces and turning them into something whole and beautiful reflects resilience and renewal. That’s why many people find mosaic-making therapeutic. When you learn how to make mosaic art at home, you’re not just crafting something pretty; you’re expressing patience, balance, and imagination.

    Every piece you create becomes a part of your story your thoughts, your choices, and your effort captured in color and texture. It’s one of the few art forms where imperfection itself adds character.

    Conclusion

    Now that you know how to make mosaic art at home, it’s time to bring your creativity to life. From small décor items to grand wall pieces, each mosaic project is a chance to express yourself in color, pattern, and texture. The process may take time, but the result is always worth it.

    So, gather your tools, choose your favorite colors, and start experimenting. Whether you create a tiny frame or a full mosaic wall panel, every project will carry your personal touch and artistic soul. Once you experience the satisfaction of completing your first mosaic, you’ll see how small pieces can come together to form something truly magical.

    FAQs

    What are the common problems with mosaics?

    Common problems with mosaics include uneven tile spacing, excess grout covering the design, and tiles not adhering properly due to weak glue or moisture. Cracking or discoloration can also occur if the surface isn’t sealed or maintained well. Careful planning, proper materials, and regular cleaning help prevent these issues and keep mosaics looking beautiful.

    How to protect mosaic art?

    To protect mosaic art, always seal it with a high-quality grout or tile sealant to prevent moisture and stains. Keep it clean by gently wiping with a soft, damp cloth. Avoid harsh chemicals or abrasive scrubbers. For outdoor mosaics, use weather-resistant materials and reseal annually to maintain shine, strength, and long-lasting beauty.

    Where can mosaic be used to decorate?

    Mosaics can be used to decorate a wide range of spaces and objects. They’re perfect for walls, floors, and ceilings in homes or public buildings. You can use them on garden pots, tables, picture frames, and pathways. Indoors, mosaics add beauty to kitchens, bathrooms, and living rooms, creating vibrant, eye-catching decorative accents anywhere.

  • What is Paper Mosaic?

    What is Paper Mosaic?

    Have you ever seen a picture made entirely from tiny bits of colored paper and wondered how it was created? That’s the magic of paper mosaic art. This simple yet stunning form of creativity transforms small pieces of paper into beautiful designs, patterns, or even full illustrations. It’s a blend of patience, imagination, and craftsmanship that anyone can try.

    In this blog, we’ll explore what is paper mosaic, how it began, what makes it so special, and how you can easily make one at home. Whether you’re a beginner, teacher, or art lover, this guide will help you fall in love with this colorful and expressive art form.

    Understanding What is Paper Mosaic

    To truly understand what is paper mosaic, think of it as a modern spin on ancient mosaic art. Traditional mosaics were created using tiny pieces of stone, glass, or ceramic tiles. Paper mosaics, however, use bits of colored paper instead. These paper “tiles” are arranged side by side to create a larger image or design.

    It’s almost like putting together a jigsaw puzzle, but you get to decide the picture, colors, and pattern. The best part is that anyone can do it. You don’t need expensive supplies or advanced skills just paper, glue, and creativity.

    Learning what is paper mosaic is about more than technique. It’s about transforming everyday materials into something visually striking and deeply personal.

    A Brief History of Paper Mosaic

    Before we dive into how to make one, it’s worth knowing where what is paper mosaic got its inspiration. Mosaic art itself dates back thousands of years, with examples found in ancient Greece, Rome, and the Middle East. Artists back then used tiny tiles, called tesserae, to decorate walls, floors, and ceilings with intricate designs.

    Over time, artists began experimenting with new materials. As paper became more widely available, people started using it in creative ways leading to the birth of paper mosaic art. It offered the same visual appeal as traditional mosaics but was lighter, cheaper, and easier to work with.

    Today, paper mosaics are popular in classrooms, studios, and homes across the world. They’re used to teach art fundamentals, color coordination, and even patience all while being fun and accessible.

    Why You’ll Love Making Paper Mosaics

    Once you understand what is paper mosaic, you’ll realize why so many people enjoy it. It’s not just a craft; it’s a relaxing and rewarding experience.

    Here’s what makes it so appealing:

    • It’s budget-friendly: You can use scrap paper, old magazines, or colored sheets you already have.
    • It’s eco-friendly: Making art from recycled paper is a great way to reduce waste.
    • It sparks creativity: You can experiment with endless color combinations and designs.
    • It’s calming: The repetitive process of gluing small pieces is almost meditative.
    • It’s for everyone: Kids, adults, and even seniors can enjoy creating paper mosaics.

    Whether you want to unwind, decorate your space, or simply try something new, discovering what is paper mosaic can be a refreshing creative escape.

    What You’ll Need for a Paper Mosaic

    If you’re ready to create one yourself, you’ll be happy to know that making a what is paper mosaic doesn’t require much. You probably already have most of the materials at home.

    Here’s a quick checklist:

    • Colored paper – You can use craft paper, origami sheets, or cutouts from magazines.
    • Base surface – A sturdy piece of cardboard, poster board, or canvas paper works best.
    • Glue – Any white craft glue or glue stick will do.
    • Scissors– For cutting your paper into small tiles.
    • Pencil and ruler -To sketch your design and guide your layout.

    Optional materials like glitter paper, foil, or patterned wrapping paper can add extra texture and shine.

    Now that you have your supplies, it’s time to actually make your own paper mosaic and bring your ideas to life.

    How to Make a Paper Mosaic: Step-by-Step

    Learning what is paper mosaic is best done hands-on. Here’s a simple step-by-step guide to help you create your first piece.

    Step 1: Choose a Design

    Start by deciding what you want to create. You can draw inspiration from nature, patterns, or even abstract shapes. Sketch your idea lightly on your base paper.

    Step 2: Cut the Paper

    Cut your colored paper into small shapes squares, rectangles, or triangles. Try to keep them roughly the same size for a neat finish.

    Step 3: Arrange Before Gluing

    Before applying glue, lay out your pieces on the design. This lets you experiment with color placement and spacing.

    Step 4: Start Gluing

    Once you’re happy with your layout, start gluing the paper tiles in place. Leave tiny gaps between each piece, just like traditional mosaics.

    Step 5: Add Final Touches

    You can add borders, outlines, or highlights for extra definition.

    Step 6: Let It Dry

    Allow the glue to dry completely before moving or framing your piece.

    And that’s it! With a few simple materials and a little patience, you’ve created your very own paper mosaic artwork.

    Creative Paper Mosaic Ideas

    Once you understand what is paper mosaic, you can use it to create almost anything. Here are a few ideas to get your creativity flowing:

    • Nature-inspired art: Create flowers, trees, or landscapes using earthy and pastel tones.
    • Animals and birds: Bring your favorite creatures to life with colorful paper tiles.
    • Abstract designs: Play with patterns, symmetry, and bold colors.
    • Home decor: Decorate photo frames, trays, or even a mosaic wall panel with paper mosaic techniques.
    • Seasonal crafts: Make greeting cards, gift tags, or festive artwork for holidays.

    With just a few tweaks in color and shape, every piece you create will have its own unique story.

    Tips to Improve Your Paper Mosaic Art

    The more you practice, the better you’ll get. Here are a few practical tips to help your work stand out:

    • Choose contrasting colors to highlight your design.
    • Avoid using too much glue it can make the paper wrinkle.
    • Cut paper pieces neatly for a clean finish.
    • Work in small sections so the glue doesn’t dry too fast.
    • Experiment with textures like glossy, matte, or metallic paper.

    Once you start creating regularly, you’ll not only get better technically but also develop your own artistic style.

    Common Mistakes to Avoid

    When you’re learning what is paper mosaic, it’s easy to make a few beginner mistakes. The good news? They’re all fixable.

    • Don’t overlap pieces unless it’s part of your design.
    • Keep the spacing consistent between each paper tile.
    • Use a strong adhesive to prevent tiles from coming loose.
    • Always plan your design before gluing.
    • Take your time mosaic art is about patience, not speed.

    By keeping these in mind, your mosaic will look neat and professional.

    Modern Uses of Paper Mosaic

    Paper mosaic isn’t just for school projects anymore. Today, it’s used in interior design, creative branding, and even fine art exhibitions.

    For example, artists often combine paper mosaic with other materials like fabric or paint to create mixed-media pieces. Designers use mosaic-inspired patterns for wallpapers, packaging, and logos. You can even pair paper mosaic décor with mosaic wash basins to give your home a coordinated artistic theme.

    It’s also a popular choice for DIY décor because it’s lightweight, safe, and easy to customize.

    Caring for Your Paper Mosaic Artwork

    Because paper is delicate, it’s important to protect your finished work. Here’s how you can make sure your art lasts for years:

    • Keep it away from water or moisture.
    • Frame your mosaic behind glass to protect it from dust.
    • Avoid direct sunlight, which can cause fading.
    • Store it flat to prevent bending or curling.

    Taking a few precautions ensures your paper mosaic remains vibrant and beautiful for a long time.

    Why Paper Mosaic Is So Special

    Now that you know what is paper mosaic, you’ll probably agree it’s more than just cutting and gluing paper. mosaic bathroom accessories It’s a form of expression that connects creativity with mindfulness.

    Unlike traditional mosaics made with heavy tiles or glass, paper mosaics are light, versatile, and beginner-friendly. The process itself is calming and satisfying it’s art therapy in its purest form.

    What makes it even better is how personal it can be. Every color you choose and every piece you place reflects a part of your imagination.

    Paper Mosaic as an Educational Tool

    One of the best things about what is paper mosaic is how useful it is in education. Teachers use it to help students improve motor skills, focus, and creativity. It teaches kids about colors, composition, and balance in a fun, hands-on way.

    When children create mosaics, they also learn patience and problem-solving. It helps them see how small details come together to make a bigger picture a valuable life lesson disguised as art.

    Sustainability in Paper Mosaic Art

    Another wonderful thing about what is paper mosaic is its eco-friendly nature. You can use leftover paper, magazines, packaging, or even old notebooks to create something beautiful instead of throwing them away.

    This makes paper mosaic not just an art form, but also a statement about sustainability. It encourages people to reuse materials creatively and appreciate the beauty of recycling.

    Some artists even use paper mosaics to spread environmental awareness, turning simple art projects into meaningful messages.

    Conclusion

    Now that you understand what is paper mosaic, you can see how versatile and enjoyable this craft really is. It’s a perfect mix of creativity, simplicity, and sustainability, an art form that proves you don’t need expensive materials to make something beautiful.

    With just paper, glue, and imagination, you can create designs that reflect your personality and brighten any space. Whether you make it for fun, decoration, or teaching, paper mosaic art brings color and calm into your life.

    So grab your supplies, choose your favorite hues, and start your creative journey today. Once you begin, you’ll discover that learning what is paper mosaic is not just about art it’s about finding joy in the process of creation.

    FAQs

    What is the purpose of a mosaic?

    The purpose of a mosaic is to create decorative art by arranging small pieces of colored materials like tiles, glass, or paper into detailed patterns or images. Mosaics add beauty, texture, and storytelling to spaces, often reflecting culture, history, or emotion. They’re used in homes, architecture, and art to transform ordinary surfaces into vibrant visual masterpieces.

    What are the three types of mosaics?

    The three main types of mosaics are classical mosaics, pebble mosaics, and paper mosaics.
    Classical mosaics use small pieces of glass, stone, or ceramic to form intricate designs.
    Pebble mosaics are made using naturally shaped pebbles for a rustic, textured look.
    Paper mosaics are a modern and eco-friendly version, created with colorful paper pieces instead of traditional tiles.

    How do you design a paper mosaic?

    To design a paper mosaic, start by choosing a simple design or image you want to recreate. Lightly sketch it on a sturdy base like cardboard. Then, cut colored paper into small squares or shapes. Arrange the pieces to match your design and glue them down, leaving small gaps between each. Finally, let it dry and display your finished artwork.