Category: Uncategorized

  • How to Clean Mosaic Floor?

    How to Clean Mosaic Floor?

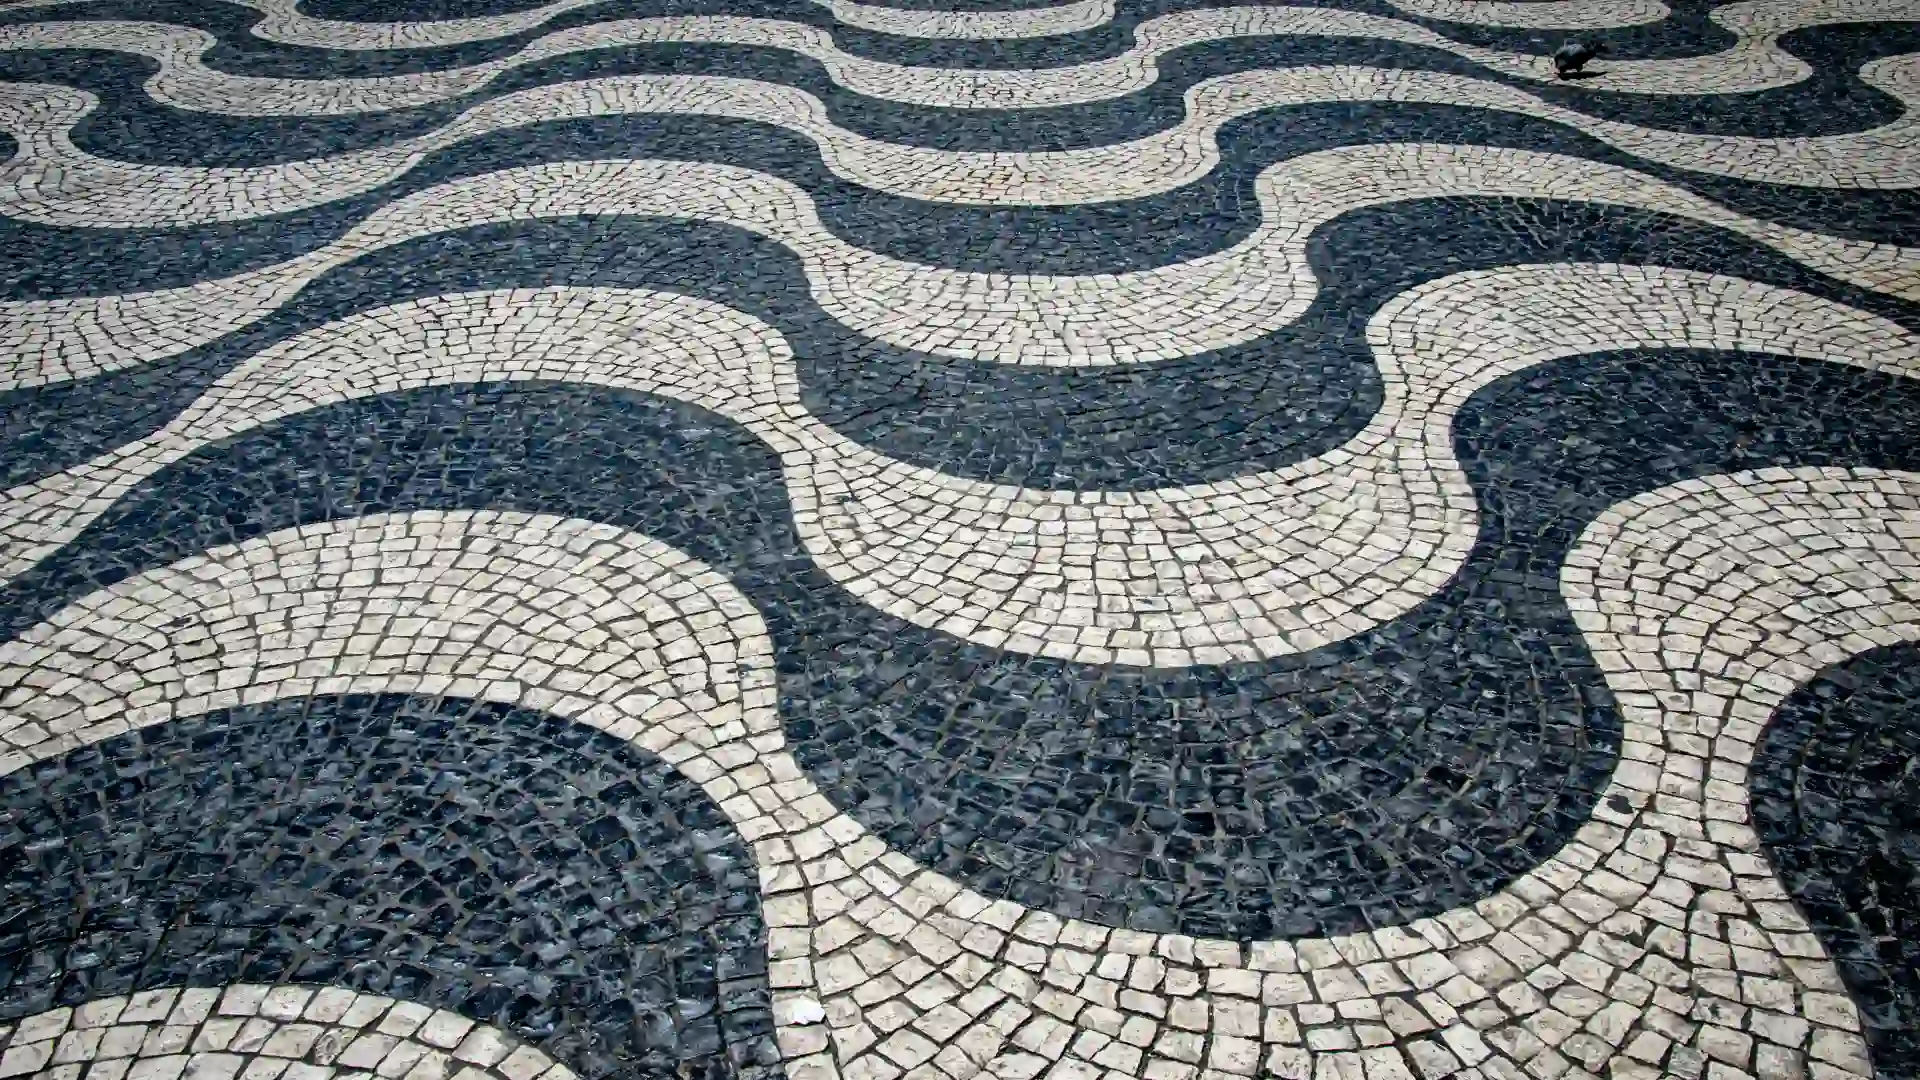
    Mosaic floors have a way of turning any room into something special. Their vibrant patterns and timeless charm can instantly elevate a space, whether it’s a bathroom, kitchen, or living area. But keeping them clean and shiny can be a bit tricky if you don’t know the right techniques.

    If you’ve been wondering how to clean mosaic floor properly without damaging it, this guide is for you. We’ll walk through easy cleaning methods, deep-cleaning tips, common mistakes to avoid, and even how to bring old mosaic floors back to life.

    Understanding Your Mosaic Floor

    Before we get into how to clean mosaic floor, it helps to know what it’s made of. Mosaic flooring is crafted by arranging small pieces of materials like glass, marble, ceramic, or stone into decorative designs. Each material reacts differently to cleaning products, so identifying what you have is important.

    • Glass mosaic tiles are sleek and easy to clean.
    • Marble or stone mosaics are porous and need gentle, pH-neutral cleaners.
    • Ceramic mosaics are tough but can trap dirt in the grout lines.

    Once you know your floor type, choosing the right cleaning method becomes much simpler.

    Your Everyday Cleaning Routine

    When it comes to how to clean mosaic floor, consistency is key. Daily cleaning helps preserve the floor’s natural shine and prevents dirt from becoming stubborn grime.

    Sweep or Vacuum First

    Dust and grit can scratch your floor’s surface if left for too long. Use a soft broom or a vacuum with a brush attachment to remove dirt and debris. Mosaic wash basins make sure you get into the corners and grout lines.

    Mop with Warm Water

    A damp mop and warm water are all you need for light cleaning. Don’t use too much water, as it can weaken grout and damage the adhesive under the tiles.

    Add a Mild Cleaner

    If the floor needs a little extra care, mix a few drops of mild dish soap or pH-neutral cleaner into warm water. Mop gently using this solution. This is one of the easiest and safest ways to maintain shine while learning how to clean mosaic floor correctly.

    Dry It Well

    Once you’re done, dry the surface with a soft towel or microfiber cloth to prevent streaks or water spots. This step makes a huge difference, especially for glossy glass mosaics.

    Deep Cleaning Mosaic Floors

    Even with regular cleaning, dirt can build up over time, especially in grout lines. Deep cleaning once a month helps keep everything spotless.

    Here’s how to clean mosaic floor more thoroughly:

    Step 1: Prepare a Safe Cleaning Solution

    For most floors, a mix of equal parts warm water and white vinegar works great. But if your floor has marble or natural stone, skip the vinegar and use a pH-balanced cleaner instead. Mosaic bathroom accessories acids can damage stone.

    Step 2: Apply and Let It Sit

    Spray or pour the mixture onto a small area of the floor. Let it rest for about 5 to 10 minutes so it can break down dirt and stains.

    Step 3: Scrub Gently

    Use a soft nylon brush or old toothbrush to scrub the grout and tile surfaces. Avoid harsh scrubbing pads or metal brushes, as they can scratch the tiles.

    Step 4: Rinse with Clean Water

    Mop again using clean water to remove any leftover cleaner. Rinse thoroughly to prevent residue from dulling the shine.

    Step 5: Buff the Floor

    Finally, dry and polish the surface using a microfiber cloth. If your floor has glass or ceramic tiles, you can use a small amount of glass cleaner to enhance the sparkle.

    Eco-Friendly Cleaning Methods

    If you like natural cleaning solutions, you can easily learn how to clean mosaic floor using simple ingredients from your kitchen.

    • For glass mosaics, use equal parts of white vinegar and water. Spray lightly and wipe clean.
    • For stone mosaics, make a paste of baking soda and warm water. Apply gently and scrub with a soft brush.
    • For how to clean mosaic floor, mix mild dish soap with water and mop as usual.

    These eco-friendly methods are gentle, safe, and effective without harming the grout or finish.

    Mistakes to Avoid When Cleaning Mosaic Floors

    A few cleaning habits can do more harm than good. Here’s what you should avoid while figuring out how to clean mosaic floor properly:

    1. Don’t use acidic cleaners on marble or stone. They can cause dullness and stains.
    2. Avoid bleach or ammonia. These harsh chemicals damage grout and fade tile color.
    3. Don’t flood the floor with water. Excess moisture can loosen the adhesive.
    4. Skip steel wool or abrasive tools that scratch the surface.
    5. Don’t ignore grout maintenance. Dirty grout makes even clean tiles look old.

    Being mindful of these small details can help your mosaic floor last longer and look better.

    Cleaning the Grout Between Tiles

    A big part of how to clean mosaic floor involves the grout. Over time, grout collects dirt, soap residue, and even mold, especially in bathrooms and kitchens.

    Here’s how to clean it effectively:

    1. Mix baking soda and water into a thick paste.
    2. Spread it over the grout lines and let it sit for about 10 minutes.
    3. Gently scrub with a toothbrush or grout brush.
    4. Rinse with warm water and wipe dry.
    5. Once it’s clean, apply a grout sealer to prevent future stains.

    Regularly cleaning and sealing grout keeps your entire floor looking fresh and new.

    Different Cleaning Needs for Different Areas

    Not all mosaic floors face the same kind of mess. Mosaic Wall panel​ Here’s how to tailor your cleaning based on where the floor is installed.

    Kitchen Mosaic Floors

    Kitchens deal with grease and food spills. Use a mild degreaser weekly and mop daily with warm water. If grease builds up, mix dish soap with vinegar and rinse well afterward.

    Bathroom Mosaic Floors

    Bathroom floors often get soap scum and water stains. Use a gentle mixture of baking soda and vinegar, unless your tiles are marble. In that case, stick to a pH-neutral cleaner.

    Outdoor Mosaic Floors

    Outdoor mosaics face dust, mud, and weather exposure. Rinse with a hose, then scrub lightly using warm soapy water and a soft brush.

    Adapting your routine based on location is an important part of learning how to clean mosaic floor efficiently.

    How to Revive Old Mosaic Floors

    If your floor has lost its shine, don’t worry. You can bring it back to life with a bit of care. Here’s how to clean mosaic floor and restore its beauty:

    1. Start with a thorough deep clean using a mild cleaner.
    2. Replace or repair any cracked or chipped tiles.
    3. Re-grout any worn-out areas.
    4. Polish the surface with a tile or stone polish.
    5. Apply a protective sealer for long-lasting shine.

    These small steps can make old mosaic floors look vibrant again without the need for replacement.

    How Often Should You Clean Mosaic Floors?

    The frequency depends on where the floor is. In high-traffic areas like kitchens or entryways, sweeping or vacuuming daily is ideal. Mop weekly and deep clean once a month.

    Regular maintenance means you won’t have to worry about how to clean mosaic floor the hard way later.

    Tips to Protect Your Mosaic Floor

    Cleaning is important, but preventing damage is even better. Try these simple habits to protect your mosaic floor:

    • Use doormats at entrances to reduce dirt.
    • Add soft pads under furniture legs to prevent scratches.
    • Avoid dragging heavy furniture across the floor.
    • Reseal grout once a year to block moisture.
    • Always keep the surface dry after mopping.

    These easy habits go a long way in keeping your floor looking new.

    DIY or Professional Cleaning: Which One Should You Choose?

    For regular upkeep, DIY cleaning is perfectly fine if you follow the right methods. However, if your mosaic floor has stubborn stains, scratches, or discoloration, professional cleaning might be worth considering.

    Experts use specialized tools and pH-balanced cleaners that are safe for all types of mosaic flooring. They also know exactly how to clean mosaic floor without causing damage.

    Final Thoughts

    A mosaic floor is more than just part of your home; it’s a piece of art. Taking care of it ensures it continues to shine and make your space beautiful for years to come.

    Now that you know how to clean mosaic floor the right way, you can confidently maintain it using gentle cleaners, consistent routines, and the occasional deep clean. With just a little care, your mosaic floor will stay just as stunning as the day it was installed.

    FAQs

    What are the common problems with mosaics?

    Common problems with mosaics include cracked or loose tiles, grout discoloration, and moisture damage that can weaken adhesion over time. Dirt buildup in grout lines and fading of colors due to harsh cleaning agents or sunlight are also frequent issues. Regular maintenance and proper sealing help prevent these problems and keep mosaics looking vibrant.

    How to restore a mosaic floor?

    To restore a mosaic floor, start by cleaning it thoroughly with a pH-neutral cleaner to remove dirt and stains. Replace or repair any broken or missing tiles. Next, re-grout areas where the old grout has worn away. Once dry, polish the surface to revive its shine and apply a protective sealant to preserve and protect the restored floor.

    What are the disadvantages of mosaic flooring?

    The main disadvantages of mosaic flooring are its high installation cost, time-consuming process, and the need for skilled craftsmanship. The small tiles make cleaning grout lines more difficult, and improper sealing can lead to moisture damage or stains. Additionally, mosaic surfaces can feel uneven underfoot compared to other flooring types, requiring regular maintenance to retain their look.
  • What is Mosaic Tile?

    What is Mosaic Tile?

    If you’ve ever walked into a space that instantly caught your eye with small colorful pieces forming beautiful patterns, you’ve already witnessed the magic of mosaic tiles. But before we dive into their charm and history, let’s first understand exactly what is mosaic tile and why it has become such a timeless choice in design.

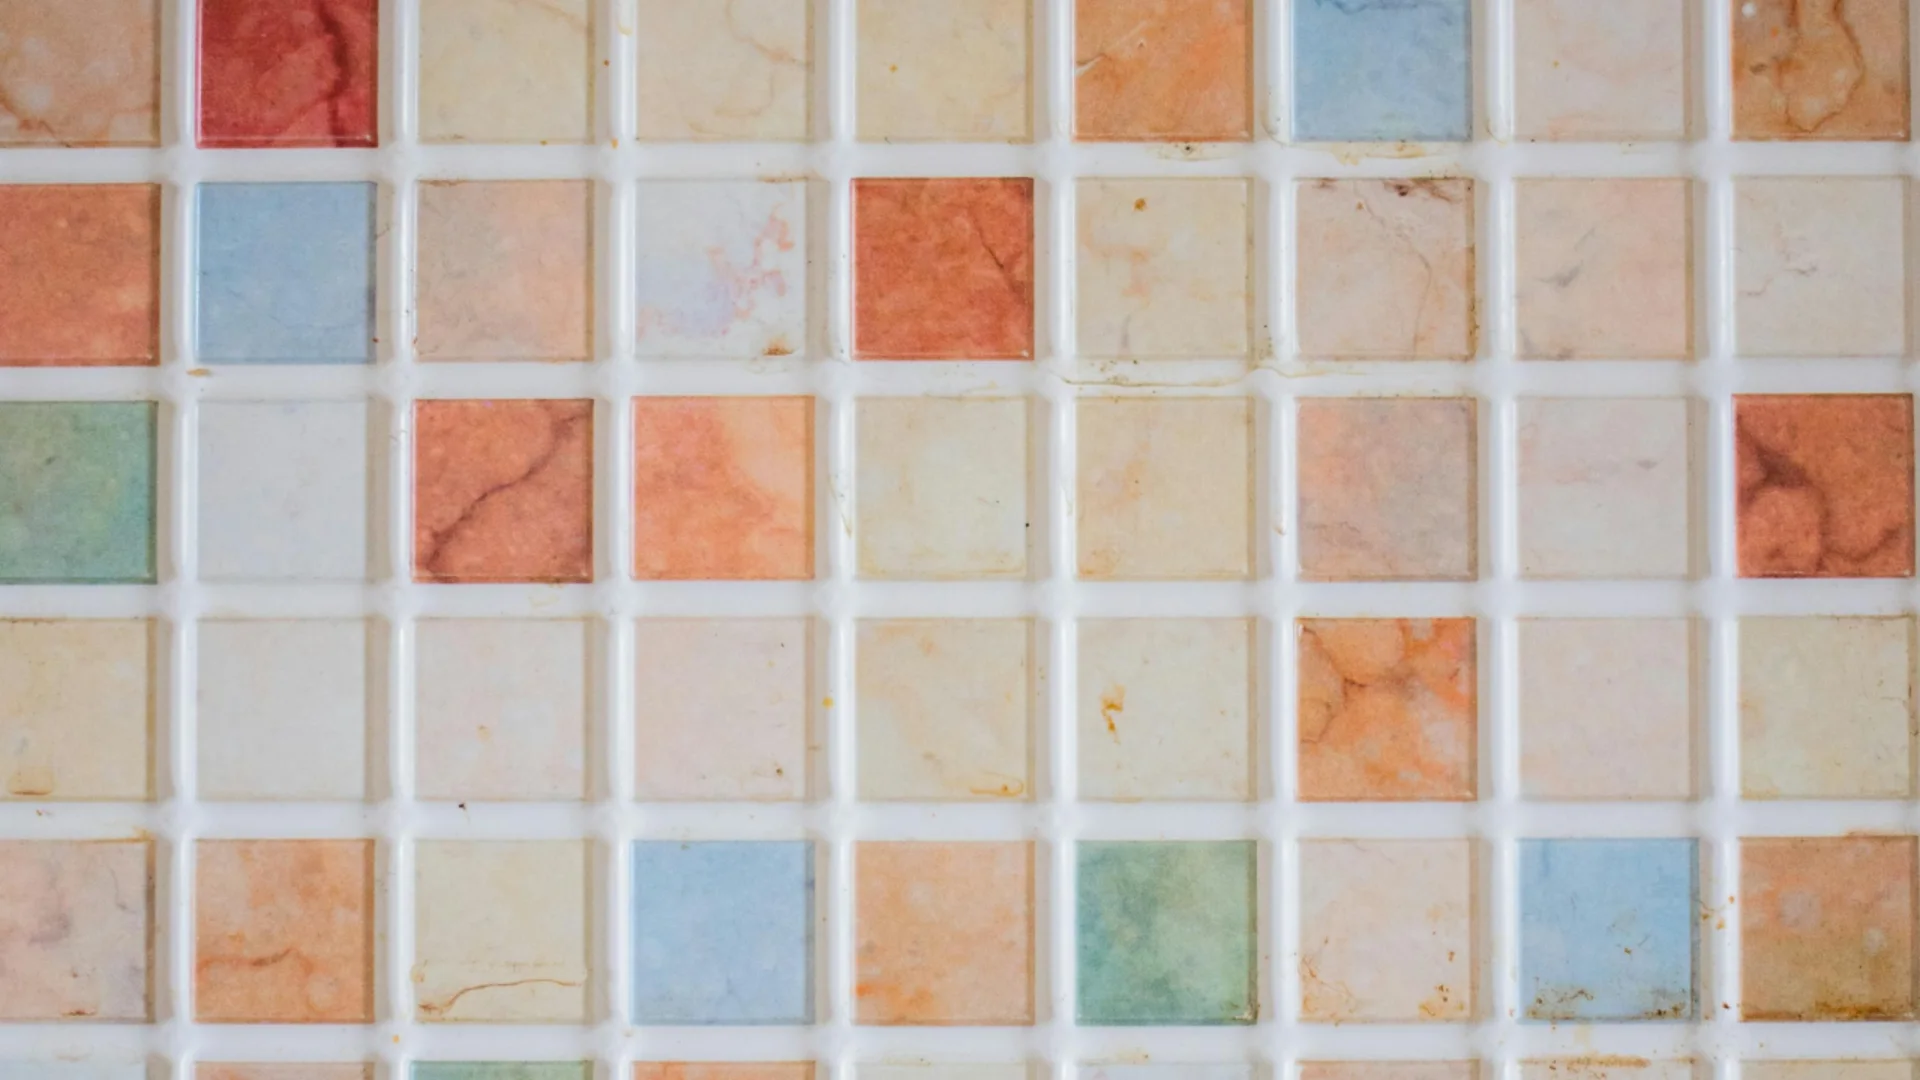
    To put it simply, mosaic tiles are made by assembling small pieces of materials like glass, stone, ceramic, or even metal into one decorative surface. These tiny fragments come together to form intricate designs, patterns, and color combinations that transform ordinary spaces into artistic masterpieces.

    When you ask what is mosaic tile, the answer isn’t limited to its structure. It’s about the creativity it allows. Each piece of tile is a part of a bigger picture, giving homeowners, artists, and designers endless freedom to experiment with texture, tone, and design.

    The Rich History Behind Mosaic Tiles

    The story of what is mosaic tile goes back thousands of years. Ancient civilizations like the Greeks, Romans, and Egyptians used mosaic art to decorate temples, palaces, and public spaces. These early forms of mosaics were often created from colored stones and glass to depict stories, deities, and cultural symbols.

    Over time, the art evolved from sacred symbols to decorative expressions. Today, the purpose of mosaic tiles is not just artistic but also functional, allowing us to beautify modern interiors in creative and durable ways. The evolution of what is mosaic tile shows how human expression has transformed over centuries while maintaining its artistic roots.

    The Composition and Design of Mosaic Tiles

    One of the most interesting aspects of what is mosaic tile lies in its composition. Mosaics can be made from glass, ceramic, marble, or even recycled materials. Each type brings a different personality to a space.

    For example, glass mosaics add shine and a reflective finish, perfect for brightening up areas like bathrooms and kitchens. Stone mosaics, on the other hand, provide a rustic, natural texture that suits outdoor walls or earthy interiors. The beauty of what is mosaic tile lies in its flexibility to adapt to any aesthetic, from luxurious and modern to vintage and traditional.

    Types of Mosaic Tiles

    To truly understand what is mosaic tile, you need to explore the different types available in the market today. Each variation caters to specific design needs and brings unique visual appeal.

    Glass Mosaic Tiles

    Glass mosaics are highly popular for their reflective quality and vibrant colors. They bring light and depth to compact spaces, making them ideal for bathrooms or accent walls.

    Ceramic Mosaic Tiles

    Ceramic mosaics are durable, cost-effective, and available in countless shapes and shades. They’re easy to maintain and can suit both modern and traditional interiors.

    Stone Mosaic Tiles

    Stone mosaics, often made from marble, travertine, or slate, create a natural, organic atmosphere. They’re often used in high-end projects and luxury interiors.

    Metal Mosaic Tiles

    For a contemporary or industrial look, metal mosaics are the perfect choice. They add a touch of modern elegance to kitchens, bars, and living areas.

    Each of these types plays a vital role in defining what is mosaic tile in the modern world of design.

    Why Choose Mosaic Tiles?

    When people wonder what is mosaic tile and why it’s preferred by so many designers, the reasons are easy to see. Mosaic tiles are not just about looks; they are also practical, durable, and incredibly versatile.

    • Aesthetic Appeal – Mosaics instantly add artistic beauty and detail to a room.
    • Durability – High-quality mosaic tiles can withstand water, heat, and wear.
    • Customizability – You can design them in any color, pattern, or layout.
    • Low Maintenance – Most mosaic tiles are easy to clean and long-lasting.

    These qualities make mosaic tiles perfect for homes, offices, and commercial spaces alike.

    Applications of Mosaic Tiles

    Understanding what is mosaic tile also means knowing where and how to use them effectively. Here are some of the most common and creative applications:

    Walls and Backsplashes

    Mosaic tiles add a statement element to walls, particularly in kitchens and bathrooms. Their ability to form intricate designs makes them ideal for backsplashes that become the focal point of the room. This is also where a mosaic wall panel can create a luxurious and seamless finish that elevates the entire design.

    Floors

    Mosaic tiles are sturdy and slip-resistant, making them suitable for flooring. Whether it’s a bathroom floor or a patio, they provide beauty without compromising functionality.

    Bathrooms

    Bathrooms are one of the most popular areas where what is mosaic tile truly shines. Mosaic tiles add an elegant touch to shower areas, vanities, and bathtub surrounds. They pair beautifully with mosaic bathroom accessories to create a cohesive and luxurious look.

    Kitchens

    From countertops to accent walls, mosaic tiles enhance the style of any kitchen. Their color variety and gloss levels can completely transform the ambiance.

    Outdoor Spaces

    Many designers now use mosaics in pools, patios, and garden pathways. Their resilience and aesthetic appeal make them perfect for outdoor artistry.

    Design Ideas for Mosaic Tiles

    To better understand what is mosaic tile, it helps to see it as a tool for creativity. Designers use mosaics to tell stories through colors and shapes. Here are some creative ideas:

    • Geometric Patterns – Use symmetrical shapes for a modern, minimalist vibe.
    • Floral Designs – Add charm and warmth to walls or floors.
    • Gradient Effects – Blend shades to create depth and dimension.
    • Abstract Art – Let colors and patterns flow freely for a bold visual impact.

    The endless customization options are what make mosaic tiles such a favorite among homeowners and designers.

    Maintenance and Care Tips

    Even though mosaic tiles are durable, proper maintenance helps them last for decades. Understanding what is mosaic tile also means knowing how to care for it.

    • Regularly clean with mild soap and water.
    • Avoid harsh chemicals that can damage the finish.
    • Re-grout every few years to maintain shine and structure.
    • Use a soft cloth or sponge instead of abrasive pads.

    Simple care habits go a long way in keeping your mosaic surfaces vibrant and fresh.

    Cost and Installation

    The cost of mosaic tiles depends on material, brand, and design complexity. Glass and marble mosaics are typically more expensive than ceramic or porcelain options. Installation, too, requires precision and skill. Each small piece needs to be carefully aligned to maintain the pattern. This is why professionals are often recommended for large mosaic projects.

    When you explore what is mosaic tile, you’ll realize that its cost reflects not only the material but also the craftsmanship that goes into bringing every piece together.

    Mosaic Tiles in Modern Interiors

    Today’s designers use mosaic tiles in both subtle and statement ways. Whether it’s a minimal glass mosaic in a modern bathroom or a grand artistic wall mural in a hotel lobby, mosaics have the power to turn a plain surface into something extraordinary.

    Even small spaces can benefit from this design choice. A simple mosaic wash basins setup or a feature wall can completely redefine the vibe of a room. The versatility of what is mosaic tile is unmatched, fitting seamlessly into both classic and contemporary interiors.

    Environmental Impact

    Another interesting aspect of what is mosaic tile is its environmental sustainability. Many manufacturers use recycled glass and natural stones to create eco-friendly tiles. These tiles reduce waste while maintaining quality and visual appeal. Homeowners who care about sustainability often choose mosaics for their green credentials without compromising beauty.

    Future Trends in Mosaic Tile Design

    The future of what is mosaic tile looks brighter than ever. Designers are now combining digital printing and new materials to create innovative designs. Custom photo mosaics, 3D tiles, and smart textures are becoming increasingly popular. These advancements keep mosaics relevant while allowing personal creativity to shine through.

    Final Thoughts

    If someone asks what is mosaic tile, the best way to explain it is to say that it’s both an art form and a design solution. It bridges history with modernity, functionality with beauty. Whether used in walls, floors, bathrooms, or kitchens, mosaic tiles never fail to bring personality and elegance to any space.

    From ancient temples to contemporary homes, the story of what is mosaic tile continues to evolve. It’s not just a surface covering; it’s a reflection of human creativity, craftsmanship, and the timeless desire to make spaces more beautiful and meaningful.

    FAQs

    What size is mosaic tile?

    Mosaic tiles typically come in small sizes, usually ranging from 1×1 inch to 2×2 inches, though some designs use even smaller or custom-cut pieces. These tiles are often mounted on mesh sheets for easier installation. Their compact size allows for intricate patterns, curves, and detailed designs, making them perfect for walls, backsplashes, and decorative accents.

    How long do mosaic tiles last?

    Mosaic tiles are highly durable and can last 20 to 30 years or more with proper care. Their longevity depends on the material used stone, glass, or ceramic and how well they are maintained. Regular cleaning, proper grouting, and sealing help preserve their color and shine, ensuring mosaic tiles remain beautiful and functional for decades.

    How much space between mosaic tiles?

    The ideal space between mosaic tiles is usually about 1/16 to 1/8 inch. This small gap allows for proper grouting, flexibility, and a clean, even finish. Most mosaic sheets come pre-spaced on mesh backing, ensuring consistent gaps during installation. Maintaining this spacing helps the design look uniform while preventing cracking or uneven alignment over time.

  • What is Wall Panelling?

    While improving or designing home wrecks may be in your mind, a term that you may encounter is what is wall panelling. Still, new designers and many homeowners often wonder what exactly is wall panelling and why is it considered an everlasting addition in home interiors?

    Wall panelling is much more than concealing walls; it is adding style and a layer of personality to the space. Nowadays, there are modern PVC and 3D designs, which, along with old school wood panels, have become one of the most adaptable decoration solutions. This blog will cover the questions you may have, such as what is wall panelling, its types, and benefits, as well as suggest ways to use it in different ways.

    What is Wall Panelling and Why is it Used?

    So, let’s begin with the basics: what is wall panelling?

    Case panelling refers to the addition of decorative panels or coverings to the internal (and on occasions, external) walls of a building. The panelling can be of wood, PVC, MDF, fabric, stone, etc. Previously, wall panels were aimed at insulating and protecting walls, but now, the intent is to make a design statement while still addressing practical needs such as durability and maintenance.  

    The quickest way of answer the question “what is wall panelling?” is to state that it is the act of covering plain walls with stylish designs in order to hide any imperfections.

    A Few Notes on Wall Panelling  

    To understand what is wall panelling, it helps to know where it all started.

    • Wooden panelling was first introduced to great stone castles and large estates as a method of heat insulation and damp reduction.
    • As years went by, this form of wall covering was no longer restricted to estate homes. Panelling became a symbol of status and luxury.
    • In the modern era, lightweight cost cost-effective materials such as MDF and PVC have made panelling materials available to everyone. This shows how modern wall covering and panelling is no longer a necessity but a vital part of wall decoration.

    This evolution shows how wall panelling shifted from being purely functional to an important interior design element.

    Different Kinds of Wall Panelling  

    When people search for what is wall panelling, they are usually also curious about its types. Wall panels today come in a wide variety of materials and styles, each serving a different purpose.

    1. Wooden Wall Panels

    Classic and timeless, wooden panels add warmth and richness to interiors. They are often used in living rooms, offices, and dining spaces.

    2. MDF Panels

    Medium-Density Fiberboard (MDF) panels are cost-effective and can be painted or laminated in different finishes.

    3. PVC Wall Panels

    Lightweight, waterproof, and durable, PVC panels are perfect for bathrooms, kitchens, or areas prone to moisture.

    4. Fabric Panels

    Often used in bedrooms or offices, fabric panels enhance acoustics and bring a soft, luxurious look.

    5. 3D Wall Panels

    For homeowners looking to make a bold statement, 3D panels create depth and texture.

    So, when answering what is wall panelling, the types play a key role in showing just how versatile it can be.

    Benefits of Wall Panelling

    If you’re still wondering what is wall panelling and why it’s worth considering, here are the main benefits:

    • Aesthetic Appeal: Instantly transforms plain walls into stylish design features.
    • Durability: Panels protect walls from scratches, stains, and everyday wear.
    • Insulation: Many materials provide thermal and sound insulation.
    • Easy Maintenance: Panels like PVC can be cleaned with a simple wipe.
    • Versatility: Countless styles, colors, and textures to choose from.

    These advantages explain why homeowners are increasingly searching for what is wall panelling when renovating their spaces.

    Where Can Wall Panelling Be Used?

    One of the best things about wall panelling is its flexibility. Here are some common applications:

    Living Rooms

    Want to create a stylish feature wall? Wall panels can add texture and elegance. Pair them with wall murals to enhance the theme.

    Bedrooms

    For a cozy and modern look, upholstered or wooden panels behind the bed create a headboard effect.

    Partitions

    Combine panels with a jali wall to design semi-private spaces that look chic and functional.

    Kitchens

    PVC panels are excellent for kitchens as they resist grease and moisture.

    Bathrooms

    Moisture-proof wall panelling prevents water damage and mold growth.

    Commercial Spaces

    Offices, hotels, and restaurants use panels to enhance ambience and acoustics.

    In every scenario, when someone asks what is wall panelling, the answer is simple: it’s a versatile solution that adapts beautifully to any space.

    Creative Combinations with Wall Panelling

    Understanding what is wall panelling also means exploring how it blends with other design elements:

    • Mix wooden panels with stone wall cladding for a rustic yet modern feel.
    • Create a serene prayer area by pairing sleek panels with a stone temple or even a stone temple for home for a perfect traditional-meets-modern balance.
    • Highlight your flooring design by using panels that complement inlay flooring patterns.
    • For those who love rustic and eco-friendly designs, wall panelling pairs beautifully with a pallet wall, giving the space an earthy charm.

    These combinations show that the answer to what is wall panelling is not limited it’s as creative as you want it to be.

    Popular Styles of Wall Panelling

    Once you know what is wall panelling, the next step is exploring styles. Some timeless and trending ones include:

    1. Shiplap Panels – Horizontal boards that give a coastal, farmhouse look.
    2. Wainscoting – Decorative panelling on the lower half of walls, often painted white.
    3. Board and Batten – Vertical strips that create a grid-like design.
    4. Tongue and Groove – Interlocking panels for a seamless, uniform finish.
    5. 3D Geometric Panels – For contemporary homes seeking bold accents.

    Installation: How is Wall Panelling Done?

    Knowing what is wall panelling naturally leads to the question of how it’s installed. While methods vary depending on the material, here’s a general idea:

    1. Preparation: The wall is cleaned, levelled, and sometimes battened with wooden or metal strips.
    2. Measurement: Accurate measurements are taken to cut panels to size.
    3. Fixing: Panels are fixed with adhesives, nails, or screws.
    4. Finishing Touches: Gaps are sealed, and trims are added for a polished look.

    Many homeowners choose DIY methods, especially with PVC panels, while others prefer professional installers for a flawless finish.

    Cost of Wall Panelling

    Another common question after “what is wall panelling” is about cost. The price varies based on:

    • Material (wood is usually more expensive than PVC)
    • Design complexity
    • Installation charges
    • Size of the space

    Budget-conscious homeowners often opt for MDF or PVC, while luxury interiors may feature wood or stone panelling.

    Maintenance of Wall Panelling

    Now that we know what is wall panelling, it’s important to understand upkeep:

    • Wooden panels need polishing or varnishing over time.
    • PVC panels only need a wipe with a damp cloth.
    • Fabric panels may require vacuuming or professional cleaning.
    • Stone panels can be maintained with sealants to prevent stains.

    This easy maintenance makes wall panelling an attractive choice for busy homeowners.

    Is Wall Panelling Worth It?

    Question many wonders after getting introduced to wall panelling is the value of wall panelling? With all the benefits it offers, the answer is yes. It increases the looks of the interior space, offers protection, and adds value to your property in the long term. Whether you opt for classic wooden finishes, modern PVC panels, or even eye-catching 3D panels, wall panelling stands out. It is one of the few home décor features that not only captivates the eye but also serves a purpose.

    Final Thoughts

    To recap: What we think of what is wall panelling is actually a method of covering walls. It could also serve as a way to beautify walls. Rather than covering walls with paint or wallpaper, panels can be used. These panels serve not only as a wall finishing system but also help improve the decor of a room and can serve as a brand statement in offices. They can be made of wood, fabric, PVC, MDF, or stone and has ability to blend with elements like wall murals, stone wall cladding, or even a pallet wall 

    Whether it is several small panels or a big panel, wall panelling will continue to improve the style of bedrooms, living rooms, and even offices and commercial stores. It is a step beyond the usual trend of wall murals and even stone cladding, as it is easy to maintain and versatile in its application. 

    Now, when panelling comes up in a discussion, not only will you understand what it is, but you will also determine creative ways in which it can be implemented in your own environment.

    FAQs

    What is the purpose of wall panelling?

    The primary objective of wall panelling is to improve the look and utility of the internal spaces of a building. What is Wall Panelling, can be best illustrated as a protective and decorative covering of a wall, adding some character, some depth, and also insulation to the wall. It provides a way of hiding crooked surfaces, wiring, or any form of imperfection together with a stylish finish to the polished walls. Walls with panels also provide some durability too, making the walls easier to clean and maintain. Wall panelling is a great way to incorporate beauty with utility to the walls, be it at home, at the office, or at a commercial place, with modern designs, as well as with classic textures, which helps to raise the standard of the interior.

    Which type of wall panelling is best us?

    When deciding on wall panelling, you should consider your interior style, budget, and functional requirements. To answer the question “What is Wall Panelling,” it includes options such as wood, MDF, PVC, fabric, and metal panels. Each type of wall panelling serves different purposes. While wooden panelling is elegant and timeless, making it suitable for luxury interiors, PVC panels are inexpensive, durable, and easy to maintain. MDF panels are suitable for painting and design customisation, while fabric panels provide warmth and acoustic advantages. Metal or 3D panels suit modern interiors, providing a contemporary look. The appropriate wall panelling, in the end, should consider a space’s durability, functionality, and aesthetic needs.

    What material is used for panelling?

    When exploring What is Wall Panelling, it’s important to understand the wide range of materials used.In the context of wall panelling, the variety of materials used is quite vast and offers much to consider. As opposed to the more modern fabrics like PVC, which is a more cost-effective and moisture-resistant modern solution, wood remains the more natural and timeless choice; it offers durability and beauty. MDF is also widely used and admired for its smooth finish and adaptability in design. Glass, metal, and fabrics, including veneers, are also used and offer distinctive styles and additional benefits. The deciding factors for the materials to be used usually revolve around the style of the interiors, the maintenance the materials will require, as well as the set budget. This, in turn, helps to maintain the functional and aesthetic value of wall panelling for a much longer period.

    What type of paint for wall panelling?

    Choosing the appropriate paint is crucial in maximizing the impact and longevity of the panelling discussed in What is Wall Panelling. For wooden panelling, oil and latex-based paints are suitable as they blend and finish well, lasting long. Textures of the panelling can be accentuated and cleaning simplified with the use of semi-gloss or satin finishes. A panelling of MDF or PVC type material requires the use of primer after which he paint can be applied for better adhesion. Timeless designs can be achieved with the use of neutral shades whereas bold shades are ideal in accenting designs. The elegance of wall panelling is greatly enhanced with a coating that works to safeguard the materials.

    Which wood is used for panelling?

    Wood panelling is commonly made from hardwoods and softwoods, depending on budget and design needs. Popular hardwood options include teak, oak, walnut, maple, and mahogany, valued for their strength, durability, and rich grain patterns. Softwoods like pine, cedar, fir, and spruce are also widely used because they are lighter, more affordable, and easier to install. Engineered woods such as plywood and MDF are often chosen for modern interiors due to stability, smooth finishes, and cost-effectiveness.

  • How to Clean PVC Wall Panels?

    Using PVC wall panels in a contemporary space brings a touch of elegance, along with a slew of benefits: style, a lightweight nature, durability, and ease of maintenance. Of course, akin to every section of your house, your panels will need periodic cleaning to keep them looking great and to keep their lifespan longer. If proper cleaning of PVC wall panels is your concern, this guide seeks to be of help. 

    We will look at simple cleaning methods, required materials, stubborn dirt handling, and upkeep to preserve the panels’ new look for a longer time. The panels may be in the lounge, the kitchen, or even the shower room, and the care required for them is as simple as using the appropriate method.

    Why Cleaning PVC Wall Panels Matters

    Though stain, moisture, and scratch-resistant, PVC wall panels are not immune to the general build-up of dust and dirt. Grease marks can develop on them in the kitchen, while the bathroom can leave behind soap and water marks on panels.

    Knowing how to clean PVC wall panels helps you:

    • Maintain a hygienic and fresh environment.
    • Preserve their shine and finish.
    • Extend their lifespan.
    • Avoid long-term stains or damage.

    Since PVC panels are relatively softer than tiles or stone, they need gentle care. With the right cleaning methods, you can ensure they look just as stylish as the day they were installed.

    Tools and Materials You’ll Need

    Before you start learning how to clean PVC wall panels, it’s best to keep the right supplies handy. Here’s what you’ll need:

    • Soft microfiber cloths or sponges
    • Mild liquid detergent or soap
    • Warm water
    • Spray bottle
    • Soft-bristled brush (for textured panels)
    • White vinegar (for tough stains)
    • Baking soda paste (for grease removal)
    • A dry towel for wiping

    Avoid using harsh chemicals, bleach, or abrasive scrubbers, as these can scratch or dull the surface of the panels.

    Step-by-Step Guide on How to Clean PVC Wall Panels

    Let’s see the process of how to clean PVC wall panels into simple steps.

    1. Dusting and Surface Cleaning

    Begin your clean by tackling loose dust. A dry microfiber cloth is perfect, or you might use a vacuum with a brush attachment. Either way, this step is a must so you don’t smear that dirt later on

    2. Preparing a Mild Cleaning Solution

    For a quick, everyday wipe-down, mix a couple of drops of mild liquid soap with warm water. This solution is effective and gentle. For walls and other vertical spaces, put the solution in a spray bottle to make application easier.

    3. Wiping Down the Panels

    Apply the solution on the panels using a spray bottle and then cleanse with a sponge or soft cloth using gentle circular strokes. With this approach, you can have your panels cleaned without the worry of damaging them.

    4. Tackling Grease and Stains

    If you notice grease on kitchen panels, mix baking soda with water to create a cleaning paste. Spread it on the greasy surfaces, allow it to rest for 10 minutes, and then wipe it off using a damp cloth. For more difficult marks such as soap scum, white vinegar diluted with warm water works wonderfully.

    5. Cleaning Textured or Patterned Panels

    Soft PVC panels with grooves or patterns require a soft-bristle brush to clean the edges. With a soft-bristled brush, you make sure no dirt is left behind. 

    6. Rinsing and Drying

    After scrubbing the panels, take a cloth and dip it in clean water. Use the cloth to wipe the panels, which assists in removing any soap residue. Then, take a dry towel and gently pat the panels dry. In the bathrooms, this procedure is vital in the prevention of watermarks.

    Special Care Tips for Different Areas

    When exploring how to clean PVC wall panels, it’s important to consider the room they are installed in:

    • Bathroom Panels – Clean weekly with vinegar-water solution to prevent mold or soap stains.
    • Kitchen Panels – Use baking soda paste monthly to tackle grease buildup.
    • Living Room Panels – Dust regularly and wipe with mild soap solution to keep them shining.

    By tailoring your cleaning approach, you can maintain both functionality and aesthetics.

    Common Mistakes to Avoid

    While learning how to clean PVC wall panels, avoid these mistakes:

    1. Using strong chemicals like bleach – They may discolor or damage the surface.
    2. Scrubbing with steel wool or abrasive brushes – This can leave scratches.
    3. Leaving panels wet – Always dry them to prevent stains.
    4. Using oil-based cleaners – They can make the surface slippery and dull.

    Preventive Maintenance for Long-Lasting Shine

    Prevention is always better than cure. Instead of waiting for stains to become stubborn, adopt these habits along with how to clean PVC wall panels:

    • Dust panels at least once a week.
    • Immediately wipe off spills or splashes.
    • Install exhaust fans in kitchens and bathrooms to reduce moisture and grease.
    • Use protective coverings if panels are near cooking ranges.

    By incorporating these habits, your panels will remain in excellent condition with minimal effort.

    DIY Natural Cleaners for Eco-Friendly Care

    For homeowners who prefer eco-friendly cleaning, here are a few natural solutions when considering how to clean PVC wall panels:

    • Vinegar and Water Mix – Best for soap stains and mild disinfecting.
    • Baking Soda Paste – Perfect for grease removal.
    • Lemon Juice Solution – Adds shine and freshness, especially in bathrooms.

    These alternatives are safe, affordable, and effective without relying on chemical cleaners.

    Comparing PVC Panels to Other Wall Options

    One reason why people often search for how to clean PVC wall panels is because they are much easier to maintain compared to alternatives:

    • Wall Murals – While visually appealing, they need delicate dusting and careful cleaning to avoid fading.
    • Jali Wall – Intricate designs can trap dust, requiring frequent brushing.
    • Stone Wall Cladding – Cleaning stone requires more effort and sometimes sealing agents.
    • Stone Temple or Stone Temple for Home – These often demand specialized cleaners to preserve the stone’s natural finish.
    • Inlay Flooring – Though elegant, it requires polishing and careful stain management.
    • Pallet Wall – Needs more regular dusting and may require wood polish to maintain shine.

    Compared to these, PVC panels offer unmatched ease of cleaning, which makes them a preferred choice for modern households.

    How Often Should You Clean PVC Wall Panels?

    The frequency depends on where they are installed:

    • Kitchen Panels – Every 1–2 weeks
    • Bathroom Panels – Weekly
    • Living Areas – Every 2–3 weeks
    • Commercial Spaces – Weekly or as needed

    The more you stick to a routine, the less effort it will take when learning how to clean PVC wall panels.

    Expert Tips for Long-Term Durability

    If you want your panels to last long, here are some bonus tips in addition to how to clean PVC wall panels:

    1. Avoid exposing them to direct flames or extreme heat.
    2. Do not use permanent markers or harsh adhesives on the surface.
    3. Clean spills immediately instead of waiting for them to dry.
    4. Consider a professional cleaning service once a year for deep cleaning.

    Final Thoughts

    PVC wall panels require minimal maintenance and can be taken care of with a few basic items commonly found in the kitchen. For example, to clean the panels safely, gentle detergent, baking soda, or vinegar can be used together with a soft cloth. 

    In comparison to more complex materials such as stone cladding and pallet wall treatments that need careful upkeep, PVC wall panels are attractive precisely because they do not demand any attention.

     From the kitchen and living room to the bathroom, very little upkeep is needed to maintain their look and strength for years.  

    Having the right knowledge is critical, and now you have the right knowledge about how to clean the PVC panels and do the job with little effort.

    FAQs

    How do you maintain PVC panels?

    The upkeep of PVC panels requires dusting with a gentle cloth and a diluted soap mixture. Strong chemicals, bleach, pumice, and harsh brushes must not be used since they may harm the panels. Any kitchen grease is to be removed at once with either a vinegar solution or a baking soda paste. To prevent water stains, in the bathroom, the panels need to be dried after cleaning. Light dusting and easy, quick spill wiping play a significant role in the upkeep of the panels’ appearance. They should be installed along with exhaust fans in moist areas. Unlike most wall finishes, PVC panels are hygienic and with minimal care, remain in good shape and serve their purpose for a considerable time.

    Are wall panels washable?

    Most wall panels can be maintained with ease; however, PVC panels stand out due to their simple maintenance routine. They require virtually no maintenance since no stain or moisture can affect them. They can be cleaned with a warm water solution mixed with a little soft soap and a soft cloth or sponge. Because of their unique composition, PVC wall panels, unlike old paint or wallpaper, do not get damaged, swell, or peel. Washable wall panels, in particular, offer great utility as they neep hygienic and functional with minimal effort, which is a great advantage in the kitchen, bathroom, and living room. In contrast, the use of strong chemicals and intense scrubbing to remove marks is harmful as it can damage and dull the finish.

    Do you need cleaner for PVC?

    Surely, no particular or severe cleaners are needed for cleaning PVC panels. In most cases warm water and an easily soluble mild cleaning agent or liquid soap will suffice. For natural and innate cleaning a diluted vinegar or a paste of baking soda will be more effective and stronger, but is still safe to be used. Because of the risk of damage and discoloration to the PVC, it is best to avoid the use of chemical cleaners, strong powders, bleaching agents and other strong chemicals. The use of soft cloths and sponges is ideal and sufficient for the proper upkeep of the panels. These methods ensure the panels maintain their polish, hygienic condition, and durability for many years.

    How to clean PVC after cutting?

    Once the PVC panels are cut, the dust, shavings, and micro-whet edges that are left need to be removed. PCB panels need to be brushed with a soft dry cloth or with a hand brush. This will help in removing the shavings. Then a damped microfiber cloth needs to be used to remove fine dust from the panels. A mild soap solution can be used to further clean the panels and ensure they are dirt free. A clean towel is then used to dry the panels so that there are no water marks are left. Use of strong chemicals and abrasive scrubbers needs to be avoided as they can dull or scratch the surface. Following this method, your PVC panels will be cleaned and ready to use.

  • How to Install Interior Metal Wall Panels?

    For all the contemporary design trends, bright, sleek modern designs with industrial edges seem to be in vogue. Metal wall panels offer a splendid opportunity to tap into this design trend and give a space a very distinct look. For any residential or commercial design that uses metal wall panels, installation is most likely the immediate next step. 

    The metal wall panels have a distinct look and feel. They blend well with high-end designs in both kitchens and corporate offices, living rooms, and even feature walls. Like any other material, metal wall panels require a special set of tools for their installation, along with prior prep work and careful implementation. The purpose of this article is to allow you to develop a deep understanding of the installation of metal wall panels and familiarize you with the planning, measuring, fixing, and finishing of panels.

    Why Choose Metal Wall Panels?

    Before knowing the details of how to install interior metal wall panels, it’s important to understand why they have become so popular.

    • Durability: Metal is resistant to moisture, pests, and fire, making it a long-lasting choice.
    • Modern Aesthetic: Whether brushed aluminum, stainless steel, or copper, these panels add an elegant, industrial vibe.
    • Easy Maintenance: They can be wiped clean with minimal effort, unlike painted walls that may need frequent touch-ups.
    • Versatility: Perfect for feature walls, kitchen backsplashes, office partitions, or even creative accent areas.

    With so many benefits, it’s no surprise that homeowners and designers are increasingly interested in how to install interior metal wall panels.

    Tools and Materials You’ll Need

    Before learning how to install interior metal wall panels, collect the  tools and supplies to make the process smooth:

    • Measuring tape
    • Level
    • Stud finder
    • Pencil or chalk
    • Power drill and screws
    • Metal cutting tools (tin snips or an angle grinder)
    • Safety gloves and goggles
    • Adhesive (optional, for extra hold)
    • Metal panels of your choice

    Proper preparation ensures that you can focus on the installation itself without unnecessary interruptions.

    Step-by-Step Guide: How to Install Interior Metal Wall Panels

    Let’s see the process into simple, actionable steps so you’ll feel confident about how to install interior metal wall panels in your space.

    1. Measure and Plan

    Start by measuring the wall area where the panels will be installed. Mark out dimensions with a pencil or chalk line. Planning ahead prevents mistakes and ensures that you order the right quantity of panels.

    2. Prepare the Wall Surface

    For the best results, clean and smooth the wall surface before installation. Remove any nails, debris, or dust. If installing over drywall, check for loose sections and repair them. This is a crucial step when learning how to install interior metal wall panels because uneven walls can affect alignment.

    3. Locate Wall Studs

    Use a stud finder to mark the studs across the wall. Metal panels are typically screwed into studs for maximum stability. Correct placement makes a big difference in durability.

    4. Cut the Panels to Size

    Metal panels may need trimming depending on your wall dimensions. Use tin snips for thinner sheets or an angle grinder for thicker ones. Always wear gloves and goggles to protect yourself from sharp edges. A neat cut will ensure your installation looks professional.

    5. Position the First Panel

    Place the first panel at one corner of the wall. Use a level to make sure it’s perfectly straight. This first piece is the foundation of the entire project, so take your time with alignment.

    6. Fasten the Panels

    Drill screws into the panel at the marked stud locations. Space them evenly for a clean look. For smaller areas, adhesive can also be used, but screws offer better long-term stability.

    7. Continue Across the Wall

    Once the first panel is secure, align the next one beside it. Check that seams are tight and panels are level. Continue this process across the wall, adjusting where necessary. Learning how to install interior metal wall panels is all about patience and precision.

    8. Finishing Touches

    After all panels are secured, inspect the seams. If desired, use trim pieces to cover edges for a polished look. Clean the surface with a damp cloth to remove dust or fingerprints.

    Tips for a Professional Finish

    As you practice how to install interior metal wall panels, these expert tips can elevate your project:

    • Always start in a corner for better alignment.
    • Keep a consistent gap between panels if you plan to use trims.
    • For kitchens, use panels with anti-fingerprint coating for easier maintenance.
    • If installing behind a stove or in a high-heat area, choose panels designed for heat resistance.

    Common Mistakes to Avoid

    Even with a guide on how to install interior metal wall panels, beginners sometimes make errors. Avoid these pitfalls:

    • Not checking wall alignment before starting.
    • Using incorrect screws or skipping stud placement.
    • Rushing the cutting process, leading to jagged edges.
    • Forgetting to wear safety gear when cutting metal.

    Taking your time ensures a neat, long-lasting finish.

    Where Can Metal Wall Panels Be Used?

    One of the biggest advantages of learning how to install interior metal wall panels is their versatility. Here are some great applications:

    • Living Room Accent Wall: Adds modern, industrial appeal.
    • Kitchen Backsplash: Easy to clean and heat-resistant.
    • Office Interiors: Sleek and professional finish.
    • Hallway Features: Reflective panels can brighten narrow spaces.

    Their ability to complement both rustic and modern styles makes them a popular design choice.

    Comparing Metal Panels with Other Wall Finishes

    When deciding whether to learn how to install interior metal wall panels, it helps to compare them with other materials:

    • Wall Murals: Creative but more delicate; require careful maintenance.
    • Jali Wall: Intricate and traditional, but harder to clean.
    • Stone Wall Cladding: Strong and timeless, though heavier and harder to install.
    • Stone Temple and Stone Temple for Home: Elegant but require more specialized installation and care.
    • Inlay Flooring: Luxurious underfoot, though not suitable for vertical applications.
    • Pallet Wall: Rustic charm, but requires regular sealing and dusting.

    Compared to these, metal panels strike the perfect balance between modern style and low maintenance.

    Maintenance After Installation

    Once you’ve mastered how to install interior metal wall panels, maintaining them is simple:

    • Wipe regularly with a damp cloth to remove dust.
    • Avoid abrasive cleaners that might scratch the surface.
    • For stainless steel, use a vinegar-water solution for extra shine.
    • Check screws annually to ensure panels remain secure.

    This easy upkeep is one of the reasons people love installing metal panels indoors.

    DIY vs. Professional Installation

    It is possible to install interior metal wall panels yourself if you have the right tools. However, for larger walls or more complex designs it is advisable to hire specialists. They not only guarantee precision but also, if they have a good reputation, can offer advice on panel finishes, trims, and even on how the surface should be prepared for the finish.

    Final Thoughts

    Installing interior metal wall panels adds a distinct visual appeal to your interiors. While offering a unique finish, metal panels are easy to maintain and are long-lasting.. They are also a great option when compared to other kinds of wall treatments. When metal Awnings and canopies panels are correctly fenced with the right tools, and some amount of planning in place, they offer results that look as if a professional has done the work.

     No matter where you want to put them, properly installing metal panels is attainable for everyone. With these tips from this guide, you won’t just learn how to put them on but also appreciate their immense benefits, from enhancing a feature wall in the living room to giving the kitchen backsplash an extra touch of style. Furthermore, they serve as a fantastic option for giving an office space an industrial touch.

    FAQs

    How are metal wall panels installed?

    Panels of metal for walls require a different approach compared to other kinds of wall finishing. The preparation of the wall begins by measuring the wall surface. Next, a stud-finder is used to determine the location of studs, to provide sufficient and adequate support. Tin snips or an angle grinder is then used to trim the panels to the appropriate size, alongside protective safety equipment. At one corner of the wall, the first panel is positioned, with special attention to its level, and is then secured with screws to the studs. All other panels are properly aligned to ensure there are no gaps and attached with the same procedure. For a more refined and elegant look, additional rest pieces may be placed. The finished panels offer a great look and require little upkeep, making them suitable for both domestic and business settings.

    What do you need for wall panelling?

    The types of tools and materials required to carry out the work will heavily depend on the nature of the work itself. For example, in the case of wall panelling, you will need a measuring tape, level, pencil, stud finder, MDF panels, trimming mouldings, screws, and for safety purposes, gloves and goggles. If the panels will need to be shaped to fit the walls, a saw and drill will be necessary. Depending on the nature of the walls, you’ll require either nails or adhesives. While gloves and goggles are not mandatory, they are highly advisable. Having all and more of the necessary materials and tools will make wall panelling a much easier task, allowing you to focus on the aesthetic modifications.

    How do you secure wall panels?

    The method of securing wall panels varies according to the material of the panel and the surface of the wall. For light panels on smooth walls, the most efficient method is adhesive. It achieves a strong bonding and a seamless finish at once. For heavier panels such as woods and metals, screws or nails with wall studs are more appropriate as they are stronger and are more durable. Some systems allow for the use of clips and brackets which allow for easier installation and removal. To achieve a professional finish, trims and mouldings are installed to the perimeter. The wall should be verified to be clean, dry, and level to ensure better results later.

    How to remove wall paneling?

    Clear the work area by moving away the furniture and putting down floor protection against debris. Proceed to cut the panel edges and trim with a utility knife to caulk and paint. Using a crowbar or a putty knife, carefully remove the mouldings and the trims. Exposed panels give you the ability to determine if they are nailed or glued.If panels are secured with nails, begin at a corner and carefully loosen small sections one after the other. For panels secured with glue, apply steady and gentle pressure to pry them off, using a heat gun to warm the adhesive if necessary. Move slowly in order to preserve the integrity of the walls.

  • What is an Inlay? 

    When people hear the question what is an inlay, it often brings to mind the elegance of the Taj Mahal, the intricacy of royal furniture, or the delicate shimmer of jewelry. Yet the meaning of inlay is much broader and deeper than one might imagine. Inlay is not only a decorative technique but also a cultural heritage, an artistic statement, and in many cases, a symbol of luxury and devotion.

    In this comprehensive guide, we will explore the origins, processes, types, applications, and modern uses of inlay. We’ll also touch on how it has influenced architecture, design, furniture, jewelry, and even contemporary rustic décor. If you’ve ever wondered what is an inlay, by the end of this blog, you’ll have a clear and enriched understanding of this timeless art.

    Defining the Core: 

    So, what is an inlay exactly? At its simplest, inlay refers to the process of embedding one material into the surface of another, creating patterns, images, or decorative effects. The inserted material—whether stone, wood, metal, or shell—contrasts with the base surface, which could be marble, wood, or metal, producing a visually striking effect.

    In other words, inlay is a technique that transforms a plain surface into a work of art. From royal palaces to personal jewelry boxes, the method has been applied across centuries and cultures, adapting to new styles while maintaining its essence of beauty and precision.

    Historical Roots of Inlay

    To fully appreciate what is an inlay, we must understand its origins. Evidence of inlay can be traced back thousands of years across different civilizations:

    • Ancient Egypt: Craftsmen used inlay in jewelry, embedding turquoise, lapis lazuli, and carnelian into gold.
    • India: The Mughal period elevated marble inlay to extraordinary heights. The Taj Mahal remains the world’s most famous example of this craftsmanship, with semi precious stones embedded into pristine white marble.
    • Renaissance Italy: Pietra Dura, or “hard stone” inlay, flourished in Florence, where colored stones were assembled like paintings to create lifelike images.
    • China and Japan: Asian artisans developed mother of pearl inlay on lacquerware, creating luminous decorative pieces.
    • Middle East: Islamic craftsmen specialized in wood and ivory inlay, producing intricate geometric patterns.

    Each culture has its own way of answering the question: what is an inlay? Whether it was for sacred spaces, palaces, or personal ornaments, inlay always carried meaning beyond mere decoration.

    Inlay Meets Mural Art

    One fascinating application in modern times is the fusion of inlay with wall murals. Artists and interior designers sometimes integrate inlaid stone, wood, or metal into painted or sculpted mural surfaces. This combination gives walls a three dimensional effect, blending traditional inlay methods with contemporary storytelling. For homeowners who ask what is an inlay in today’s design world, murals with embedded detailing are a perfect example of heritage meeting innovation.

    The Process Behind Inlay

    Answering what is an inlay is incomplete without knowing the painstaking process artisans follow:

    1. Design Creation – Patterns are first drawn on paper and then traced onto the surface.
    2. Carving Grooves – Using hand tools, artisans cut precise cavities into the base material.
    3. Shaping Inserts – Stones, shells, or wood pieces are cut into exact shapes to fit into the grooves.
    4. Embedding – The shaped pieces are carefully inserted, often using natural adhesives.
    5. Polishing – The surface is smoothed and polished until base and inlay are flush, creating a seamless look.

    This labor intensive process explains why is so closely tied to craftsmanship, patience, and mastery.

    Inlay and Traditional Screens

    In architecture, inlay is often combined with carved screens. A fine example is a jali wall, where perforated stone or wood designs allow light and air to pass through. When combined with delicate inlay work, these screens become more than just functional—they turn into works of art, blending texture, shadow, and color. Such combinations show that extends beyond flat surfaces into architectural elegance.

    Different Types of Inlay Work

    When people ask what is an inlay, the answer varies depending on the materials used:

    • Stone Inlay: Semi precious stones such as lapis lazuli, onyx, and carnelian are embedded into marble.
    • Wood Inlay: Contrasting woods, ivory, or metals embedded in wooden furniture.
    • Metal Inlay: Popular in India’s Bidriware, where silver or brass is embedded into blackened metal.
    • Mother of Pearl Inlay: Shell pieces embedded into wood or lacquer for luminous designs.
    • Glass and Ceramic Inlay: Used in mosaics, flooring, and decorative tiles.

    Each type broadens the definition of showing how adaptable the art is across different mediums.

    A popular architectural example is pairing inlay work with stone wall cladding, where luxurious marble walls are enhanced with embedded floral or geometric motifs. This is often seen in luxury hotels and large villas, demonstrating how old traditions still influence modern design.

    Inlay in Sacred Architecture

    For centuries, inlay has been an important part of religious and sacred spaces. When asked what is an inlay in this context, one need only look at temples, mosques, and churches where marble and wood have been decorated with delicate motifs.

    In India, a stone temple decorated with inlay embodies both devotion and artistry. Lotus flowers, divine symbols, and geometric borders are carefully inlaid into the structure, creating a sacred environment that is as visually breathtaking as it is spiritually uplifting.

    Inlay in Homes

    For homeowners, the question what is an inlay often comes down to how it can be incorporated into everyday living spaces. From flooring to tabletops, from headboards to wall accents, inlay is increasingly popular in residential design.

    For example, a stone temple for home often features subtle inlay details that balance tradition with modern lifestyle needs. Small but significant, these details add both sacredness and artistry to the home.

    A Touch of Royalty

    One of the most luxurious answers to what is an inlay in modern interior design is inlay flooring. Marble or granite floors can be transformed into artistic canvases with embedded floral or geometric motifs. Palaces, luxury hotels, and modern villas all use this technique to achieve a timelessly elegant effect.

    Rustic and Modern Fusions

    While inlay is usually associated with luxury, it has also found its place in rustic and contemporary design. A striking example is incorporating inlay into a pallet wall, where industrial, raw textures are softened and elevated by delicate patterns of embedded wood or metal. This unexpected fusion proves that what is an inlay today is not confined to tradition—it can adapt to even the most unconventional design themes.

    Jewelry and Fashion Inlay

    In jewelry, what is an inlay refers to embedding gemstones such as turquoise, coral, or opal into gold or silver settings. Native American artisans are particularly known for turquoise inlay rings and pendants. Similarly, fashion accessories often use shell or stone inlay to enhance bags, belts, and decorative items.

    Why Inlay Represents Luxury

    Whenever one asks what is an inlay, luxury inevitably comes into the conversation. Because inlay is handcrafted, it cannot be mass produced. Each piece is unique, taking hours or even months to complete. Semi precious materials add value, but it is the artistry that makes inlay synonymous with exclusivity and refinement.

    Global Variations

    Different cultures have their own answer to what is an inlay:

    • India: Marble inlay from Agra and wooden inlay from Mysore.
    • Italy: Pietra Dura with highly detailed stone pictures.
    • Middle East: Ivory and wood inlays with geometric precision.
    • Japan: Mother of pearl in lacquerware.
    • Native America: Jewelry with gemstone inlays.

    This global diversity proves that is truly a universal art form.

    Maintenance of Inlay Work

    To truly understand what is an inlay, one must also know how to care for it:

    • Use soft cloths for dusting.
    • Avoid harsh cleaning chemicals.
    • Keep pieces away from moisture and excessive sunlight.
    • Re polish surfaces when they start to lose shine.

    With care, inlay art can last generations, often being passed down as family heirlooms.

    The Symbolism of Inlay

    Beyond beauty, what is an inlay also carries symbolic meaning. Floral patterns symbolize growth and prosperity, geometric patterns represent balance and order, while religious motifs embody devotion. This symbolic layer is why inlay has survived centuries—it connects art to human emotions and beliefs.

    Conclusion

    So, what is an inlay? It is the art of embedding one material into another, creating timeless patterns, images, and symbols. It is found in the Taj Mahal, in a delicate in luxurious and even in modern concepts like a pallet wall.

    Inlay is not just a craft; it is a story of patience, heritage, and luxury. From ancient civilizations to modern design studios, it continues to inspire and evolve. The next time you encounter a decorated floor, a piece of jewelry, or an intricate tabletop, you’ll know that the answer to what is an inlay lies not just in the material—but in the art of making something truly timeless.

    FAQs

    How is an inlay created?

    Inlay making involves designing a pattern, carving a cavity into the base, and shaping pieces to fit perfectly. These pieces are then carefully embedded into the cavity with precision. Finally, the surface is polished smoothly, enhancing the overall look and highlighting the detailed design with fine craftsmanship and elegance.

    Is inlay durable?

    With quality materials and skilled craftsmanship, inlays can last for decades, maintaining their beauty and charm. Their durability ensures the design remains intact, while careful polishing and finishing preserve the details. Such artistry combines strength with elegance, allowing inlays to retain their timeless aesthetic appeal across generations with ease.

    Can inlay designs be customized?

    One major advantage of inlay is its customizability. It allows the creation of diverse designs, from geometric patterns to floral motifs, abstract art, or personalized symbols. This flexibility makes inlay a versatile decorative technique, offering endless possibilities to match individual tastes, styles, and themes while enhancing beauty and uniqueness effectively.

  • How to Install PVC Wall Cladding?

    When it comes to giving walls a modern, stylish, and low maintenance finish, PVC wall cladding has become one of the top choices. Both homeowners and designers love it for being durable, cost effective, and attractive. If you have been searching for how to install PVC wall cladding, this complete guide will help you with preparation, tools, installation steps, maintenance tips, and expert advice to achieve a professional finish.

    What is PVC Wall Cladding?

    Before we explore how to install PVC wall cladding, let’s first understand the material. PVC (Polyvinyl Chloride) is strong, lightweight, and moisture resistant. When designed as wall panels, it offers:

    • A sleek decorative finish.
    • Easy cleaning and maintenance.
    • Protection against moisture, making it perfect for kitchens and bathrooms.
    • An affordable alternative to tiles, paint, or wallpaper.

    Unlike heavy materials such as, PVC panels are quick to fix and cost efficient.

    Why Choose PVC Wall Cladding?

    If you are considering how to install PVC wall cladding, here are reasons why it’s a smart option:

    • Moisture Resistance – PVC panels don’t peel or crack in damp areas.
    • Hygienic Surface – Great for kitchens, bathrooms, and hospitals.
    • Quick Installation – Once you know how to install PVC wall cladding, you can renovate in just hours.
    • Variety of Designs – Some styles even mimic wall murals and wood textures.
    • Cost Friendly – Affordable compared to other wall finishes.
    • Insulation – Provides mild thermal and sound insulation.

    Tools and Materials You’ll Need

    To start with how to install PVC wall cladding, prepare the following:

    • PVC wall panels
    • Measuring tape
    • Chalk line & pencil
    • Level tool
    • Fine tooth saw or cutter
    • Solvent free adhesive
    • Nails or screws
    • Safety gloves & goggles

    Step by Step Guide: How to Install PVC Wall Cladding

    Now let’s go through how to install PVC wall cladding step by step:

    Step 1: Prepare the Wall

    • Clean and dry the wall surface.
    • Remove dust, nails, and old wallpaper.
    • Resolve any damp issues first.

    Step 2: Measure the Wall

    • Take accurate height and width measurements.
    • Calculate the number of panels needed.
    • Keep 5–10% extra for cuts.

    Step 3: Cut the Panels

    • Mark cutting lines with a pencil.
    • Use a sharp cutter or fine tooth saw.
    • Wear gloves for safety.

    This step is crucial in how to install PVC wall cladding because precise cutting ensures a neat look.

    Step 4: Fix the Starter Trim

    • Begin at one corner.
    • Secure a starter trim with screws or adhesive.
    • This will lock the first panel properly.

    Step 5: Install the First Panel

    • Place the panel into the starter trim.
    • Align it vertically with a level.
    • Secure using adhesive or nails.

    Step 6: Add More Panels

    • Insert the next panel into the groove of the first.
    • Continue across the wall.
    • Maintain even alignment.

    This makes how to install PVC wall cladding easier than working with intricate jali wall patterns.

    Step 7: Finishing Touches

    • Add top trims and corner trims.
    • Wipe panels clean with a damp cloth.
    • Double check that joints are tight.

    Tips for Best Results

    • Always begin from a corner.
    • Use solvent free adhesive to avoid damage.
    • Keep checking panel alignment.
    • Leave expansion gaps for temperature changes.
    • Use lighting effects like inlay flooring, PVC panels look more striking under accent lights.

    Applications of PVC Wall Cladding

    After you know how to install PVC wall cladding, you’ll see how versatile it is:

    • Bathrooms – Water resistant and mold proof.
    • Kitchens – Easy to clean splashes and stains.
    • Living Rooms – Creates a stylish look like a pallet wall.
    • Commercial Spaces – Perfect for shops, salons, and offices.
    • Religious Spaces – Can complement designs like a stone temple for home.

    PVC Wall Cladding vs Other Finishes

    FeaturePVC Wall CladdingTiles / PaintStone Wall Cladding
    Installation TimeQuickModerateLong & labor heavy
    MaintenanceEasyMediumDifficult
    CostAffordableMediumExpensive
    Moisture ResistanceHighLowHigh
    Aesthetic VarietyWide rangeLimitedNatural look only

    Mistakes to Avoid

    While learning how to install PVC wall cladding, beginners often make these errors:

    • Skipping wall preparation.
    • Applying too much adhesive.
    • Forgetting expansion gaps.
    • Ignoring alignment checks.
    • Cutting unevenly.

    Avoid these for a smooth, professional outcome.

    Maintenance of PVC Wall Cladding

    Once you’ve learned how to install PVC wall cladding, maintaining it is easy:

    • Clean with mild detergent.
    • Avoid harsh cleaners.
    • Fix scratches with polish.
    • Replace damaged panels individually.

    This is one reason why people prefer PVC panels over heavy options like stone wall cladding.

    Cost of Installing PVC Wall Cladding

    The cost of PVC wall cladding installation depends on:

    • Wall size.
    • Panel design (plain, 3D, textured, wood finish).
    • DIY vs professional fitting.

    Generally, PVC is more affordable than tiles or natural stone.

    Why It’s a Smart Investment

    • Boosts property value.
    • Reduces repainting costs.
    • Long lasting with minimal effort.
    • Works in both modern and traditional interiors.

    Like a PVC cladding can be a permanent and aesthetic upgrade.

    Final Thoughts

    Now you have learned how to install PVC wall cladding step by step, from preparation to finishing. This material is a durable, stylish, and affordable alternative to traditional wall finishes. Whether in bathrooms, kitchens, or living spaces, PVC wall panels add a modern touch without the hassle of heavy materials.

    So, if you’re planning to renovate, keep in mind that knowing how to install PVC wall cladding will save money, time, and effort while giving your walls a fresh, professional look.

    FAQs

    What is PVC wall cladding?

    PVC wall cladding is a decorative and protective wall covering made from Polyvinyl Chloride. It is lightweight, waterproof, and easy to maintain making it a popular choice for both residential and commercial interiors.

    Why should I choose PVC wall cladding over tiles or paint?

    PVC wall cladding is easier to install, more affordable, and requires less maintenance than tiles or paint. It is also highly resistant to moisture, unlike paint which can peel in damp conditions.

    Can I learn how to install PVC wall cladding myself, or do I need a professional?

    Yes, you can DIY. Once you understand how to install PVC wall cladding, it becomes a straightforward process using basic tools like a cutter, measuring tape, adhesive, and trims.

  • How to Install Colorbond Wall Cladding?

    When it comes to modern architecture, nothing combines strength, beauty, and functionality quite like Colorbond steel. If you’ve ever wondered how to install Colorbond wall cladding, you’re not alone. This innovative material has become one of the most popular choices for both residential and commercial buildings. It not only provides superior protection from the elements but also delivers a sleek, stylish finish that can completely transform the look of a property.

    In this comprehensive guide, we’ll explain everything you need to know about how to install Colorbond wall cladding, from preparation to final touches. By the end, you’ll have a clear understanding of the process, the benefits, and some pro tips that ensure a long lasting, professional quality finish.

    What Is Colorbond Wall Cladding?

    Before we dive into how to install Colorbond wall cladding, let’s first understand what it is. Colorbond is a pre painted steel product manufactured in Australia, known for its durability, weather resistance, and aesthetic versatility. Available in a wide range of colors, profiles, and finishes, Colorbond is designed to withstand even the harshest climates from heavy rains to scorching sun.

    It’s lightweight yet strong, making it easier to work with compared to traditional building materials. Many modern designers even integrate it alongside creative interior elements like wall murals to balance the industrial steel look with artistic detail.

    Why Choose Colorbond Cladding?

    When learning how to install Colorbond wall cladding, it’s important to understand why it’s such a great option. Here are some key benefits:

    • Durability: Resistant to corrosion, chipping, and peeling.
    • Low Maintenance: Requires minimal cleaning and upkeep.
    • Energy Efficiency: Reflects heat, keeping buildings cooler.
    • Variety: Comes in multiple colors and profiles to suit different styles.
    • Sustainability: 100% recyclable and environmentally friendly.

    In some architectural projects, Colorbond is paired with traditional features like a jali wall to add texture and a touch of heritage while maintaining modern strength.

    Tools and Materials You’ll Need

    Before starting the installation, gather the necessary tools and materials. A well prepared toolkit ensures a smoother installation process.

    • Colorbond cladding sheets (chosen profile and color)
    • Measuring tape and chalk line
    • Spirit level and square
    • Power drill and screws (self drilling or tek screws)
    • Metal snips or circular saw with steel cutting blade
    • Safety gear (gloves, glasses, helmet)
    • Sealants and flashing materials

    Just as you would choose premium materials for stone wall cladding, selecting the right Colorbond sheets and accessories ensures lasting quality.

    Preparation Before Installation

    The key to successfully mastering how to install Colorbond wall cladding lies in preparation. Proper groundwork ensures the cladding will sit evenly, last longer, and perform well against weather conditions.

    Step 1: Inspect the Wall Structure

    Ensure that the wall frame (timber or steel) is properly aligned and sturdy. Any irregularities or weaknesses must be corrected before proceeding.

    Step 2: Install a Moisture Barrier

    A breathable moisture barrier or sarking should be applied to prevent condensation issues inside the wall cavity.

    Step 3: Measure and Mark

    Accurate measurements are crucial. Use a chalk line to mark guidelines for the first sheet to ensure a perfectly level installation.

    In homes where sacred areas are present, builders sometimes complement modern steel cladding with traditional features like a stone temple in the courtyard, blending spiritual elegance with contemporary design.

    Step by Step Guide: How to Install Colorbond Wall Cladding

    Now, let’s break down the process of how to install Colorbond wall cladding in clear, simple steps:

    Step 1: Starting at the Base

    • Begin installation from the bottom corner of the wall.
    • Fix a starter strip or base flashing to guide the first sheet.
    • Ensure it is perfectly level, as this will determine the alignment of the entire wall.

    Step 2: Installing the First Sheet

    • Position the first Colorbond sheet against the framework.
    • Secure it with screws, starting from the bottom and working upwards.
    • Keep screws evenly spaced (generally 200 300 mm apart).

    Step 3: Overlapping Sheets

    • Each sheet has a designed overlap to ensure weatherproofing.
    • Make sure sheets interlock tightly without gaps.
    • Avoid over tightening screws, as this may damage the sheet.

    Step 4: Adding Flashings and Trims

    • Flashings should be installed around edges, windows, and doors.
    • They prevent water leakage and give the wall a neat finish.

    Step 5: Finishing Touches

    • Once all sheets are installed, inspect the wall carefully.
    • Seal any exposed joints with a recommended sealant.
    • Clean the surface to remove construction dust or fingerprints.

    Just like creating a stone temple for home, precision and attention to detail are crucial when installing Colorbond cladding. A small mistake in alignment can affect the entire structure.

    Common Mistakes to Avoid

    While learning how to install Colorbond wall cladding, many first time installers make avoidable errors. Here are the most common ones:

    • Skipping Measurements: Always double check dimensions before cutting.
    • Incorrect Fastening: Over tightening screws may distort the sheets.
    • Ignoring Safety Gear: Working with steel requires gloves and eye protection.
    • Poor Overlaps: Misaligned overlaps can lead to water leakage.

    These issues can compromise the quality of your project. Always take your time, measure twice, and cut once.

    Maintenance Tips After Installation

    After you’ve successfully learned how to install Colorbond wall cladding, maintenance becomes the next priority. Thankfully, one of Colorbond’s biggest strengths is its low maintenance nature.

    • Wash the surface occasionally with clean water to remove dirt.
    • Avoid abrasive cleaners that may scratch the paint.
    • Inspect screws and flashings every year to ensure they remain secure.
    • Trim nearby vegetation to prevent scratches from branches.

    In some homes, people enhance the beauty of their cladding by matching it with luxury interior features like inlay flooring, creating a seamless design transition from inside to outside.

    Design Inspirations with Colorbond Cladding

    Once you know how to install Colorbond wall cladding, you’ll discover its true design potential. Architects and homeowners love experimenting with it due to its wide color palette and profiles.

    • Modern Minimalism: Flat profiles in neutral tones create a sleek, contemporary look.
    • Rustic Charm: Earthy tones combined with timber highlights bring warmth.
    • Industrial Style: Dark colors paired with exposed brick and steel elements exude urban sophistication.
    • Eco Friendly Design: Colorbond is recyclable and pairs beautifully with natural landscaping.

    Some designers even combine rustic features like a pallet wall with Colorbond to create striking contrasts between industrial steel and organic textures.

    Why Professionals Prefer Colorbond Cladding

    Professionals often recommend Colorbond because it balances performance with visual appeal. It’s lightweight, easy to install, and highly customizable. Builders also appreciate its weather resistant coating, which helps structures withstand Australia’s extreme climate conditions.

    When compared to other options like wood or stone, Colorbond offers a faster, cleaner installation process. Plus, its long lasting finish means fewer maintenance costs in the future.

    Sustainability and Energy Efficiency

    Another key reason for learning how to install Colorbond wall cladding is its contribution to sustainability. Colorbond steel is recyclable and energy efficient. Its reflective properties help reduce cooling needs in hot weather, lowering energy consumption.

    As green building practices become the standard, Colorbond continues to be a material of choice for eco conscious architects and homeowners.

    Conclusion: Mastering How to Install Colorbond Wall Cladding

    By now, you should have a clear understanding of how to install Colorbond wall cladding and why it’s such a valuable choice for modern buildings. From preparation and tools to installation and finishing touches, every step matters in achieving a professional result.

    Colorbond cladding doesn’t just protect walls it redefines their appearance. Whether you’re going for a modern minimalist design, a rustic charm, or a bold industrial look, Colorbond has the flexibility to make it happen.

    When paired thoughtfully with traditional design elements like a feature or even cultural icons such as a stone temple, it proves how versatile and timeless this material truly is.

    FAQs

    What is Colorbond wall cladding?

    Colorbond wall cladding is a type of pre painted steel used to cover walls, offering durability, weather resistance, and a stylish finish. It is suitable for both residential and commercial buildings and comes in various colors and profiles.

    Is Colorbond wall cladding easy to install?

    Yes, Colorbond wall cladding is designed for straightforward installation. With proper tools, accurate measurements, and correct fastening techniques, even first time installers can achieve a professional finish. Following manufacturer guidelines ensures durability and performance.

    Can I install Colorbond cladding on any type of wall?

    Colorbond cladding can be installed on both timber and steel frameworks. The wall must be structurally sound, level, and dry. A moisture barrier or sarking is recommended to prevent condensation and ensure long term performance.

  • What Is Wall Cladding? 

    Have you ever looked at a beautifully designed building and wondered how its walls manage to look so elegant and weathernresistant at the same time? The answer lies in one innovative architectural technique what is wall cladding. Wall cladding has become an integral part of modern construction and design, offering both functional and aesthetic benefits that go far beyond traditional wall finishes.

    In this comprehensive guide, we’ll dive deep into what is wall cladding, explore its types, benefits, applications, and materials, and explain how it enhances the overall look and longevity of buildings.

    Understanding What Is Wall Cladding

    At its core, what is wall cladding refers to applying a protective or decorative material layer over a building’s internal or external walls. This additional layer not only safeguards the structure from weathering but also elevates its appearance. Simply put, cladding acts like a second skin for your walls durable, beautiful, and highly functional.

    Modern architects often use wall murals with wall cladding to create feature walls that tell a story. It’s not just about protection anymore; cladding has evolved into an artistic element that defines the character of a space.

    Why Wall Cladding Matters

    When discussing what is wall cladding, it’s important to understand its dual role — performance and aesthetics. Cladding shields buildings from environmental factors like rain, sunlight, and dust. It prevents moisture from seeping in, which can cause cracks, stains, or damp patches over time.

    But beyond protection, cladding transforms a flat, lifeless wall into something visually rich and textured. In modern architectural designs, jali wall patterns are often integrated into cladding systems to allow ventilation while maintaining privacy and visual appeal.

    The Core Purpose of Wall Cladding

    To fully grasp what is wall cladding, think of it as both an armor and an art form. Functionally, it acts as a protective barrier; aesthetically, it brings out the best of your building’s design. Whether you’re designing a corporate office, a luxury home, or even a boutique café, wall cladding helps set the mood and tone of the space.

    Some designers also combine cladding with sacred architectural features such as a carved panels to maintain cultural and traditional essence in modern homes.

    Types of Wall Cladding

    Once you understand what is wall cladding, you’ll realize that its versatility lies in the variety of materials used. Let’s look at the most common types:

    1. Stone Cladding

    Among the most premium and long lasting options, stone wall cladding offers timeless charm and durability. Natural stones like marble, granite, and sandstone bring a rugged, authentic look. Stone cladding is often used for both exteriors and interiors, especially in areas where strength and elegance go hand in hand.

    2. Wooden Cladding

    Wooden cladding gives warmth and a natural aesthetic to interiors. It’s perfect for those who want an eco friendly design with a cozy vibe. However, it requires regular treatment to protect against moisture and termites.

    3. Metal Cladding

    Made from materials like aluminum, zinc, or steel, metal cladding provides a sleek, modern finish. It’s low maintenance, weather resistant, and ideal for commercial or industrial projects.

    4. Vinyl Cladding

    Vinyl is a cost effective alternative that mimics natural textures. It’s lightweight, durable, and available in a wide range of colors and designs, making it perfect for budget conscious homeowners.

    5. Ceramic and Porcelain Cladding

    If you’re wondering what is wall cladding for interiors, ceramic and porcelain options are excellent. These materials are easy to clean, resistant to stains, and come in a variety of finishes suitable for kitchens and bathrooms.

    In traditional homes, you’ll even see cladding complementing spiritual spaces like a stone temple for home, blending divine aesthetics with modern functionality.

    Benefits of Wall Cladding

    Understanding what is wall cladding isn’t complete without knowing why it’s preferred over conventional wall finishes. Here are the top benefits that make it so popular:

    1. Protection from the Elements

    Wall cladding acts as a shield against weather conditions like heavy rain, extreme sunlight, and pollution. It prevents moisture penetration, reducing the risk of damage to the structural wall beneath.

    2. Energy Efficiency

    When properly installed, cladding provides an insulating layer that helps maintain indoor temperature. This reduces the need for excessive heating or cooling, leading to energy savings.

    3. Enhanced Aesthetics

    When people think of what is wall cladding, the first thing that comes to mind is beauty. Cladding materials come in various textures, colors, and finishes making walls more attractive and modern.

    4. Low Maintenance

    Unlike painted walls that need frequent touch ups, wall cladding requires minimal care. Materials like stone, metal, and ceramic retain their look for decades.

    5. Value Addition

    High quality cladding not only improves the appearance of your property but also increases its market value. It’s an investment that pays off in both aesthetics and durability.

    Many designers go a step further by pairing wall cladding with inlay flooring to create a continuous flow of elegance from floors to walls a trend gaining immense popularity in luxury homes.

    Interior vs Exterior Wall Cladding

    If you’re exploring what is wall cladding, it’s essential to understand its two main applications interior and exterior.

    Exterior wall cladding provides protection and curb appeal. It shields the structure from weather while enhancing its architectural style. Materials like stone, brick, or metal are common for exteriors.

    Interior wall cladding, on the other hand, focuses on design aesthetics. It transforms ordinary spaces into visually stunning environments. Designers often use it as a backdrop for décor items or feature walls, and sometimes even integrate pallet wall designs for a rustic, textured appearance.

    Installation Process of Wall Cladding

    Knowing what is wall cladding also means understanding how it’s installed. The installation process can vary based on material, but the general steps include:

    1. Surface Preparation: Cleaning and leveling the wall to ensure proper adhesion.
    2. Framework Creation: Installing metal or wooden battens as a base for cladding.
    3. Panel Fixing: Cladding panels are securely attached using screws, clips, or adhesives.
    4. Finishing Touches: Sealing joints and applying any protective coating if needed.

    Proper installation ensures longevity, protection, and a flawless finish.

    Design Trends in Wall Cladding

    If you think what is wall cladding is just a functional element, think again. Modern architecture has turned it into a design statement. Let’s explore some ongoing trends:

    1. Mixed Textures

    Combining multiple materials like stone and wood creates visual contrast. This adds depth and uniqueness to modern interiors.

    2. 3D Wall Panels

    Textured, three dimensional panels are making waves in interior design. They create movement and dynamism on flat surfaces.

    3. Sustainable Cladding

    Eco conscious homeowners prefer materials like bamboo, reclaimed wood, or composite panels. Sustainability has become a core value in design.

    4. Accent Walls

    Feature walls using bold materials or patterns add character to interiors. These are often paired with subtle lighting or artistic décor to make a statement.

    Maintenance and Care

    Even though cladding is low maintenance, knowing how to care for it extends its lifespan. Here are some simple tips:

    • Clean periodically with mild detergent and water.
    • Inspect for loose panels or cracks.
    • Reseal stone or wooden surfaces every few years.
    • Avoid abrasive cleaners that can damage textures.

    By following these steps, your wall cladding will continue to look fresh and beautiful for decades.

    Common Myths About Wall Cladding

    While researching what is wall cladding, you might encounter some misconceptions. Let’s clear them up:

    Myth 1: Cladding is only for luxury homes.
    Fact: There are affordable materials like vinyl or ceramic that suit all budgets.

    Myth 2: It’s difficult to maintain.
    Fact: Cladding is easier to clean and maintain than painted walls.

    Myth 3: It’s only for exteriors.
    Fact: Interior cladding is equally popular and offers creative freedom in design.

    Wall Cladding in Traditional and Modern Architecture

    Architects have always appreciated what is wall cladding for its versatility. In traditional designs, it adds depth and grandeur, while in modern spaces, it creates minimalist sophistication. In Indian homes, for example, it’s common to see natural stone cladding used around a stone temple area to enhance spiritual ambience while maintaining durability.

    In corporate architecture, designers often combine metal and glass cladding to achieve sleek, professional aesthetics. The beauty of wall cladding lies in its adaptability across styles, eras, and cultures.

    Sustainability and Eco Friendly Design

    As green architecture gains importance, sustainable cladding options are in high demand. Eco friendly materials like recycled wood, fiber cement, and composite panels are now preferred for reducing environmental impact.

    When people explore what is wall cladding in the context of sustainability, they find that modern materials are not only durable but also recyclable, making them ideal for future forward construction.

    Why Architects Recommend Wall Cladding

    Architects around the world advocate for cladding because it’s both beautiful and practical. It enhances thermal efficiency, reduces maintenance, and opens new design possibilities. Whether you’re designing a commercial building or a modern villa, understanding what is wall cladding helps you make better design choices.

    It’s not just about decoration  it’s about improving the way walls perform and interact with their environment.

    Conclusion: The True Meaning of Wall Cladding

    After exploring all aspects of what is wall cladding, one thing becomes clear: it’s far more than just a design element. It’s a blend of art, technology, and protection a way to express personality through texture, material, and craftsmanship.

    From stone wall cladding on luxurious exteriors to rustic designs inside cozy homes, cladding brings spaces to life. It protects, beautifies, and defines the identity of your property. And when paired with thoughtful interior details like elegant, it creates an ambiance that feels both timeless and modern.

    FAQs

    What is wall cladding and why is it important?

    Wall cladding is the process of covering a wall surface with materials such as stone, metal, wood, or ceramic to improve both durability and appearance. It acts as a protective layer that shields walls from harsh weather conditions like rain, dust, and heat. Beyond protection, cladding adds a decorative touch, making buildings look more elegant and long lasting.

    What are the different types of wall cladding?

    Wall cladding comes in various materials, including stone, wood, metal, vinyl, ceramic, and porcelain. Each type offers unique benefits, from durability and weather resistance to aesthetic appeal, making it suitable for different design preferences and budgets.

    Can wall cladding be used indoors as well as outdoors?

    Yes. Exterior wall cladding protects buildings from environmental elements like rain and sun, while interior wall cladding enhances the visual appeal of spaces, creates feature walls, and can even integrate textures like pallet walls or decorative panels.

  • How to Paint Wood Paneling Walls?

    If your goal is to increase the character and warmth of your home, wood paneling is an excellent option. Paneling as a home feature, however, is a matter of taste. For some people, wood paneling feels outdated and in some cases, it can feel too dark to be of any use. Painting is a very cost-effective and stylish alternative to dealing with new paneling. This comprehensive guide will be of great help to you should you have any questions regarding the painting of wood paneling walls, as it will lead you through every step from the preparation stage and onwards.

    Why Paint Wood Paneling Walls?

    Before we get into how to paint wood paneling walls, let’s explore the reasons why homeowners often do this:

    • Modernize Your Space: Old, dark wood can make rooms feel dated. A fresh coat of paint brightens interiors instantly.
    • Cost-Effective: Painting is far cheaper than tearing out wood panels and replacing them with drywall.
    • Customizable Look: You can choose any shade, from crisp whites to bold accent colors, depending on your style.
    • Preserves Character: Instead of losing the unique texture of wood, painting enhances it while giving a modern twist.

    With so many benefits, learning how to paint wood paneling walls can be a rewarding DIY project.

    Tools and Materials You’ll Need

    Before starting the process of how to paint wood paneling walls, gather the right supplies:

    • Sandpaper (medium and fine grit)
    • Tack cloth or microfiber cloth
    • Wood filler (for holes and gaps)
    • Putty knife
    • Painter’s tape
    • Primer (preferably stain-blocking)
    • Quality paint (latex or acrylic recommended)
    • Paintbrushes, rollers, and trays
    • Drop cloths or plastic sheets
    • Ladder or step stool

    Preparation is key to achieving a smooth and long-lasting finish.

    Step-by-Step Guide: How to Paint Wood Paneling Walls

    Here’s a detailed process so you’ll know exactly how to paint wood paneling walls without missing any important steps.

    1. Prepare the Space

    Move furniture away from the walls and cover floors with drop cloths. Use painter’s tape to protect trim, outlets, and windows. A well-prepared workspace makes the painting process smoother.

    2. Clean the Panels

    Dirt, grease, and dust often accumulate on wood surfaces. Wipe down the walls with a damp cloth and mild soap solution. For stubborn stains, a vinegar-water mix works well.

    3. Fill Gaps and Holes

    Inspect the panels for dents, cracks, or nail holes. Use wood filler to repair imperfections, then sand the areas smooth. This step is crucial for achieving a flawless finish when learning how to paint wood paneling walls.

    4. Sand the Surface

    Lightly sand the entire paneling surface with medium-grit sandpaper to remove gloss. Follow up with fine-grit sandpaper for a smooth finish. Sanding ensures the primer and paint adhere properly.

    5. Clean Off Dust

    After sanding, use a tack cloth or microfiber cloth to remove dust particles. Any residue left behind will show through the paint.

    6. Apply Primer

    A stain-blocking primer is essential when working on wood paneling, as it prevents knots and tannins from bleeding through the paint. Apply one to two coats, allowing each to dry completely.

    7. Paint the Panels

    Now comes the fun part—painting! Use a brush to cut in along edges and grooves, then a roller for larger flat sections. Apply two coats of your chosen paint color, letting each layer dry thoroughly.

    8. Finishing Touches

    Once dry, remove the painter’s tape and touch up any missed spots. Clean your brushes and rollers, then step back to admire your transformed walls.

    By following these steps, you’ll master how to paint wood paneling walls with a professional-looking result.

    Tips for a Professional Finish

    Here are some expert tips to keep in mind as you learn how to paint wood paneling walls:

    • Always sand lightly after priming for an ultra-smooth finish.
    • Choose lighter colors if you want to make a room feel larger and brighter.
    • Use semi-gloss or satin finishes in high-traffic areas for easier cleaning.
    • Don’t skip primer, as paint alone may peel or discolor over time.

    Common Mistakes to Avoid

    Even if you know how to paint wood paneling walls, mistakes can happen. Avoid these pitfalls:

    1. Painting without sanding paint won’t stick properly.
    2. Skipping primer, wood stains will bleed through.
    3. Using low-quality paint, coverage will be poor.
    4. Rushing drying times can cause streaks or peeling.

    Patience is just as important as technique.

    How Painted Wood Paneling Compares to Other Wall Finishes

    While exploring how to paint wood paneling walls, it helps to see how this option compares with other popular wall treatments:

    • Wall Murals: Artistic but require professional care to maintain their original look.
    • Jali Wall: Beautiful for traditional designs, but less versatile for modern interiors.
    • Stone Wall Cladding: Durable and luxurious but more expensive and harder to install.
    • Stone Temple: Adds elegance in spiritual spaces, though maintenance is more intensive.
    • Stone Temple for Home: Great for sacred areas, but not suitable for every wall type.
    • Inlay Flooring: Exquisite craftsmanship, though limited to floors rather than walls.
    • Pallet Wall: Rustic and trendy, though it needs sealing and regular dusting.

    Compared to these, painting wood paneling is an affordable and versatile option, perfect for DIY enthusiasts.

    Choosing the Right Paint Color

    One of the most exciting parts of learning how to paint wood paneling walls is selecting the right color.

    • Whites and Neutrals: Create a bright, airy atmosphere.
    • Grays and Blues: Modern and calming, great for bedrooms or offices.
    • Bold Shades: Perfect for accent walls or adding drama.

    Think about the size of your room, lighting conditions, and furniture style when picking a color.

    Maintenance After Painting

    Once you’ve mastered how to paint wood paneling walls, maintaining them is easy:

    • Dust regularly with a soft cloth.
    • Wipe spills immediately to prevent stains.
    • Avoid harsh cleaners—mild soap and water are enough.
    • Touch up minor scuffs with leftover paint.

    With minimal effort, your painted walls will stay fresh for years.

    DIY or Hire a Professional?

    If you have the right tools and don’t mind spending some time on the initial prep, you’re certainly capable of doing it yourself. Dates to wood paneling isn’t as straightforward as sheetrock it takes a bit more elbow grease to get a good result. That said, it’s worth calling in a pro if you’ve got a large area, especially if it’s got vaulted ceilings or if you want it to have an ultra-smooth finish. It’s really not worth the struggle doing it yourself.

    Final Thoughts

    If you want to give your home a new look, painting wood paneling walls can be an excellent skill to master because it doesn’t require the same investment that replacing walls would. Fine picture-worthy homes can be achieved quickly if there is cleaning, sanding, priming, and painting done in that exact order. 

    When compared to stone wall cladding or building a pallet wall, wood paneling is the least expensive option. In addition, it is a beginner’s level and customizable to a certain degree. With old wall paneling, all that is needed is a bit of resolve to change it to a smooth and classy backdrop. 

    If painting wood paneling walls is something you have put off for a while, now is the perfect moment to pick up your brushes and acquire the skill.

    FAQs

    What Type of Paint Should I Select for Wood Paneling?  

    The paneling of the wood could be finished with a high-quality interior latex paint or oil-based paint, depending on the desired finish. For example, living room latex paints could be an option as they are easier to clean, have quicker drying times, and lesser odour s. On the other hand, oil-based paints are more enduring and may maintain a smooth finish for a longer period, and are therefore potsherds for high-traffic zones. To avoid the tannins in the wood from bleeding, it is crucial to use a stain-blocking primer and apply it to the surface before painting, particularly if the surface is to be painted with an oil-based paint. Wood paneling with the right paint and primer will not only look fresh and smooth but also will be preserved for a long time.

    How to paint on wooden panels?

    Begin by cleaning the panels; make sure to remove any dust or grease. Next, take some fine-grit sandpaper and lightly hand sand each panel so that you can confirm that the surface is smooth and is ready for paint. Lastly, use a good quality primer, preferably one that is stain blocking, so that the tannins in the wood don’t leach out. Once it’s dry, you can paint with latex or oil-based paints, satin, semi-gloss, or eggshell finishes, all of which have a good track record of endurance. Spread the paint with a brush or a roller, and wait for one dry coat to thinly and evenly set before applying the next. To keep the paint job looking good for years, a clear protective sealant may be applied.

    Why Should One Opt for Paint Art on Wood Panels?

    Boring room designs are now a relic of the past with wood panel wall art. It’s like an extra room that enhances the beauty of your house without needing any other changes. While paint definitely boosts curb appeal, its real value lies in shielding wood from scratches, wear, and moisture. Additionally, it offers an assortment of colours that one can use to reinvent their walls. The change it brings goes beyond just style, as it works well with both rustic and contemporary designs. Paint is also more cost-effective in comparison to revamping a room with brand new drywall or stone wall cladding. What’s more, a fresh coat of paint on the wood panels adds to the value of a house, as it gives one the impression that the house is warm, loved, and deliberately designed, which serves as an additional perk for buyers.

    How to prepare a wood panel for painting?

    Every painting project begins with proper preparation, which is key to achieving a nice finish that lasts. You want to begin by washing the panel with some mild detergent to remove any dust, grease or dirt. After the wood is clean, you want to focus on the panel and lightly sand it so as to smooth all the rough areas. Next, you want to fill the wood filler and sand it after it has dried. After you have completed all of this, take a high quality primer to wood surfaces and apply it to the wood so as to block the stains and have even coverage. Make sure the primer is completely dry before you start painting. When done correctly, this preparation will ensure that not only is the wood panel more durable, but it will also look smooth and professional.

    How do you apply paint on wood?

    Getting a wood panel ready for painting is critical if one wants to achieve a smooth finish that lasts. Begin by dusting the panel with some warm water mixed with a small amount of grease and dust removing detergent. Next, use some light sandpaper to work on some of the more rough areas. This will also make the paint stick better. Any dents, gaps, or holes should be treated with wood filler, and the panel should be re-sanded once the filler is dry. Use a primer of good quality, which should be of the wood primer type, in order to seal any stains and provide uniform coverage to the panel. The primer should be allowed to dry fully before the paint is applied. Proper preparation not only ensures that the wood panels will last longer but also gives them a refined and professional look.